Append Data Connectors
Audience:
Audience: Administrators
Overview
OrgChart can import data from multiple data sources. For example, if you would like to include open requisitions on your chart, but you do not track open requisitions using your Main Data Connector, you can connect to one of the following Append Data Connectors to import those records.
Append Data Connectors
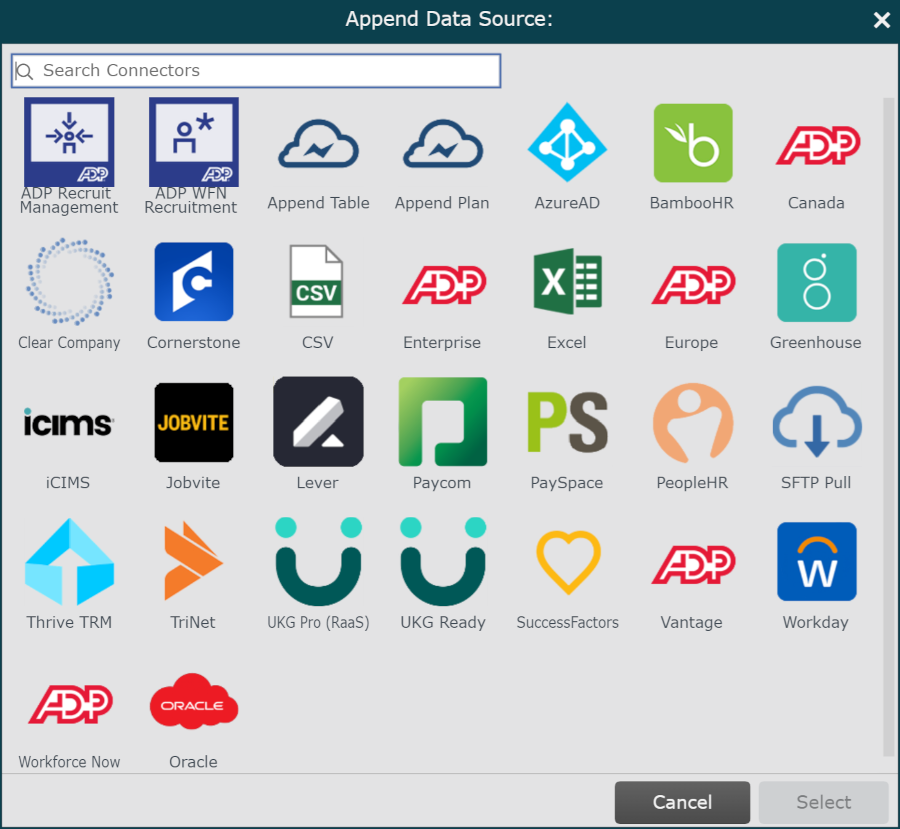
The following table lists the available Append Data Source connectors in alpha order.


Setting Up an Append Data Connector in OrgChart Viewer
Log in to OrgChart.
Click on the Mode Switcher icon in the Top Toolbar, and then select the Setup option. The Setup panel is displayed.
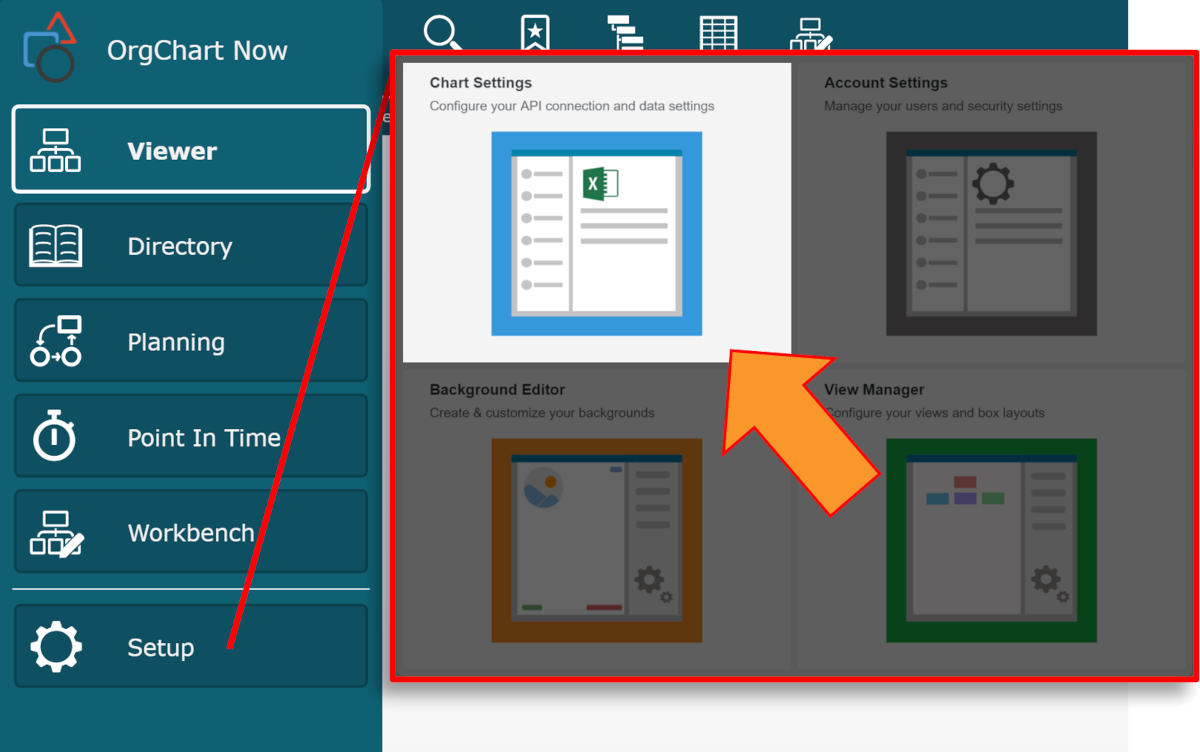
Click on the Chart Settings tile. The Source panel is displayed.
Click on the
 icon (under the Append Data heading).
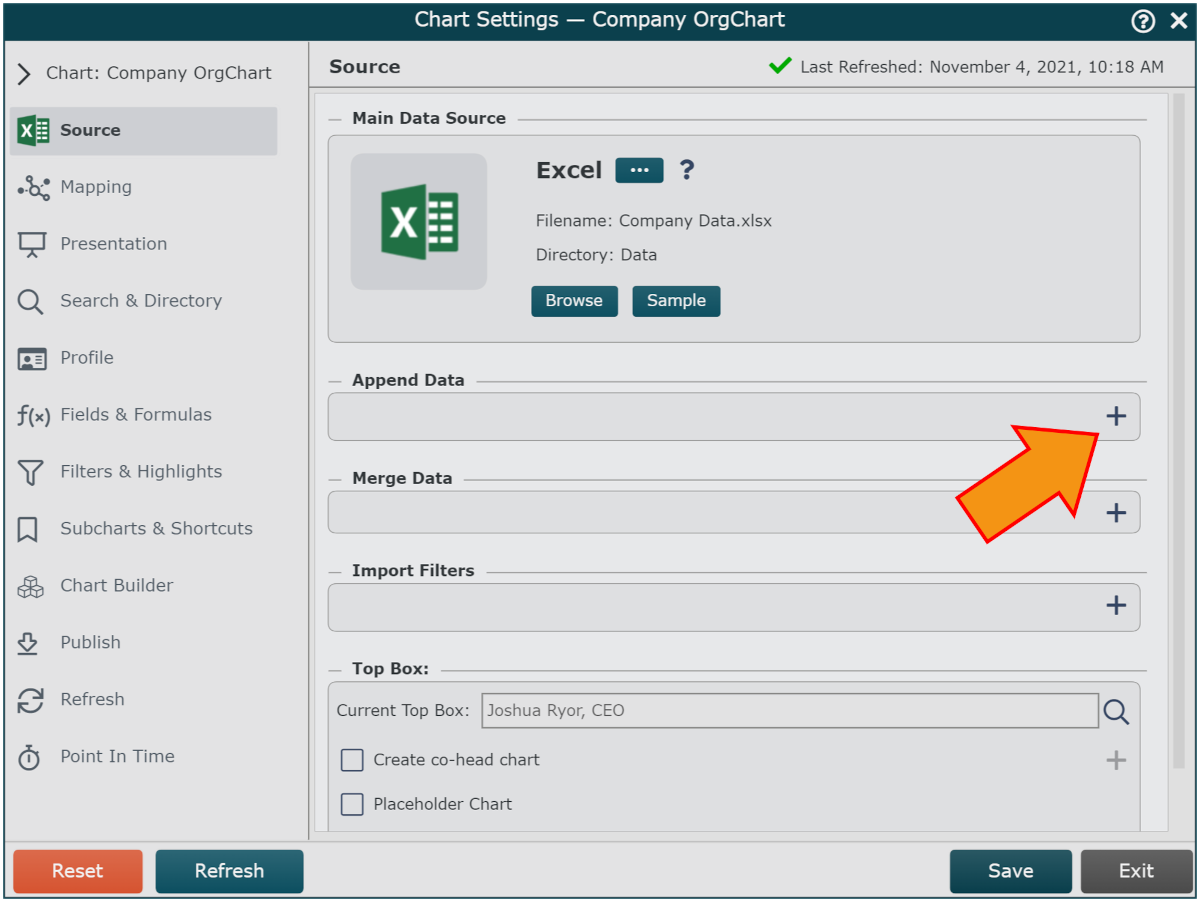
Click on the Append Data Source you wish to integrate with OrgChart, and then click Select.
If the selected Append Data Connector requires additional information (such as a Client ID), enter the necessary information in the corresponding text boxes.
Optionally check the Separate boxes for each open job requisition checkbox to display a box for each available opening listed under the same requisition ID. For example, if one open job requisition lists 5 available positions, OrgChart will generate 5 separate open requisition boxes.
Note
Note: iCIMS will show separate boxes for each available position under a single requisition ID by default. Optionally, uncheck the Separate boxes for each open job requisition checkbox to display one box per open requisition.
Note
Note: For Append Data Connectors that can be used as either an Applicant Tracking System OR a supplementary data source (i.e., CSV/Excel), the Separate boxes for each open job requisition checkbox will only become available after checking the ATS checkbox.
Click on the hyperlink associated with your Append Data Source (above) for more information.
Click on Save, and then click on Refresh