Access Groups
Audience
Audience: Administrators
Overview
The Access Group panel allows Administrators to create and modify groups defining user access.
Access Groups control access privileges to source data and application features. Access Groups are assigned to users in the Account Settings: Manage Users panel.
Accessing Access Groups
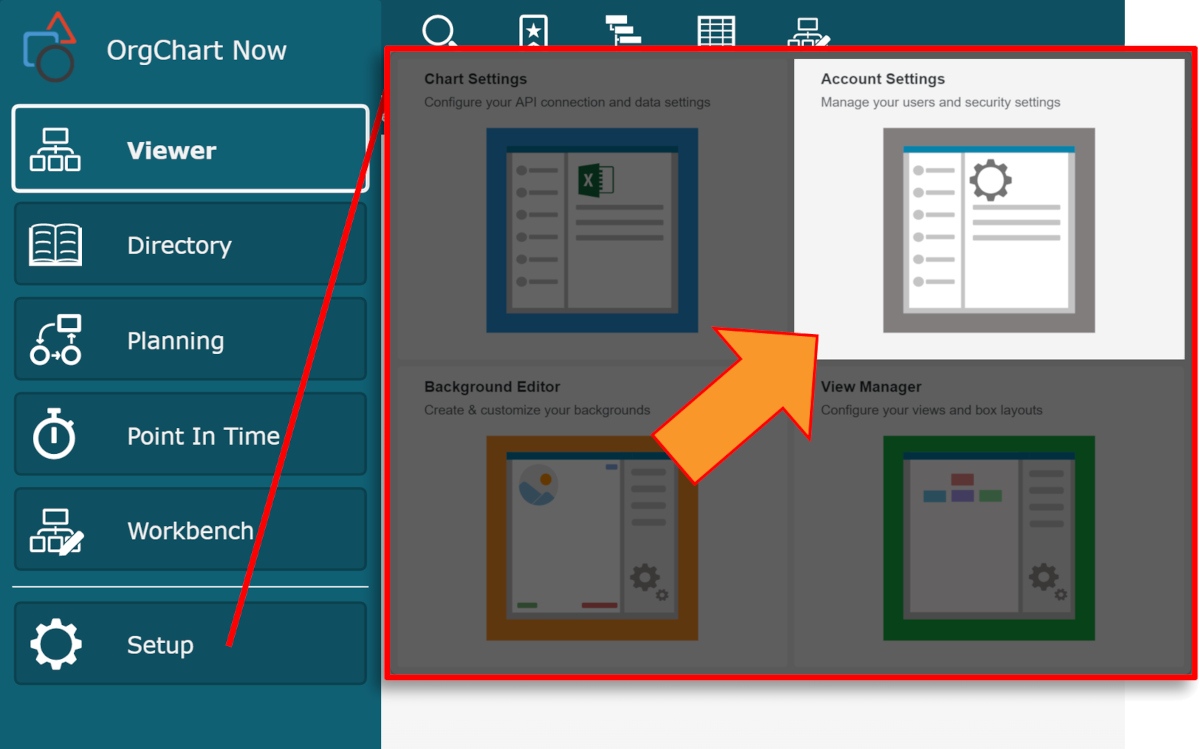
Click on the Mode Switcher icon in the Top Toolbar, and then select the Setup option. The Setup panel is displayed.
Click on the Account Settings tile.

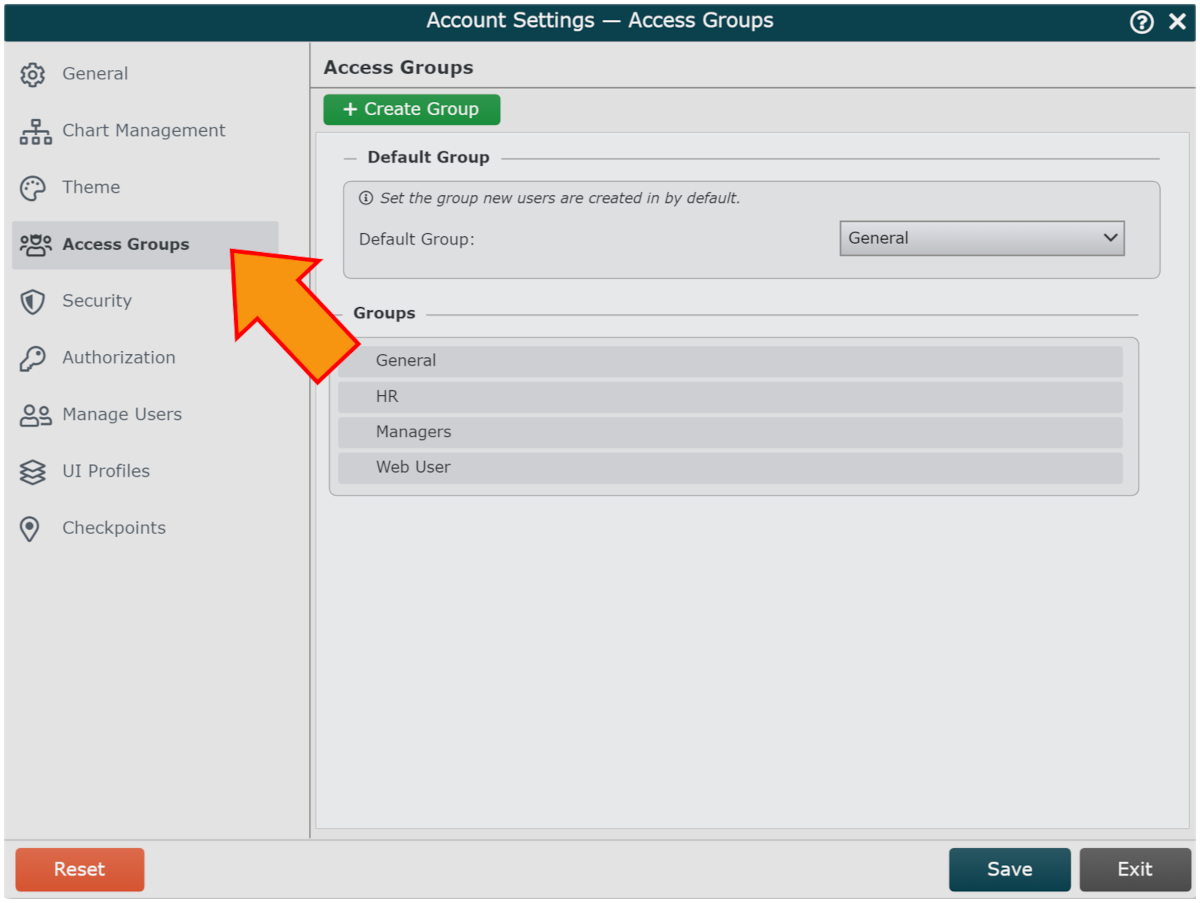
Select the Access Groups option from the left side menu.

Access Groups Options
The following options are available in the Access Groups panel.
Create Group | Create a new access group. See Configuring Access Groups section below. |
Default Group | Select the Access Group a new user will be assigned after it's created. NoteIf no other Access Groups exist in your account, users will be assigned Full Access by default. |
 | Mouse over to configure Access Group. |
 | Mouse over to copy Access Group. |
 | Mouse over to delete Access Group. |
Configuring Access Groups
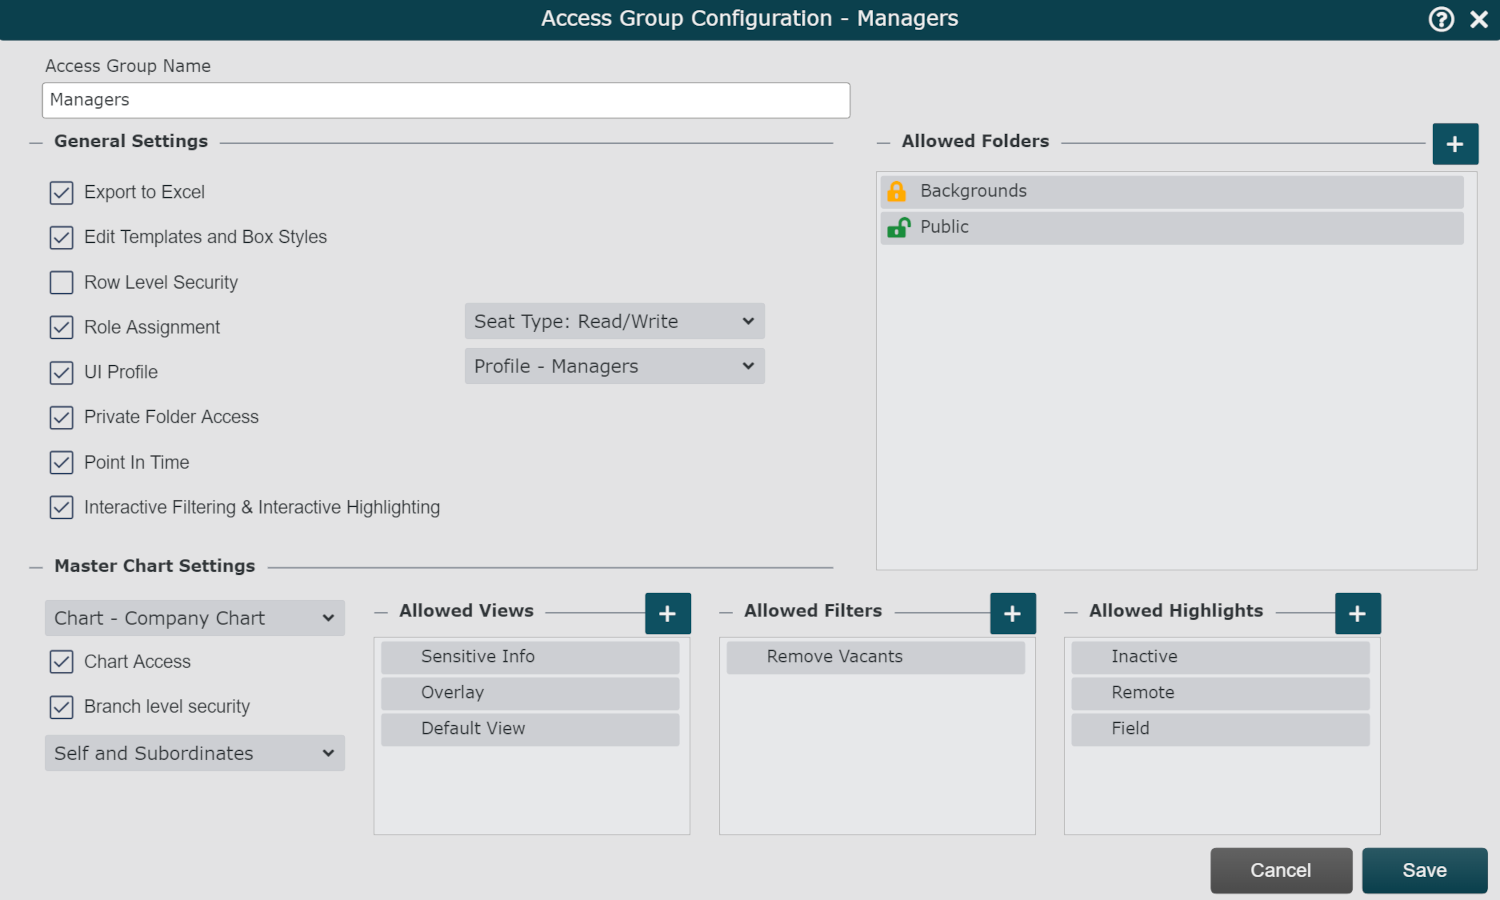
The Access Group Configuration panel allows Administrators to set the application functionality and access privileges for the selected Access Group.

General Settings
The General Settings section allows Administrators to select application functionality and folder access for members of the selected Access Group.
Export to Excel | Check to allow exporting raw data to Excel. NoteUsers with this setting enabled must be assigned to a UI Profile with Export to Excel enabled. |
Allowed Folders dropdown | Click on the By default, folders will be locked. Hover over the name of the folder, and then click on the Users with access to unlocked folders will be able to add content to it. NoteWhen creating Access Groups, always grant access to the Backgrounds folder, so that users can view the Background elements on the chart. The Background folder can remain locked. |
Edit Templates and Box Styles | Check to allow modification of Views and Box Styles in View Manager. |
Row Level Security | Check to enable Row Level Security. The Row Level Security dropdown menu is displayed. Click on the Row Level Security dropdown menu, and then select a Row Level Security Profile from the list. |
Role Assignment | Check to always assign a Read Only, Read/Write, or Admin seat role. Reference the Manage Users article for more information on seat roles. |
UI Profile | Check to assign a default or custom UI Profile . |
Private Folder Access | Check to generate and allow access to user-assigned private folders in the File Manager. This option is only available for users assigned a Read/Write or Admin seat role. |
Point in Time | Check to allow access to the Point in Time module. |
Chart Settings
The Chart Settings section allows Administrators to set Chart Access, Branch Level Security, and Allowed Views settings for each Master Chart.
Chart dropdown | Click to select for which Master Chart to configure access settings. |
Chart Access | Check to allow access to the selected Master Chart. |
Branch Level Security | Check to enable Branch Level Security for the selected Master Chart. Click on the Select a Profile dropdown menu to select the Branch Level Security profile to assign to members of the selected Access Group for the selected Master Chart. |
Allowed Views dropdown | Click to toggle on and off access to available Views. |
Allowed Filters dropdown | Click to toggle on and off access to available Filters. |
Allowed Highlights dropdown | Click to toggle on and off access to available Highlights. |

