Picklist Fields
Audience
Audience: Administrators
Overview
A Picklist is a field that contains a list of values from which an end-user can make a selection.
Picklists are helpful for limiting data entry within defined parameters, so that data remains clean and consistent.
Administrators in OrgChart can convert an existing field to a Picklist field in the Chart Settings: Fields & Formulas panel. The following article provides step-by-step instructions for configuring and using Picklist fields.
Configuring a Picklist Field
Click on the Mode Switcher menu in the Top Toolbar, and then select the Setup option. The Setup panel is displayed.
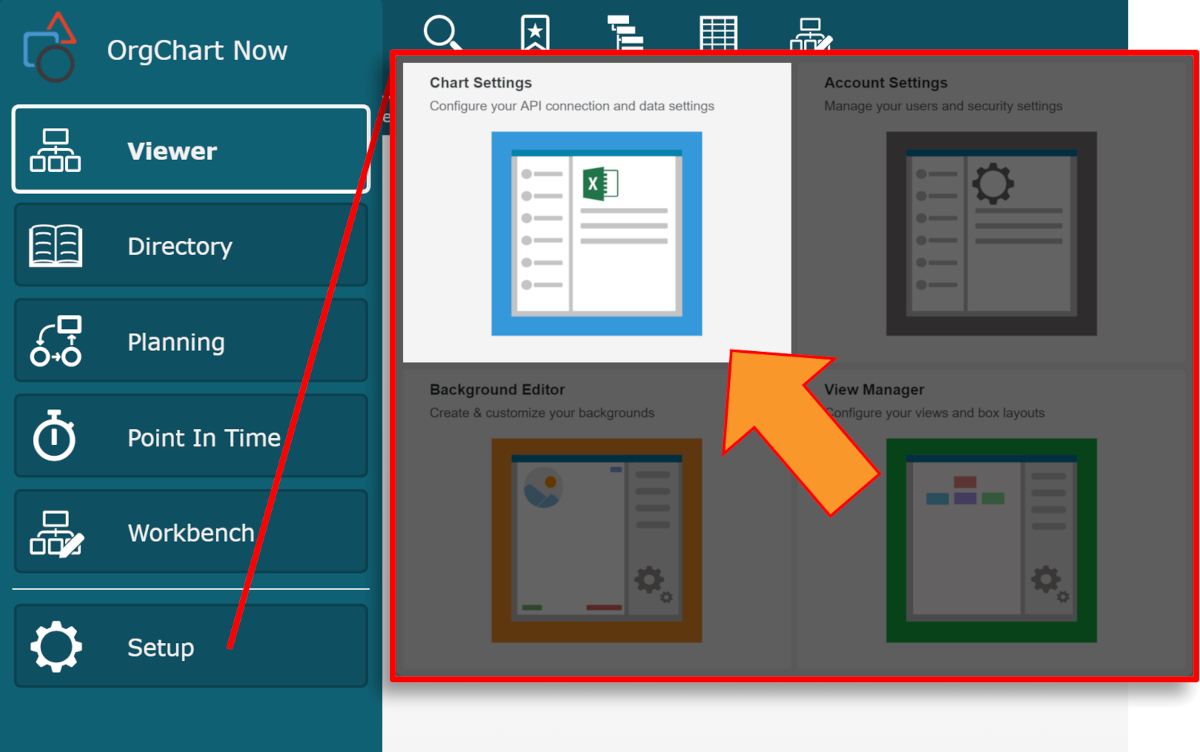
Click on the Chart Settings tile, and then click on the Fields & Formulas tab in the left side menu.
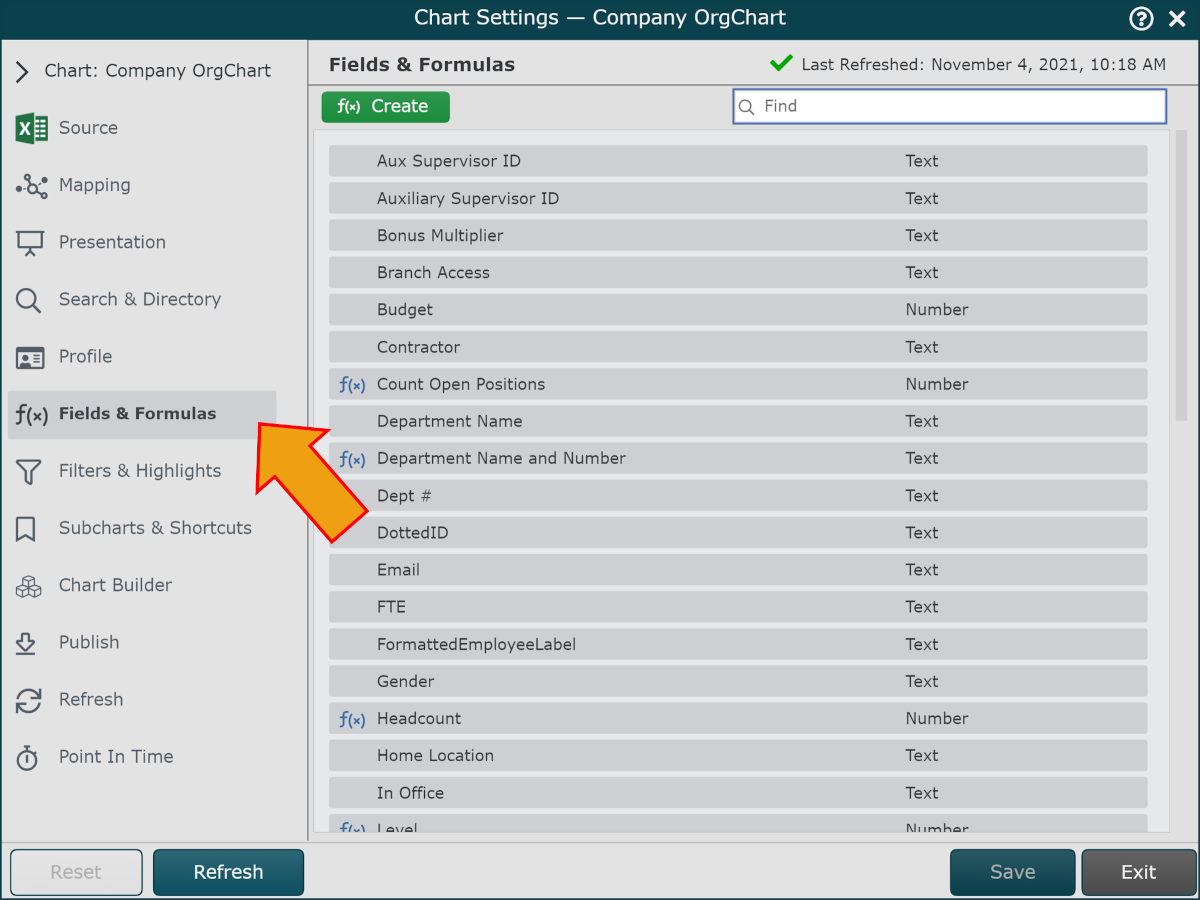
Hover over the field that you'd like to convert into a Picklist, and then click on the
 icon. The Field Properties menu is displayed.
Note
If you want to add a new field to OrgChart (that does not exist in your HRIS), you can do so in the Append Table.
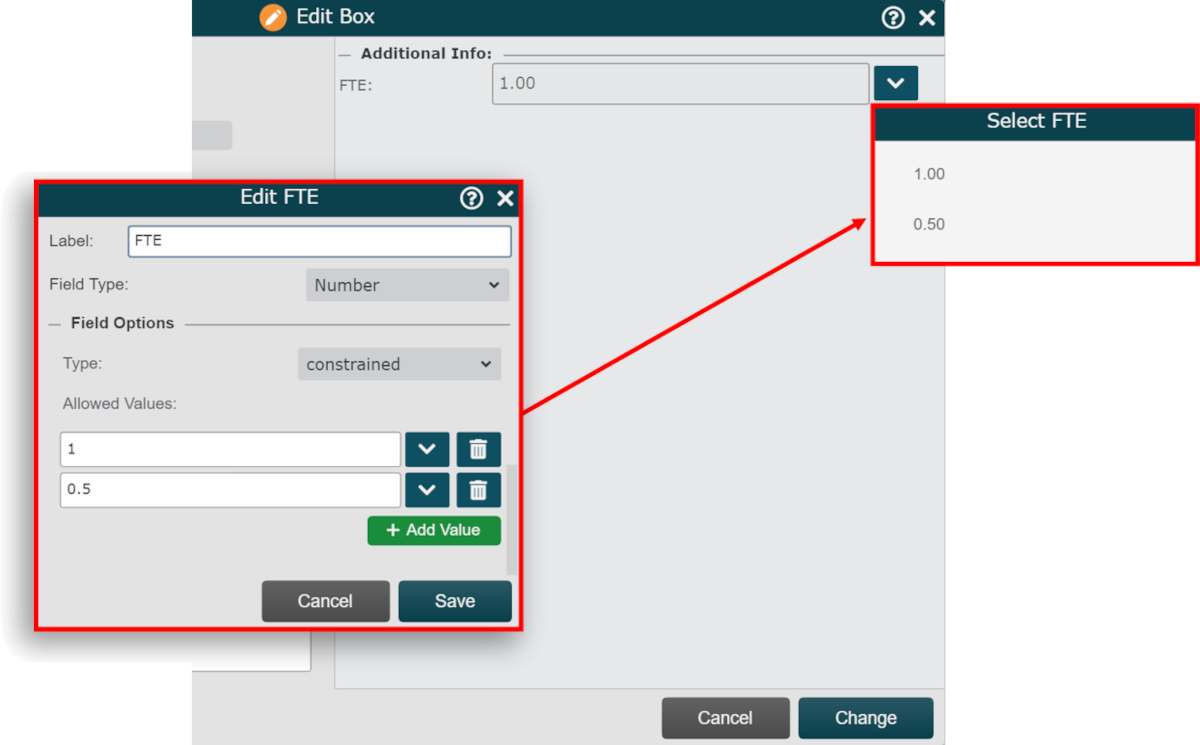
Scroll down to the Picklist Options section, and then check the Set Picklist checkbox.
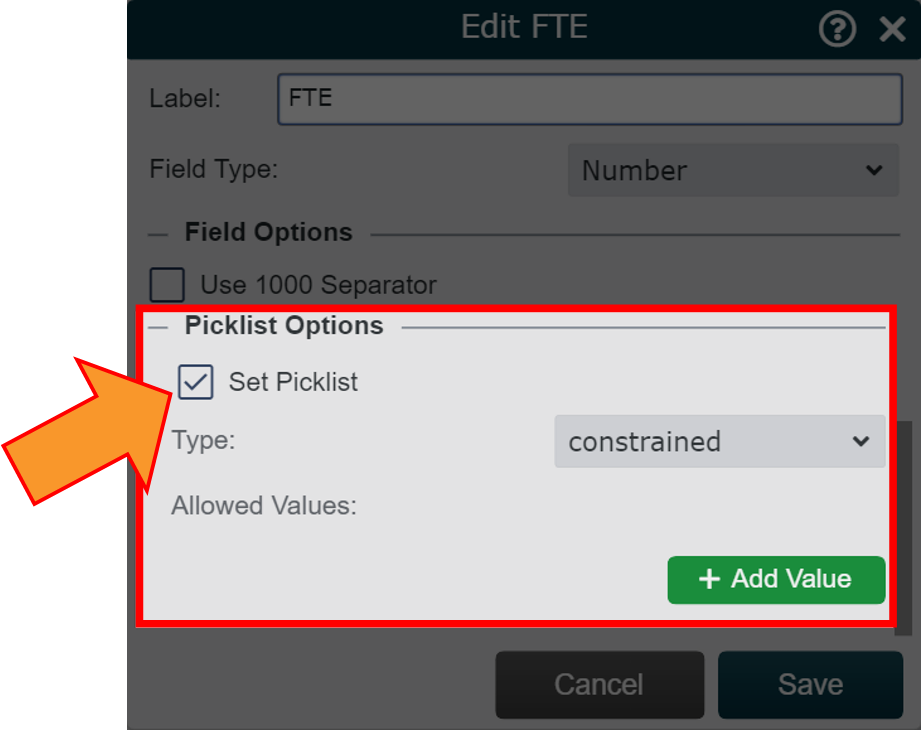
Click on the Type dropdown menu, and then select one of the following two options:
Constrained - Field values in Planning that do not exist in the Allowed Values list will be flagged as conflicts in Planning, or highlighted in the Append Table.
Unconstrained - Field values in Planning that do not exist in the Allowed Values list will not be flagged as conflicts in Planning, or highlighted in the Append Table.
Click on the + Add Value button.
Click on the
 icon to select a field value from your dataset. The value is added to the Allowed Values list.
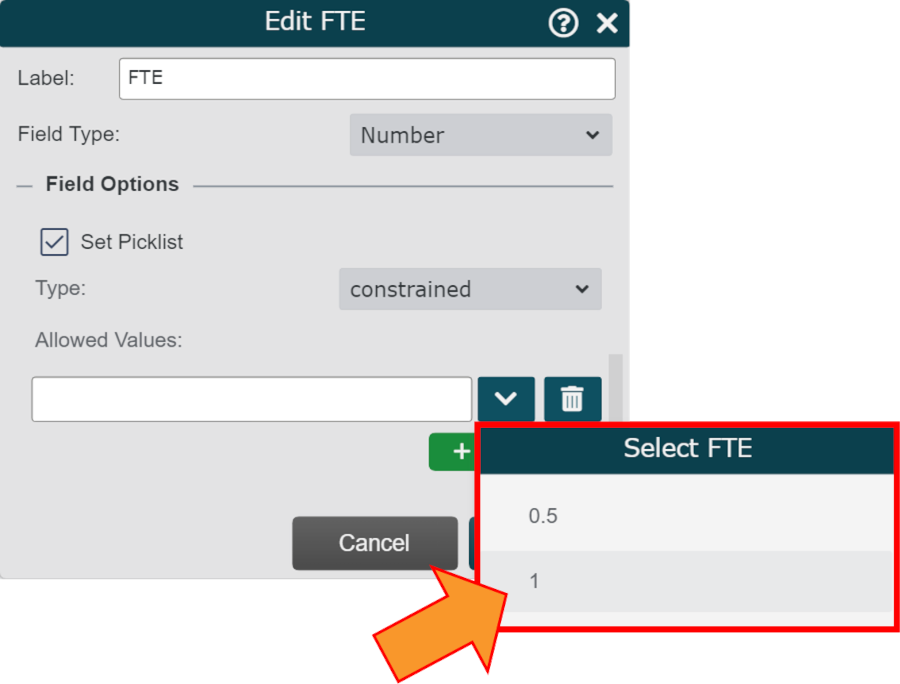
Repeat steps 6 and 7 as desired.
Optionally, click on the + Add Value button, and then type a value into the text box. This will add a value to the Allowed Values list that does not yet exist in your source data.
Click on Save, and then Refresh.
Using Picklist Fields
Picklist fields help facilitate clean and consistent data entry. This is useful when conducting Planning exercises, or updating records in the Append Table.
The following section provides step-by-step instructions for using Picklist fields in Planning.
Click on the Mode Switcher menu in the Top Toolbar, and then select the Planning option.
Create a new plan and include the Picklist field in the Editable Fields section.
Note
Plan Owners and Administrators can add a Picklist field to the list of Editable Fields for an existing plan.
Caution
If the Picklist field already exists as an Editable Field for your plan, open that plan, and then perform a sync before continuing.
Open the plan.
Hover over a record that you would like to update, and then click on the
 icon. The Change Editor is displayed.
Locate the Picklist Field (under the Additional Info heading). Notice that you cannot edit the text for a Picklist field. Click on the
icon (to the right of the Picklist field), and then select one of the enumerated values.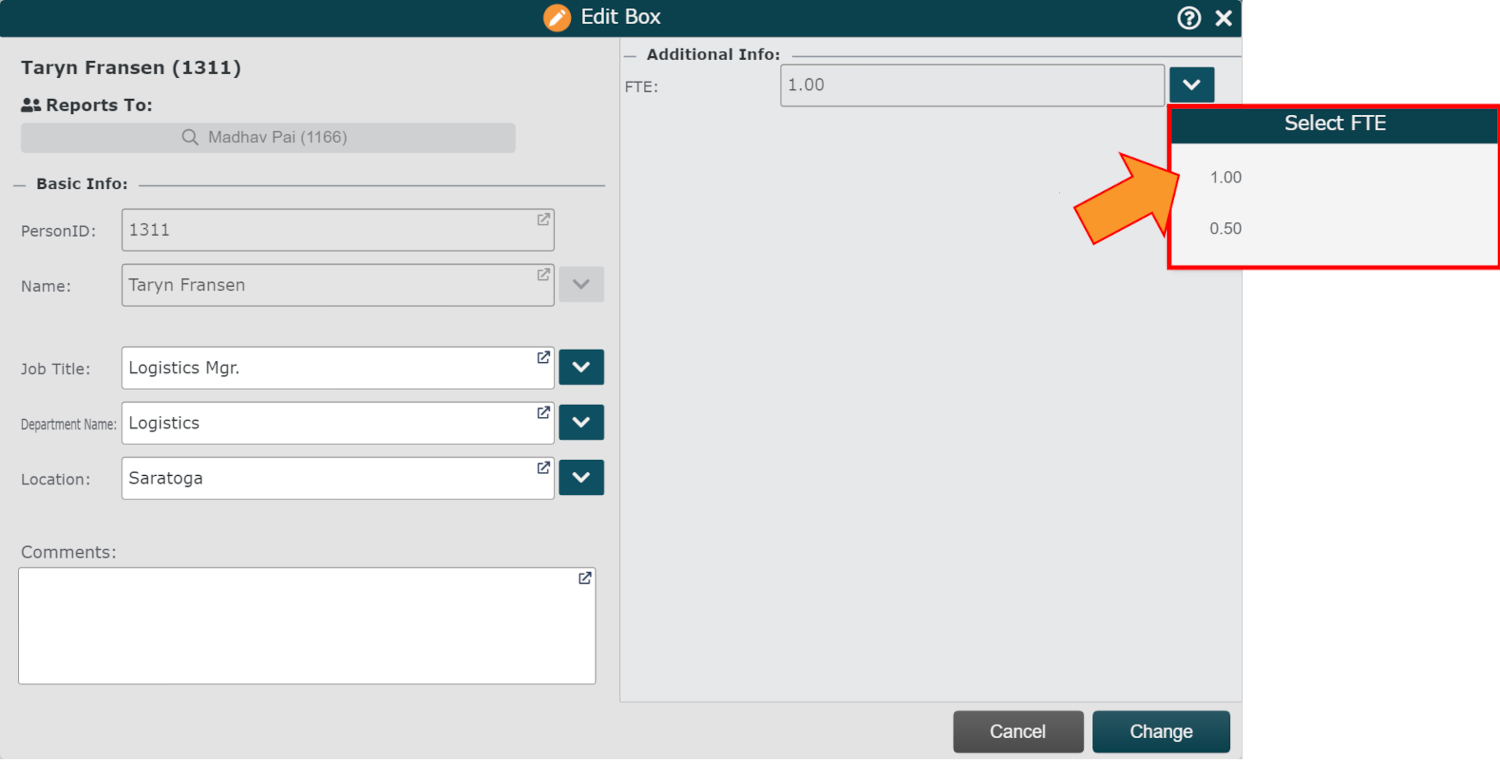
Note
Only the Allowed Values listed in the Picklist section of the Field Properties Editor are displayed.
Click Change to preserve the update.
Resolving Constrained Picklist Conflicts
Constrained Picklists flag records with field values outside the parameters of the Allowed Values list.
This is helpful for identifying data inconsistencies, which may come from the source data, or from changes made to a plan before a Constrained Picklist was added.
There are two types of Conflicts:
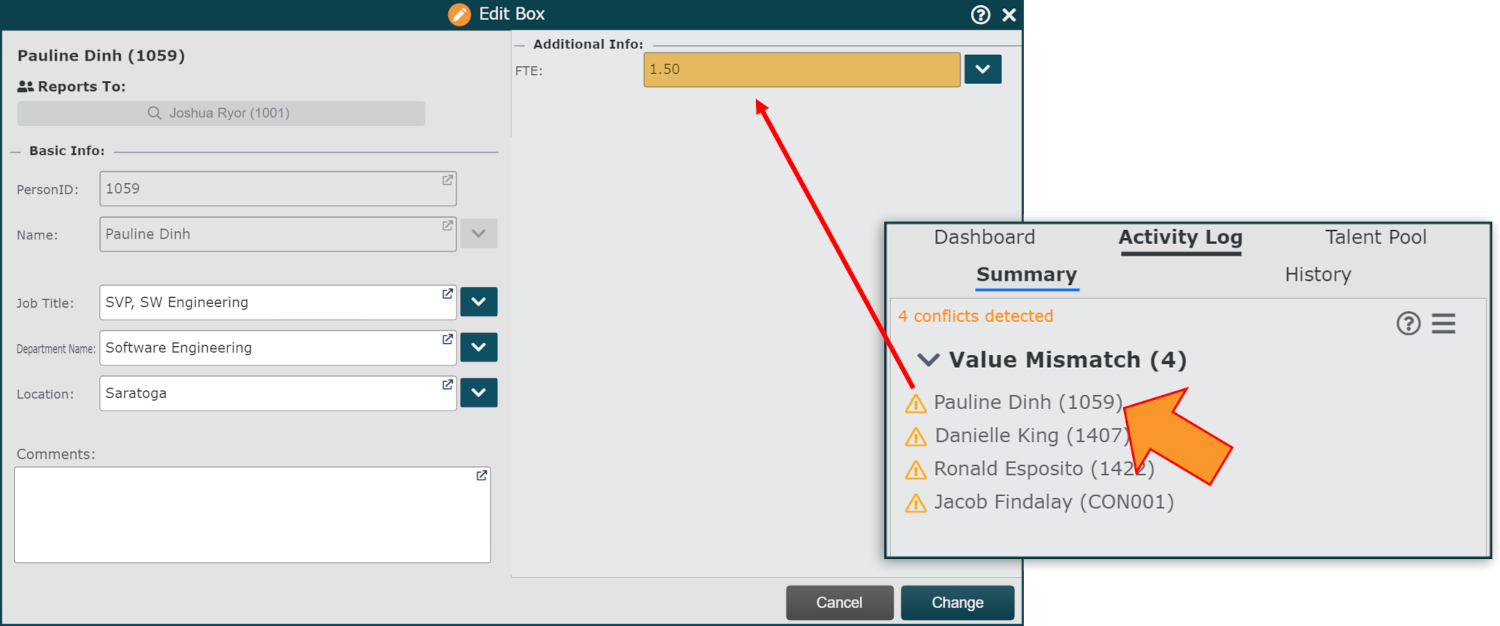
Value Mismatch - Source values for the Picklist field do not exist in the Allowed Values list.
Change Mismatch - Changes made within the plan prior to adding the Constrained Picklist contain field values for the Picklist field that do not exist in the Allowed Values list.
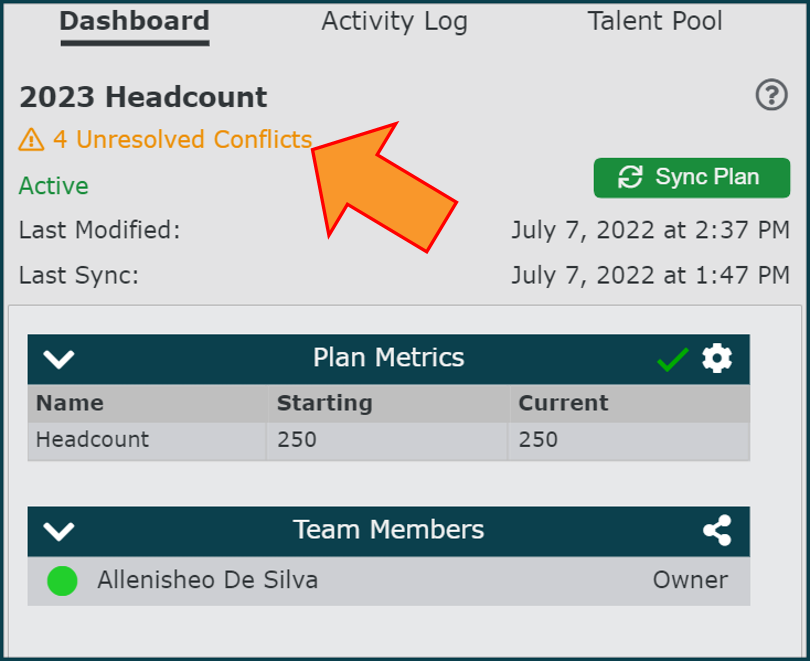
If there are unresolved conflicts, you will see an alert in the Plan Dashboard. Click on the alert to view the list of conflicts.
Resolving Value Mismatches
Records with value mismatches are displayed under the Value Mismatch heading in the Activity Log.
To resolve the conflict, double-click on the flagged record, and then edit the highlighted Picklist field. Only the Allowed Values listed in the Picklist section of the Field Properties Editor are displayed.
Click on Change to preserve the update.
Resolving Change Mismatches
Records with change mismatches are displayed under the corresponding change type heading, but appear with a  next to them.
To resolve the conflict, double-click on the flagged record. The Resolve Conflict panel is displayed.
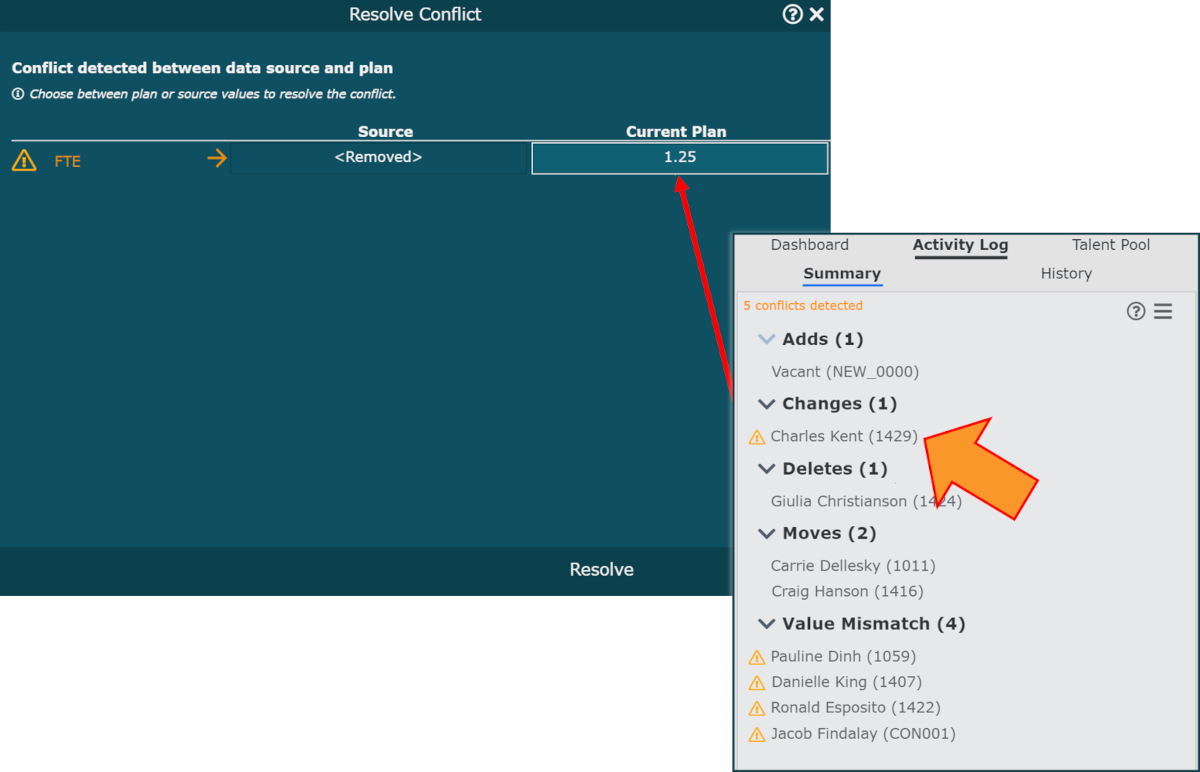
Click on the Current Plan value, and then select a new value from the dropdown menu. Only the Allowed Values listed in the Picklist section of the Field Properties Editor are displayed.
Click on Resolve to preserve the update.