Fields and Formulas
Audience
Audience: Administrators
Overview
The Fields and Formulas panel allows an administrator to update field properties (i.e. Label, Field Type, etc.), define Static Formulas, create Aggregated Fields, and create Pick List Fields.
Formulas can be added to Box Styles, or displayed on the Backgrounds.
Accessing Fields and Formulas
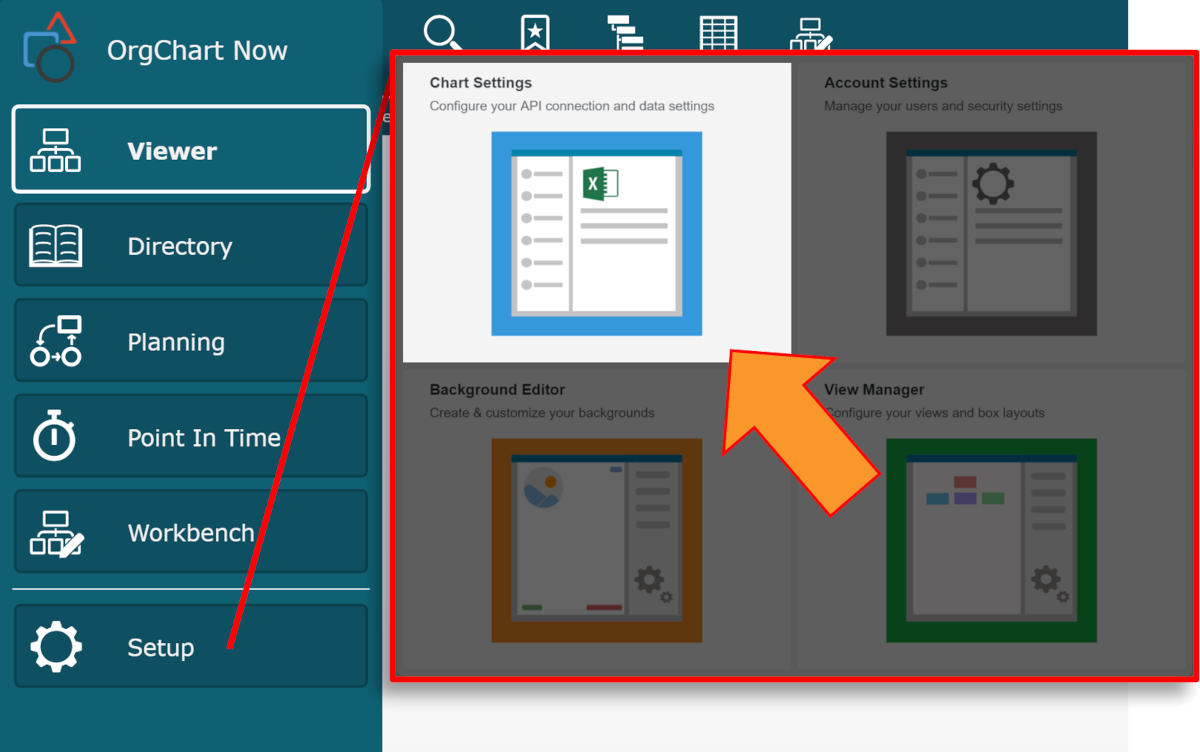
Click on the Mode Switcher icon in the Top Toolbar, and then select the Setup option. The Setup panel is displayed.
Click on the Chart Settings tile.

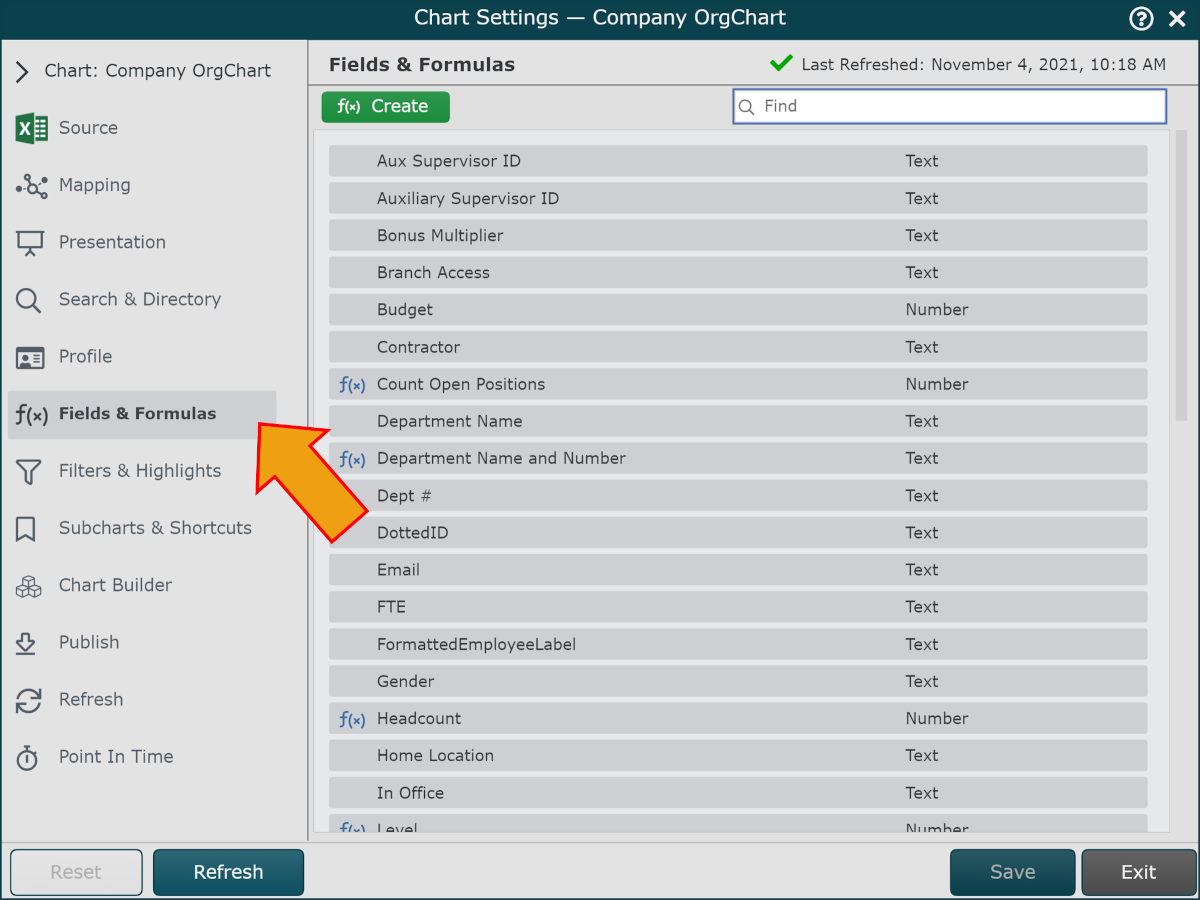
Select the Fields and Formulas option from the left side menu.

Fields and Formulas Settings
The Fields and Formulas panel display a list of all fields loaded in from the data sources. The panel also includes both predefined and user-defined formulas.
Predefined Formulas
The set of predefined formulas are automatically recalculated on each refresh. Predefined formulas include:
Headcount | Number of direct and indirect subordinates that report to a manager. Count also includes the manager. |
Level | The org chart level on which a box resides (e.g. CEO on level 1, Vice Presidents on level 2, Directors on level 3) |
Peers | Number of boxes that report to same manager as the current box. |
Span of Control | Number of direct subordinates that report to a manager. |
Subchart Level | The display level on which a box resides (top box is level 1, subordinates to top box are level 2) |
Subordinates | Number of direct and in direct subordinates that report to a manager. |
Important
User-defined formulas cannot have the same name as a pre-defined formula.
Always ensure to use a unique name for user-defined formulas.
Editing Fields and Formulas
You can define new formulas or edit field/formulas properties using the following functions:
 | Define a new Static Formula, or Aggregated Field. |
 | Modify the field properties (i.e. Label, Field Type, Prefixes, etc). |
 | Update the configuration of a user-defined formula. |
 | Update the configuration of an Aggregated Field. |
 | Delete a user-defined field or formula. NotePre-defined formulas and source data fields cannot be deleted. |
Field Properties
Each field or formula has an associated field type. The field type determines how a field is displayed when presented in an org chart.
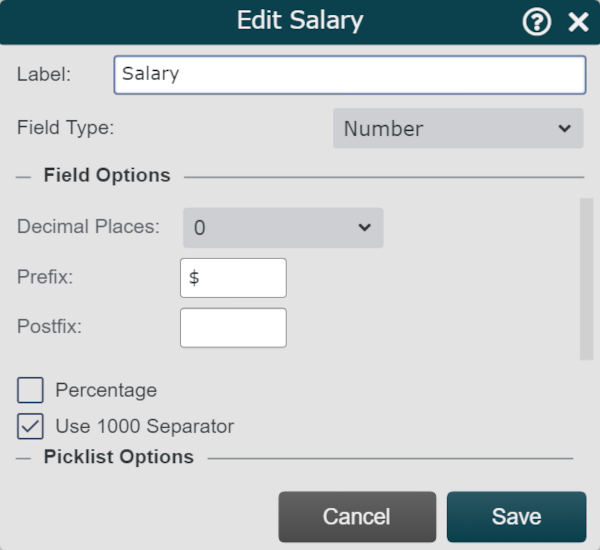
To edit the Field Properties of a field or formula, mouse over the field or formula, and then click on the  icon. The following dialog is displayed:

Click on the Field Type dropdown menu, and then choose one of the following options:
Display field as text. | |
Display field as a numeric value. | |
Display field as an image. | |
Display field as a date. |
Text Fields
Text fields have the following properties:
Break Character | Specify a list of characters that can be used for word wrap. By default, org chart will only break on spaces. For example, by adding the ‘@’ characters as a break character, the string elizabeth.jones@officeworksoftware.com can be word wrapped as follows:
|
Number Fields
Number fields have the following properties:
Decimal Places | Set the number of decimal places shown (0.00 vs 0.0) |
Prefix | Set Prefix character to be shown before a number (for example, "$" displays “$1,000”) |
Postfix | Set Postfix character to be shown after a number (for example, " USD" displays “1,000 USD”) |
Percentage | Set a number to be shown as a percentage (for example, 0.2 is shown as 20%) |
Use 1000 Separator | The number 1000 is shown as 1,000 |
Image Fields
Setting the field type to Image allows you to:
Follow a URL to retrieve an image (for example, https://myphotos.acme.com/12345.jpg ).
Follow a Path (within your account) to retrieve an image (for example, "Photos:jsmith.jpg" will retrieve an image from the Photos directory).
Date Fields
Setting the field type to Date allows you to:
Set the display format for a date (for example, January 28, 2017 vs. 01.28.2017). Reference Account Settings: General for more information.
Perform date calculations (e.g. Convert a birthdate to age).
Picklist Options
You can convert any existing field or formula into a Picklist. This is helpful when populating fields in Planning, so that data remains consistent.
Reference the Picklist Fields article for more information.
The following options are available when configuring Picklists:
Set Picklist | Check to enable the selected field as a Picklist. |
Type | Choose between the following two types of Picklists:
|
Add Value | Add a new value to the Picklist. Type to in the text box to enter a new value (not yet present in your data set), or use the |
 | Add an existing field value (from your data) to the Picklist. |
 | Delete associated field value from the Picklist. |
