Presentation Menu
Audience
Audience: Administrators & Read/Write Users
Overview
The Presentation Menu Administrators and Read/Write users to view and apply Chart Templates (Views) and Box Styles (created in View Manager mode) to a Chart Document.
Administrators and Read/Write users can also access the Master Editor, to create and modify Master Pages.
Accessing the Presentation Menu
-
Click on the
icon to open the Mode Switcher. Then, click on the Workbench button. The Workbench dialog is displayed.
-
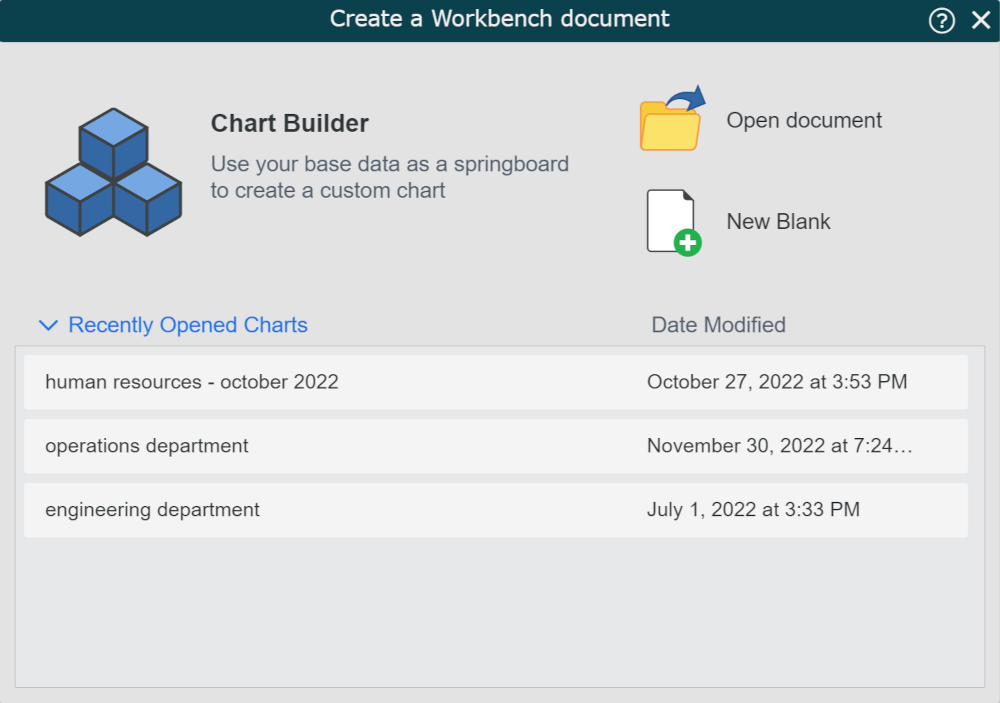
Open a recently open document, open an existing document, create a blank chart, or use the Chart Builder to enter the Workbench.
-
Click on the Presentation menu.
Chart Templates and Box Styles Options
The first two options are displayed in the Presentation menu:
Chart Templates |
Display a list of available Views in the right-side panel. Double-click on a View to apply it to the open Chart Document. |
Box Styles |
Display a list of available Box Styles in the right-side panel. Click on an employee record in the open Chart Document, and then double-click on a Box Style to apply it to that record. NoteThis type of manual change will not be preserved upon refresh. Whenever possible, drive the presentation of a chart using conditional formatting. |
Important
Chart Templates (Views) and Box Styles cannot be edited in Workbench mode.
Enter View Manager mode to create and edit Box Styles and Chart Templates for use in Viewer or Workbench mode.
Master Editor Options
Administrators and Read/Write users can create and modify Master Pages using the Master Editor.
Master Pages contain elements, such as company logos, legends and page numbers, which appear in the background of a Master Chart or Chart Document. Reference the Creating a Master Page article for step-by-step instructions on how to create a Master Page.
The following tools are available in the Master Editor:
Tools
![]() |
Click to select an object. |
![]() |
Click to enable the pan function. Click and drag to view different sections of the Master Page. |
![]() |
Delete a selected object. |
Insert
The following options are applied to the current Master Page, and will appear on each page of the Master Chart or Chart Document to which this Master Page is applied.
![]() |
Insert a text box |
![]() |
Insert an AutoText element, such as page numbers, or subchart name. |
![]() |
Insert an image. NoteImages inserted on a Master Page must be uploaded and saved to the Masters folder in the File Manager. |
![]() |
Insert a table. Right-click on the table to edit its properties in the Box Layout Editor. |
![]() |
Insert a legend. Right-click on the table to edit its properties in the Box Layout Editor. |
![]() |
Insert a pie chart. Reference the Pie Chart topic article for more information. |
Arrange
![]() |
Pin selected object on Master Page. Pinned objects are automatically repositioned when the page is resized. |
![]() |
Set order that objects (like text boxes and images) appear on the Master Page. |
Background
![]() |
Set the background color. |
![]() |
Apply a saved Master Page to the current Chart Document. |
![]() |
Save Master Page as a Master Page document to the Masters Folder. ImportantAlways save a Master Page as Master Page document, and then store it in the Masters folder, so that it can be later applied to a Master Chart and Chart Document. |
Box
The following options pertain to the selected text box element(s) inserted on the Master Page.
![]() |
Change shape of box. |
![]() |
Change the fill color. |
![]() |
Turn box shadow effect on/off. |
![]() |
Change the border thickness and style. |
![]() |
Change the border color. |
Text
The following options pertain to the text within a selected element.
Note
These options cannot be applied to images.
![]() |
Chant the font style. |
![]() |
Change the font size. |
![]() |
Change the text color. |
![]() |
Change the cell color. |
![]() |
Bold text. |
![]() |
Italicize text. |
![]() |
Underline text. |
![]() |
Configure the field label display settings.
|
Alignment
The following options pertain to the text within a selected element.
Note
These options cannot be applied to images.
![]() |
Align text to the top. |
![]() |
Align text to the middle. |
![]() |
Align text to the bottom. |
![]() |
Make all cell content visible by displaying it on multiple lines. |
![]() |
Align text to the left. |
![]() |
Align text to the center. |
![]() |
Align text to the right. |
![]() |
Align text to both the right and left margins. Use this option when displaying a field label and a field value within the same cell. |