Rule-Driven Charting Example
Audience:
Audience: Administrators & Read/Write Users
Overview
Administrator and Read/Write users can create and modify chart Views, which contain a set of conditional formatting rules that drive the presentation of certain employee records. For example, you can create a View that marks consultants with a green flag.
This eliminates the need for manual formatting.
The following article provides step-by-step instructions for creating a View.
Creating a View
Log in to OrgChart.
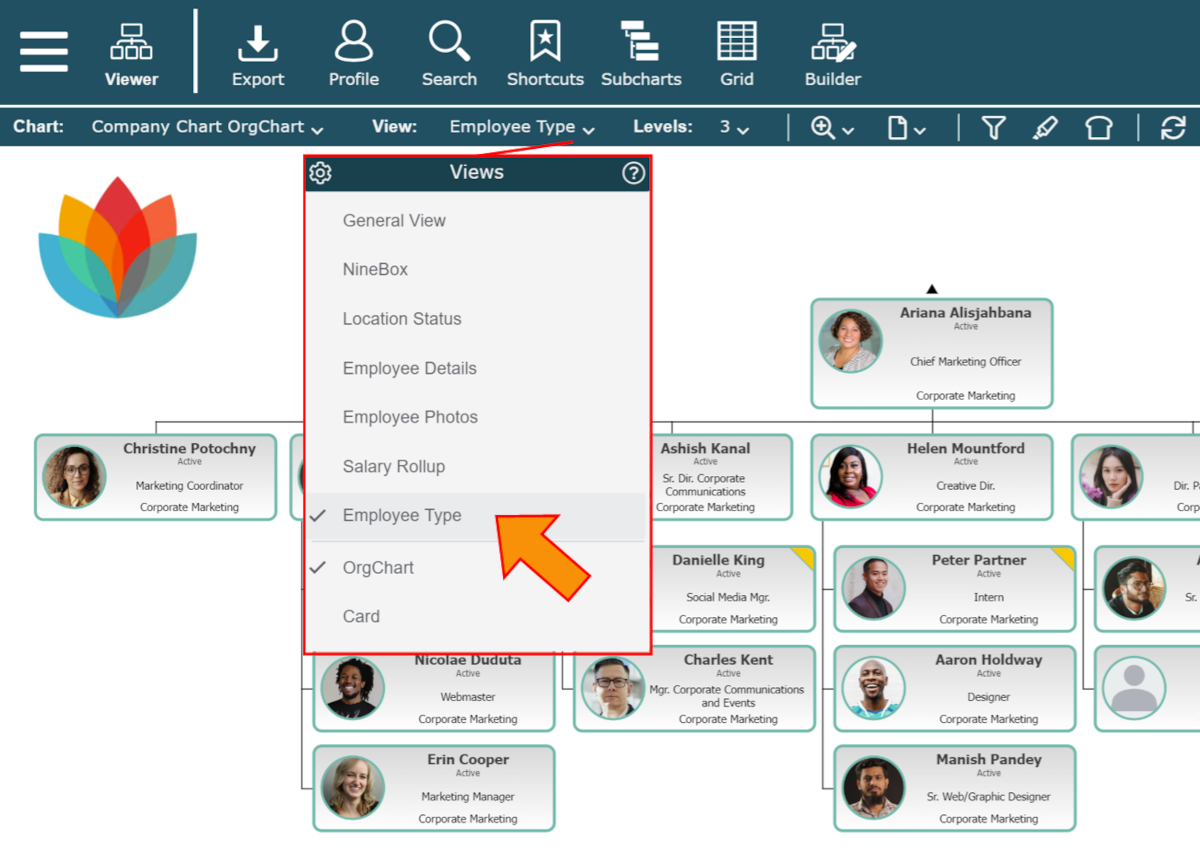
Click on the Mode Switcher icon in the Top Toolbar, and then select the Setup option. The Setup panel is displayed.
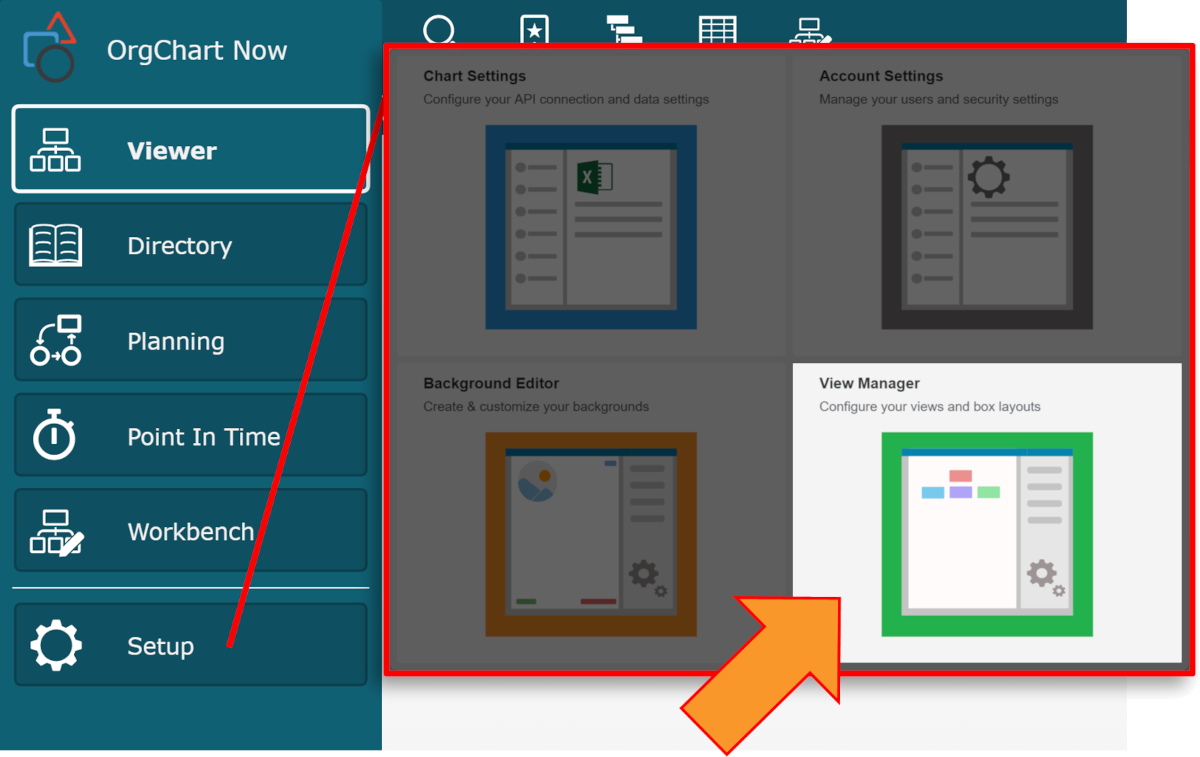
Click on the View Manager option. The View Manager user interface is displayed.
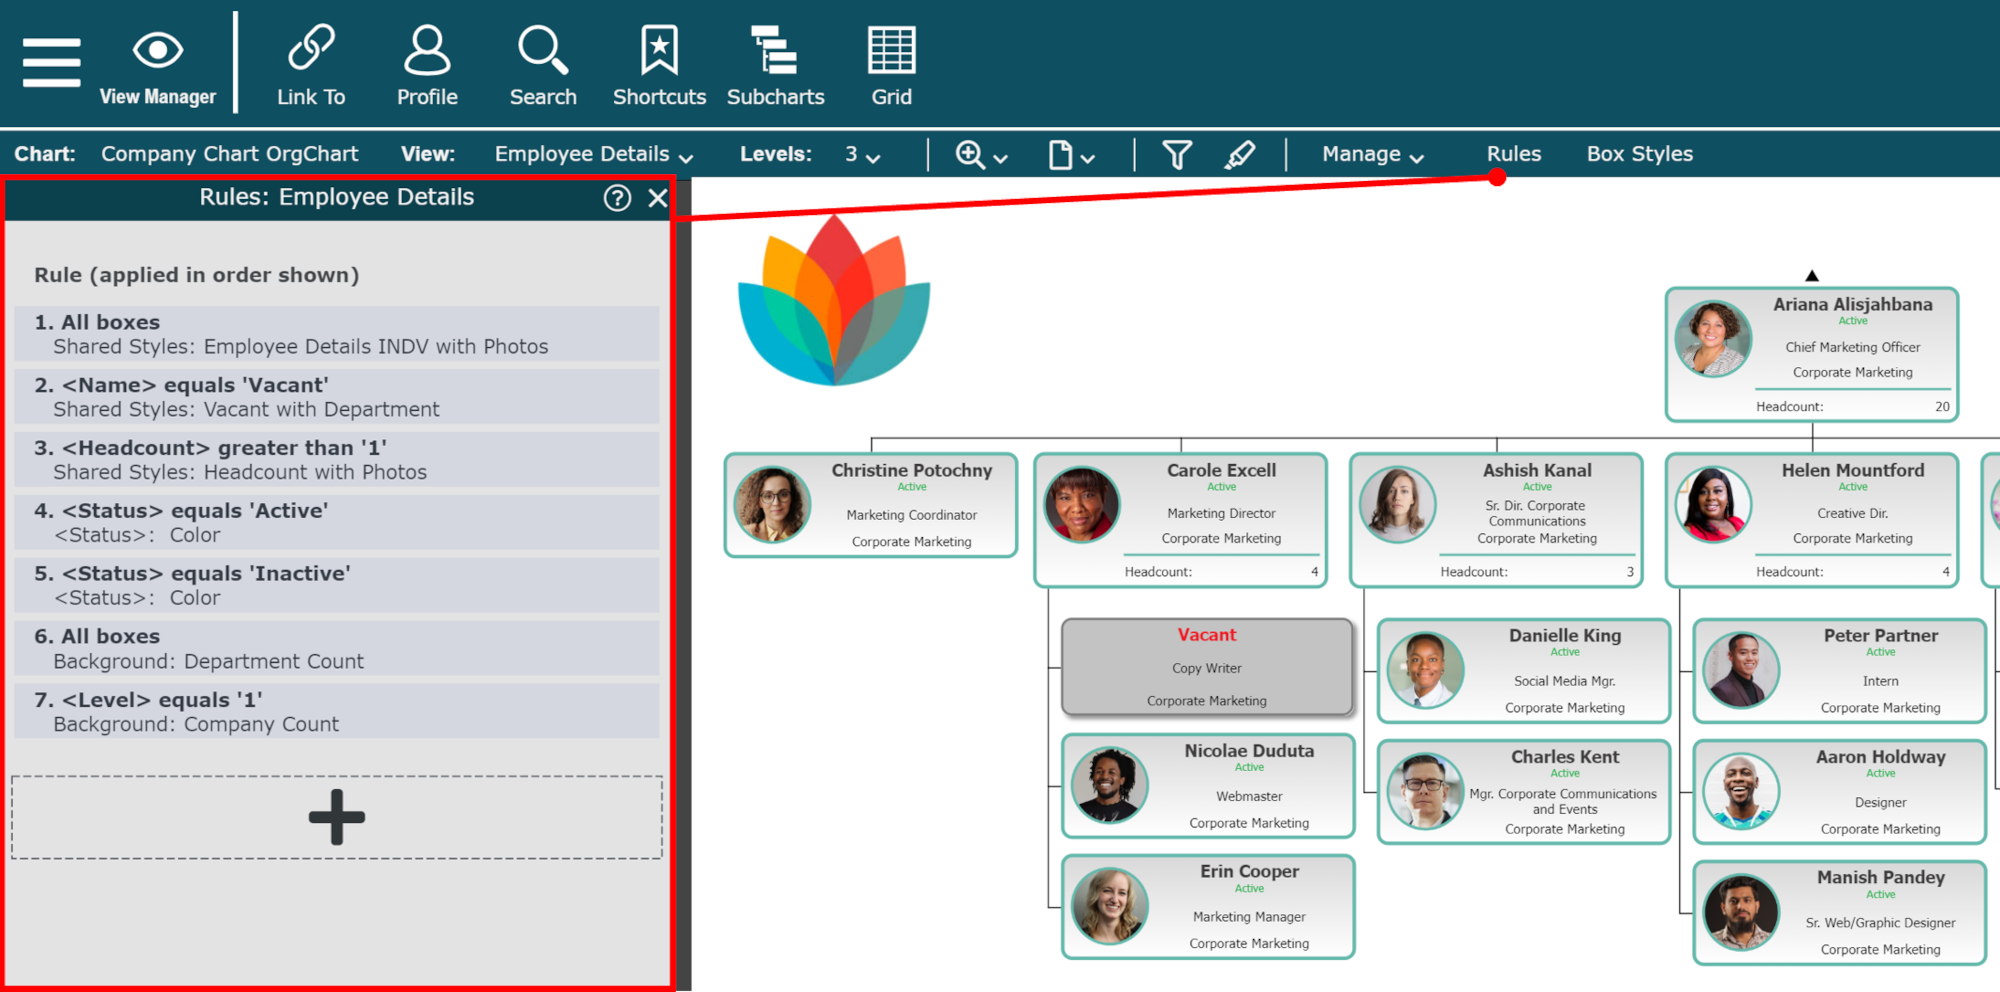
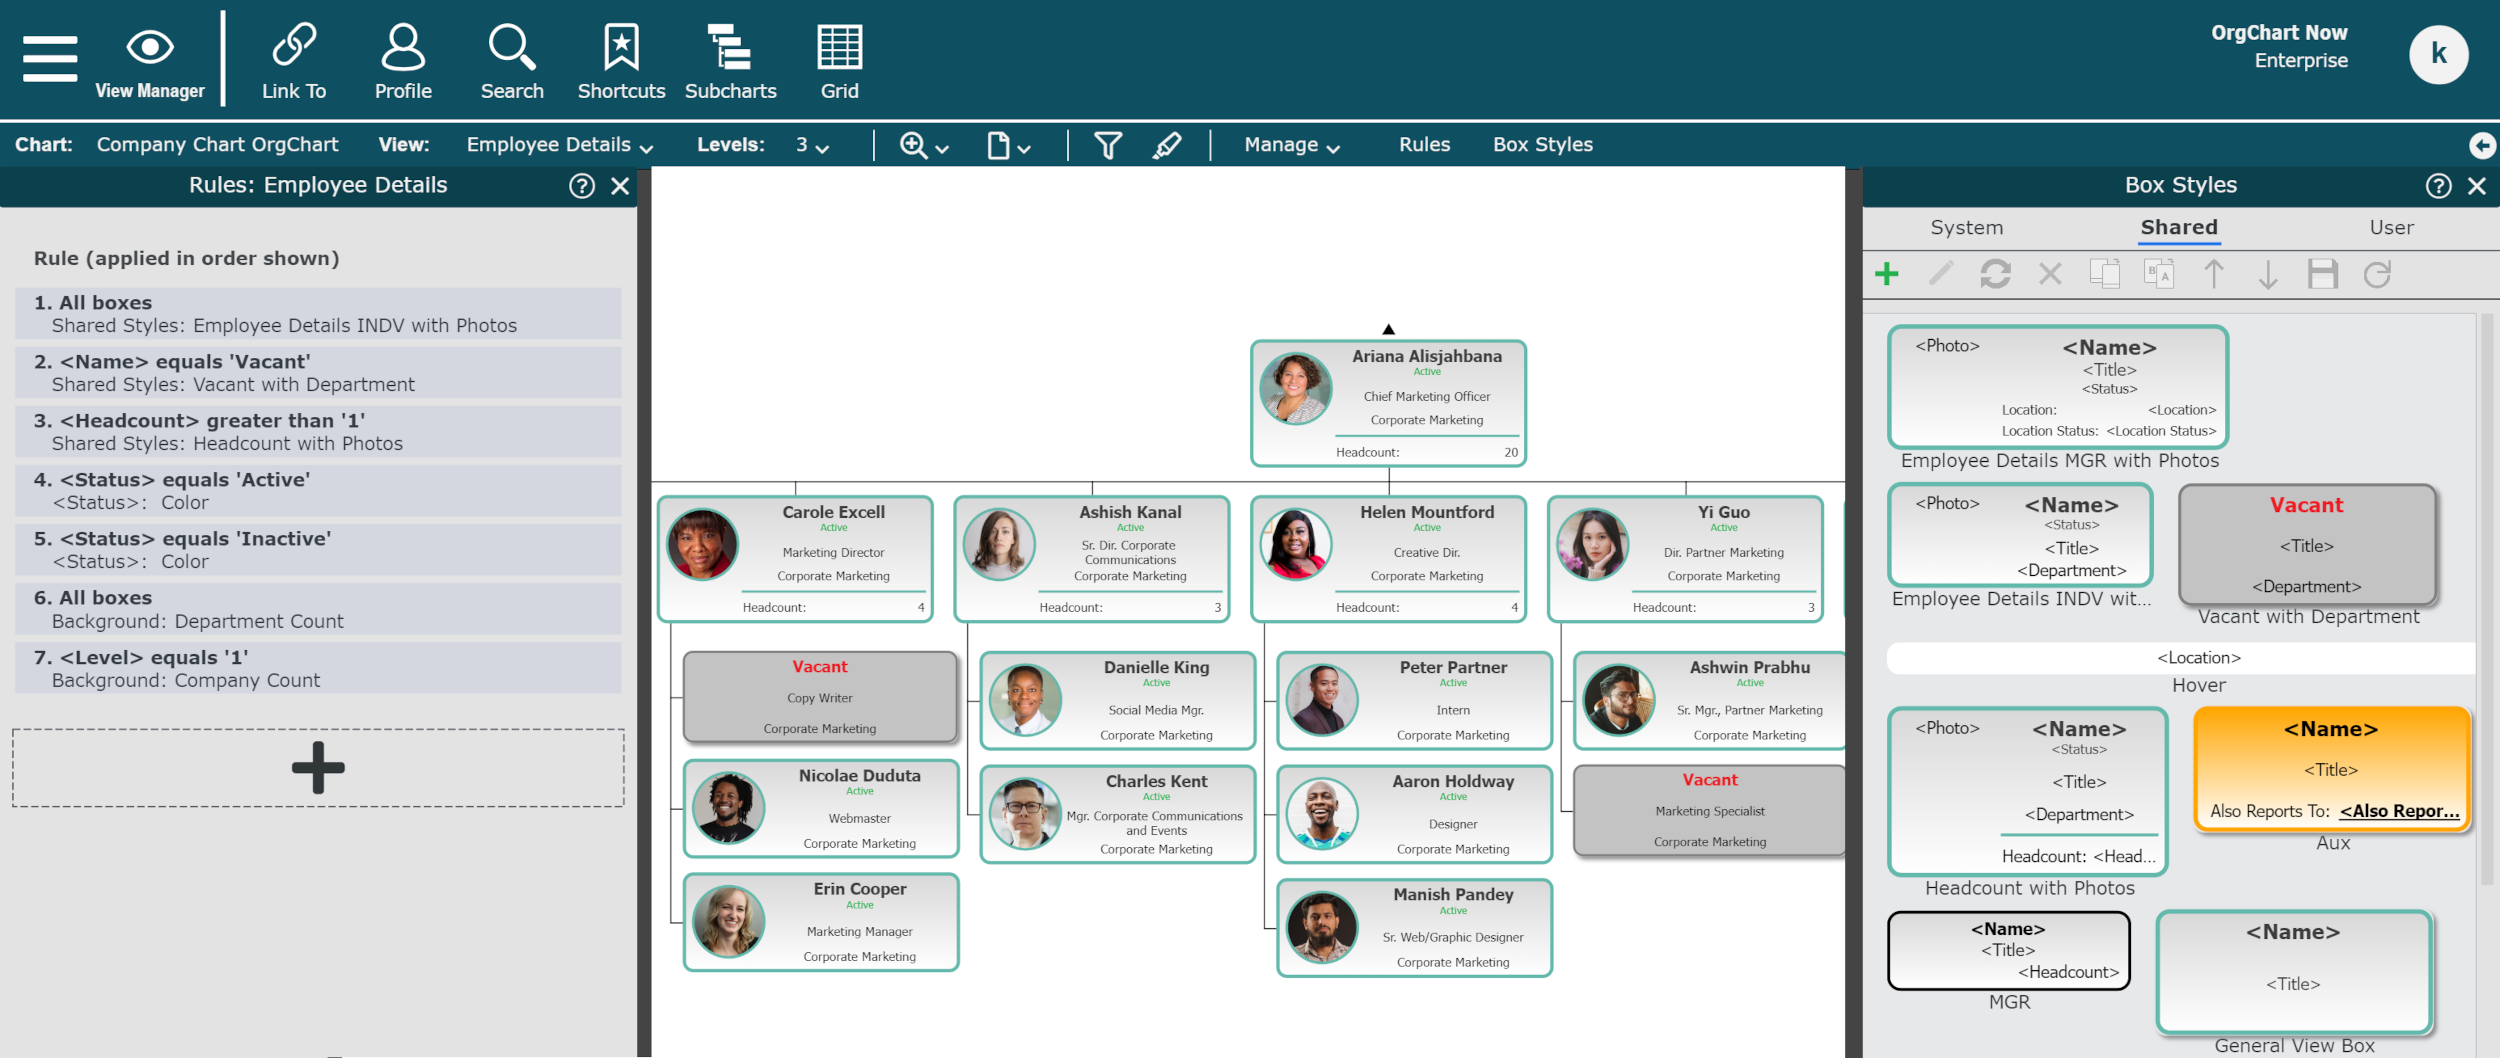
Click on the Rules button (in the View Manager toolbar). The Rules panel is displayed on the left side of the screen.
Optionally, click on the Box Style button (in the View Manager toolbar) to see the Box Styles you have created in your Shared library.
Click on the Manage dropdown menu.
Ensure that the Current Set is Shared, If the Current Set is not Shared, click on the Current Set option to change the set.
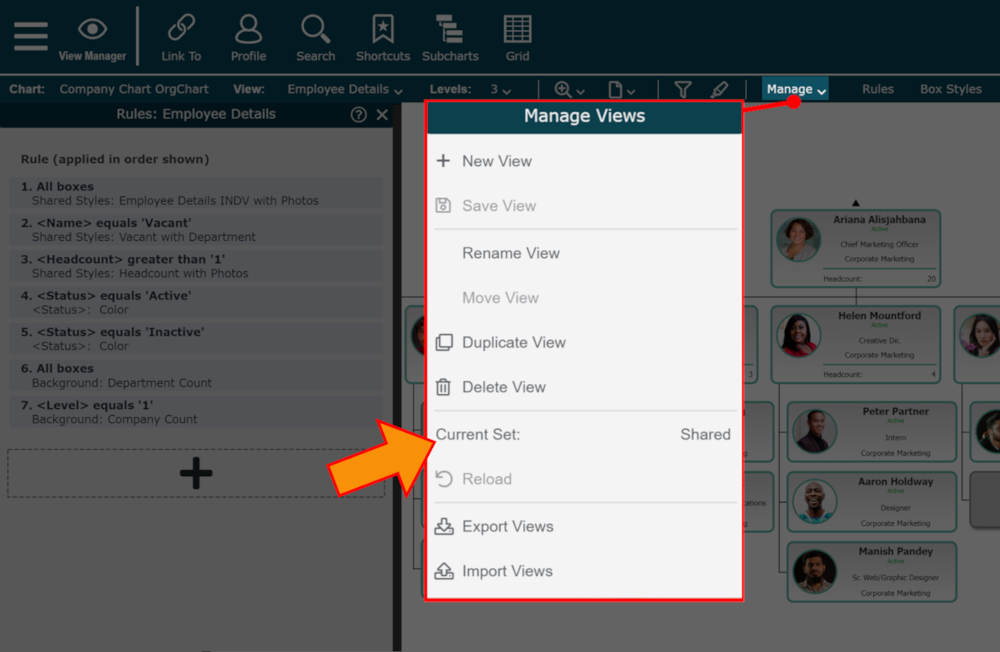
Select the New View option from the Manage dropdown menu.
Enter a name for the View (i.e., Employee Type) in the Name textbox, and then click on Save.
The new View is generated with the System Classic Box Styles applied to all boxes.
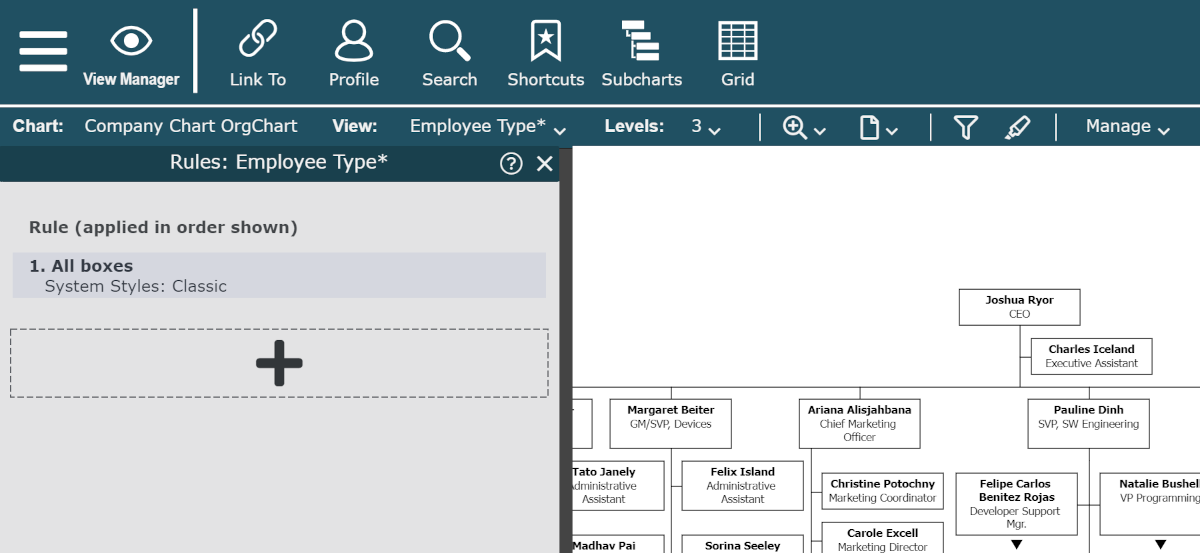
Double click on the All boxes rule. The Rule Editor is displayed.
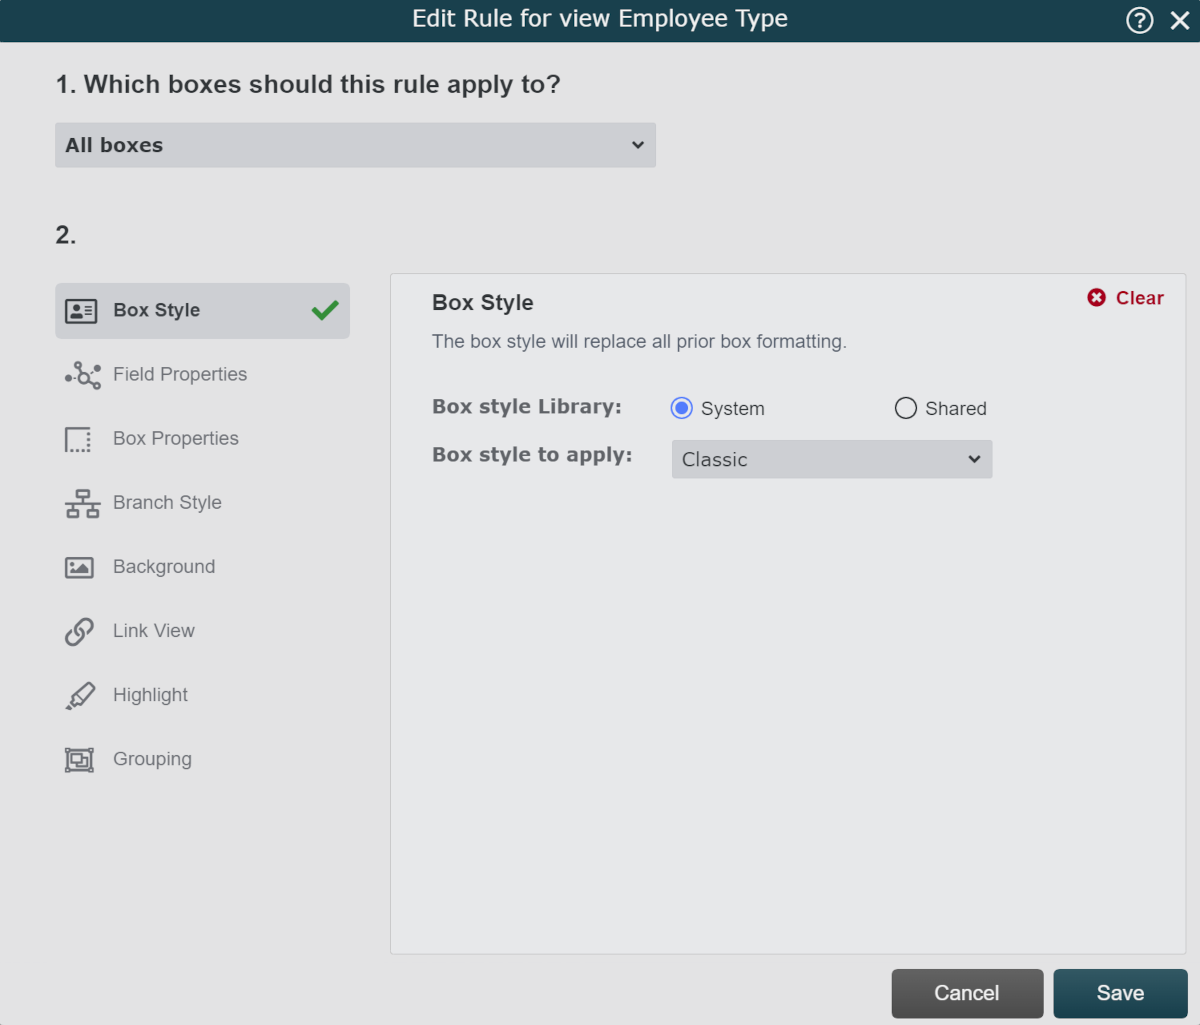
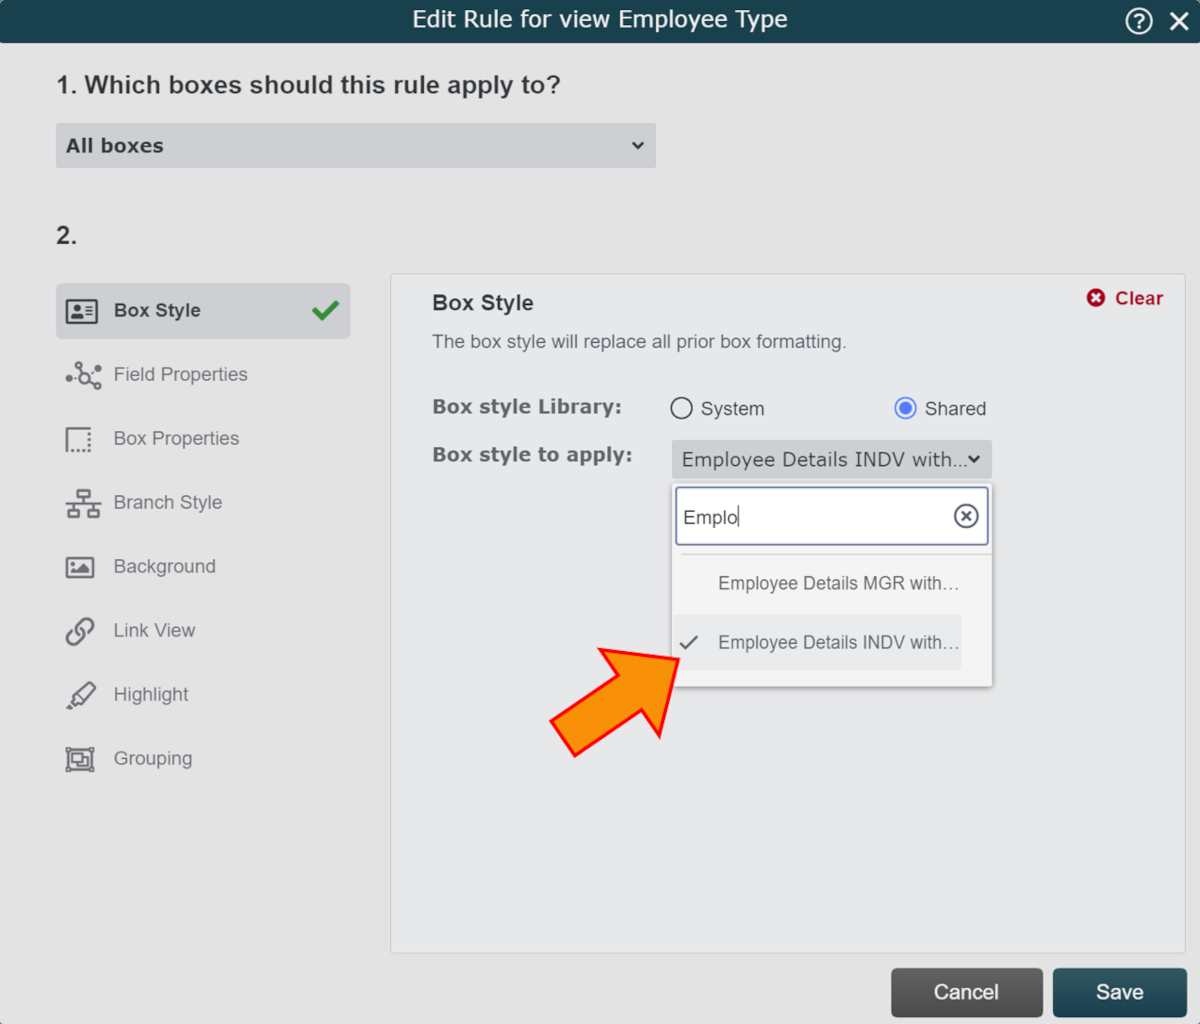
Click on the Shared radio button (to the right of Box Style Library).
Note
Note: Selecting the System radio button allows you to apply system generated Box Styles to your chart. Selecting the Shared radio button allows you to apply custom Box Styles to your chart.
Click on the Box Style to Apply dropdown menu, and then select the name of the Box Style you want to apply to the chart.
Important
Using an All Boxes rule will ensure that all employee always have a Box Style applied to their record. You can add subsequent Rules that apply different Box Styles to employees that meet a defined condition.
Click Save.
Click on the
 icon (at the bottom of the list of Rules displayed in the Rules panel) to add a rule that will apply changes to boxes matching the defined criteria.
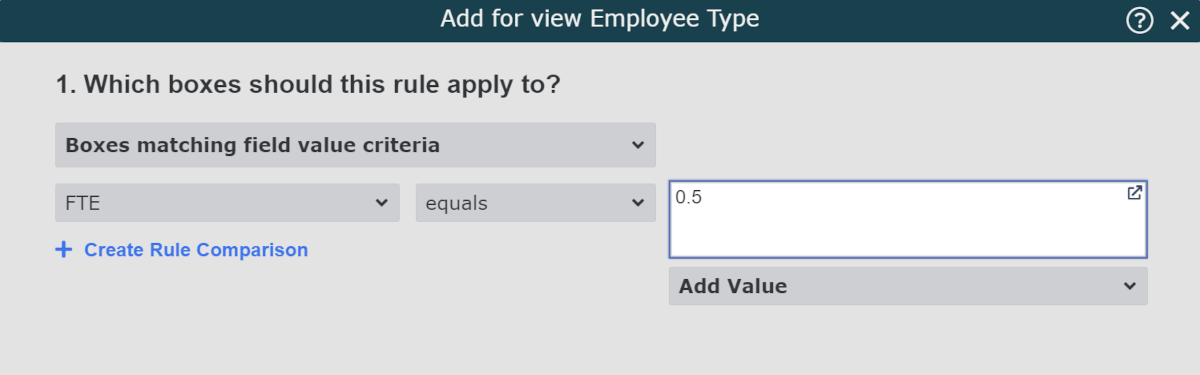
Select a field (i.e. FTE) from the left-hand Field dropdown menu.
Select a Comparison value from the Rule Comparison dropdown menu to define the relationship between the Field and the Field Value.
Enter a Field Value in the Value text box to define the condition of this Basic Rule. Optionally, you can click on the Add Value button to pull a field value from your data set.
Click on the Box Properties tab.
Check the Box Flag checkbox. The Box Flag options are displayed.
Check Set Color. Two boxes appear to the right of the Set Color option.
To create a Box Flag with one color, click on the first box, and then select a Box Flag color from the color picker.

Note
To create a Box Flag with two colors, click on the first box, and then select a Box Flag color from the color picker. Then, click on the second box, and select the second color to use in the Box Flag. Box Flags with two different colors look like this:

Click on OK.
Note
Note: Optionally, you can drive multiple aspects of the box presentation when a record matches the established criteria. For example, you can apply Box Properties, as well as Field Properties using rule.
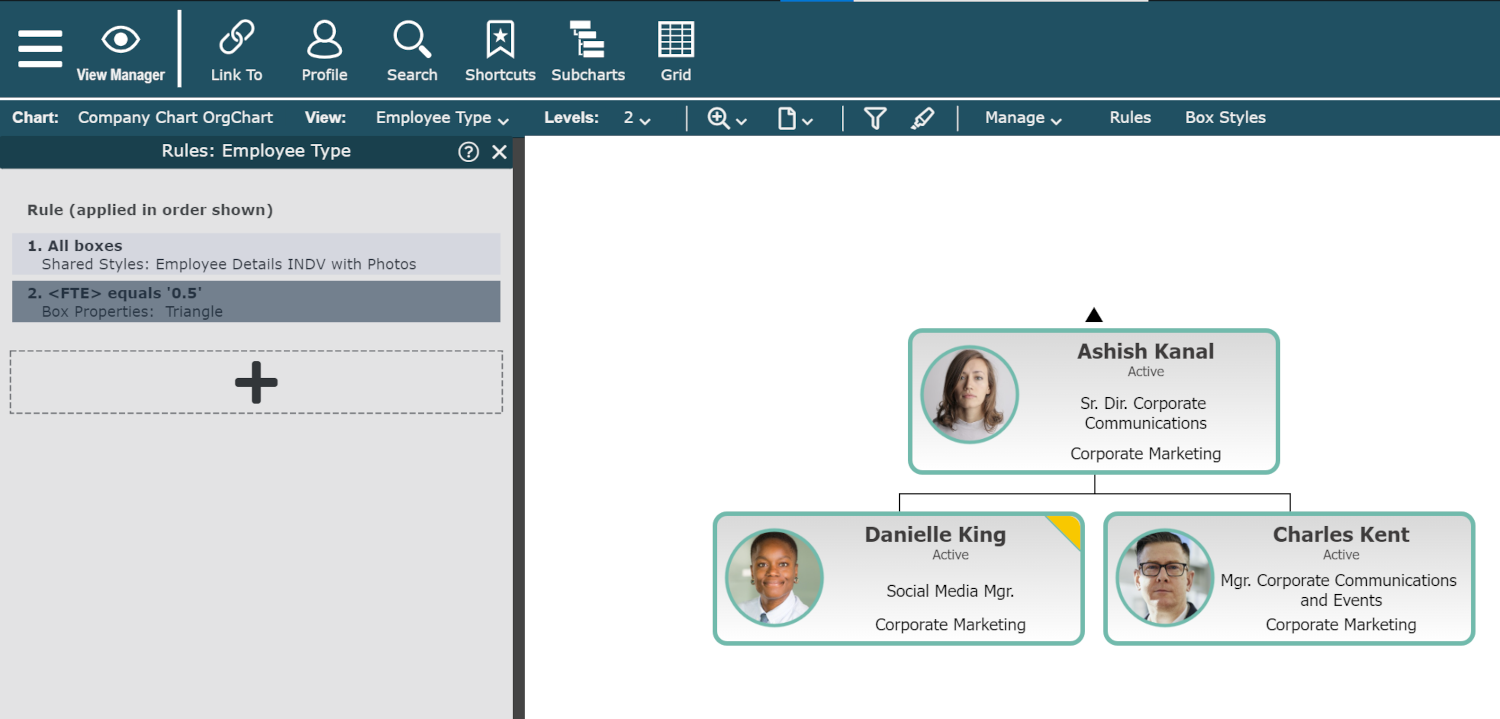
Click on Save. The Rule has been added to the list of Rules for the current View, and these changes are reflected on the chart.
Click on the Manage dropdown menu, and then select the Save option to preserve the changes.
Promoting a View to a Master Chart
Views that you create in View Manager are not automatically available in the View dropdown menu.
Administrators can promote a View to a Master Chart in two different ways:
From View Manager
Click on the Link To button in the Top Toolbar. The Chart Settings: Presentation panel is displayed, and the current View has been added to the Views list.
Click on Save. The View is now available in the Views dropdown menu for that Master Chart.
From an Open Master Chart
Open the Master Chart on which you'd like to promote a View.
Click on the Views dropdown menu, and then click on the
 icon in the top left corner. The Chart Settings: Presentation panel is displayed.
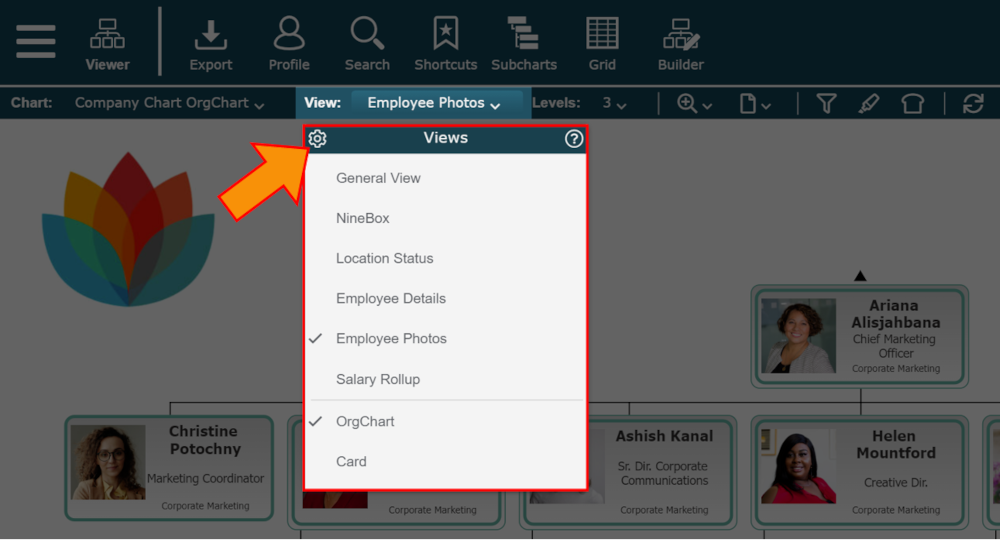
Click on the
 icon to the right of the Views heading, and then select the View you'd like to promote from the dropdown menu.
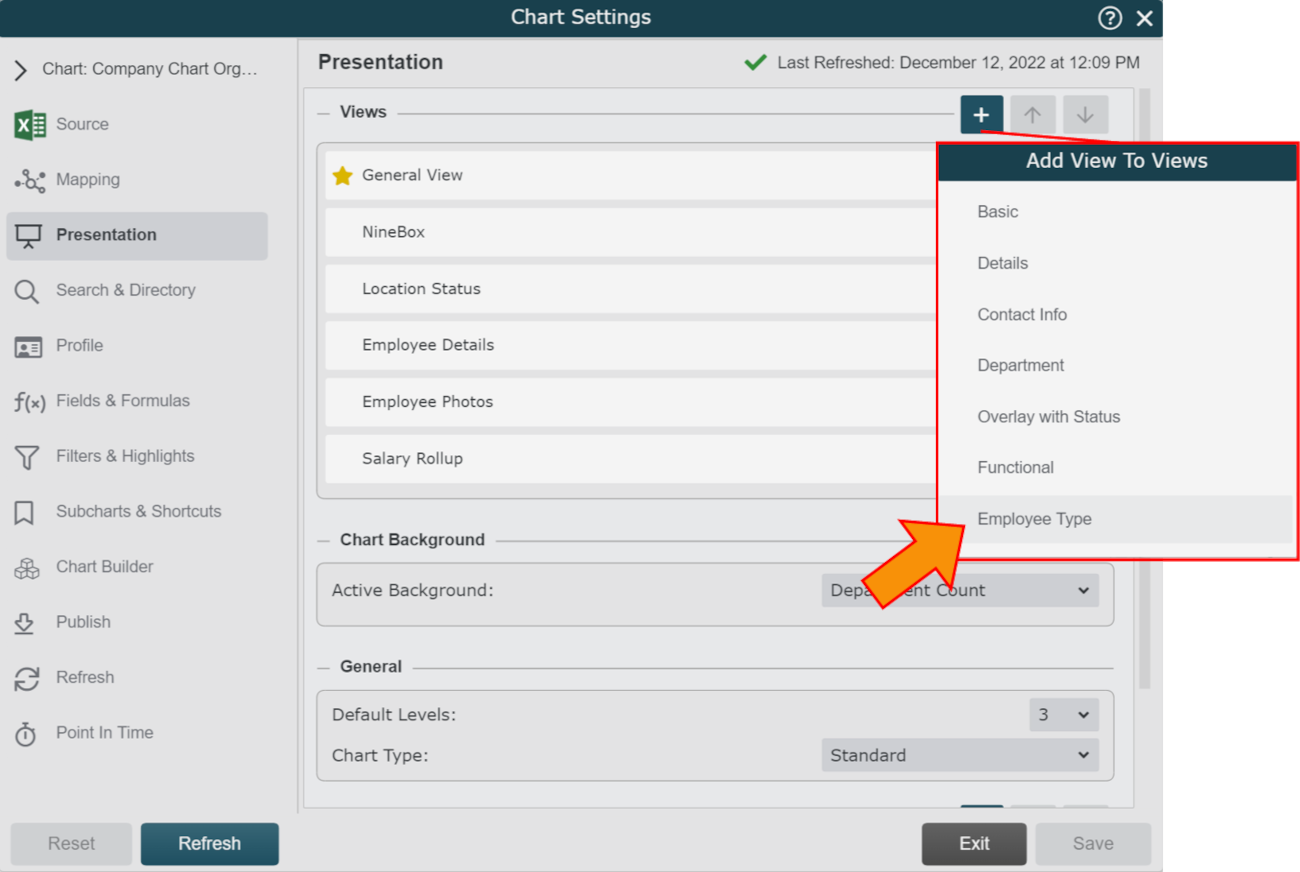
Click on Save. The View is now available in the Views dropdown menu for that Master Chart.