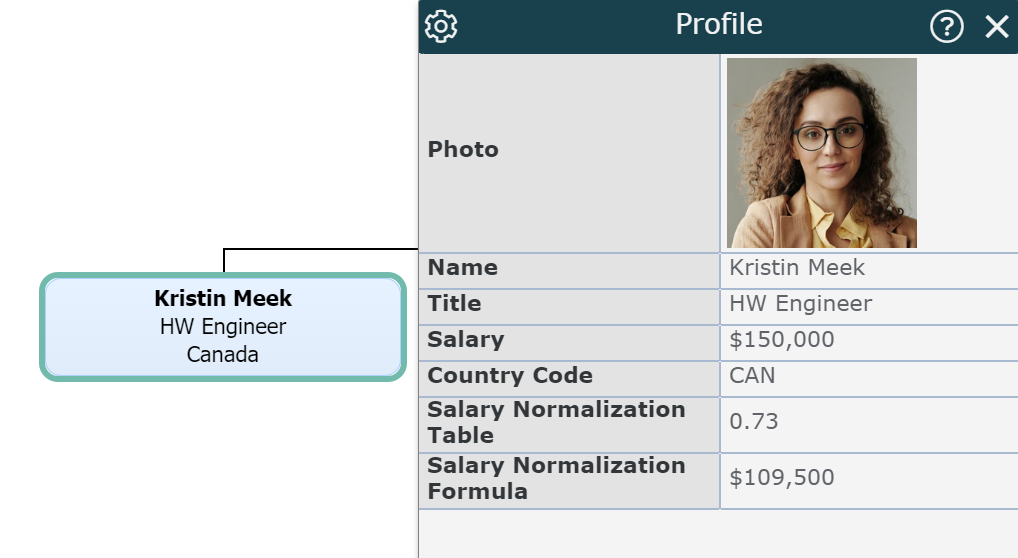
Reference Table Example
Audience
Audience: Administrators
Overview
Admins can create Reference Tables using Excel spreadsheets in order to cross reference fields in custom formulas or while Planning.
The following article provides step-by-step instructions for creating a Reference Table and using that Reference Table to create a formula.
Formatting a Reference Table File
Reference Tables are created using Excel files. The following format is required in order to successfully create a Reference Table in OrgChart:
Reference Fields - One or more fields that exist in your OrgChart data and are associated with the Target Field value.
Target Field - Field that doesn't yet exist in your OrgChart data, and will be imported and assigned to records based on the Reference Fields.
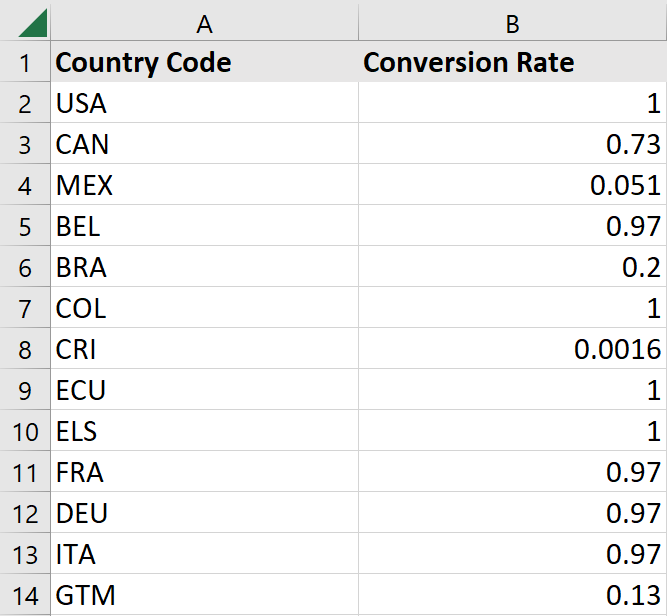
To create a Reference Table containing conversion rates based on a Country Code, the file should resemble the screenshot below, in which the Country Code is the Reference Field and the Conversion Rate is the Target Field.
Creating a Reference Table
Admins can create Reference Tables in the Chart Settings: Fields & Formulas panel. The following section provides step-by-step instruction for creating a Reference Table.
Log in to OrgChart.
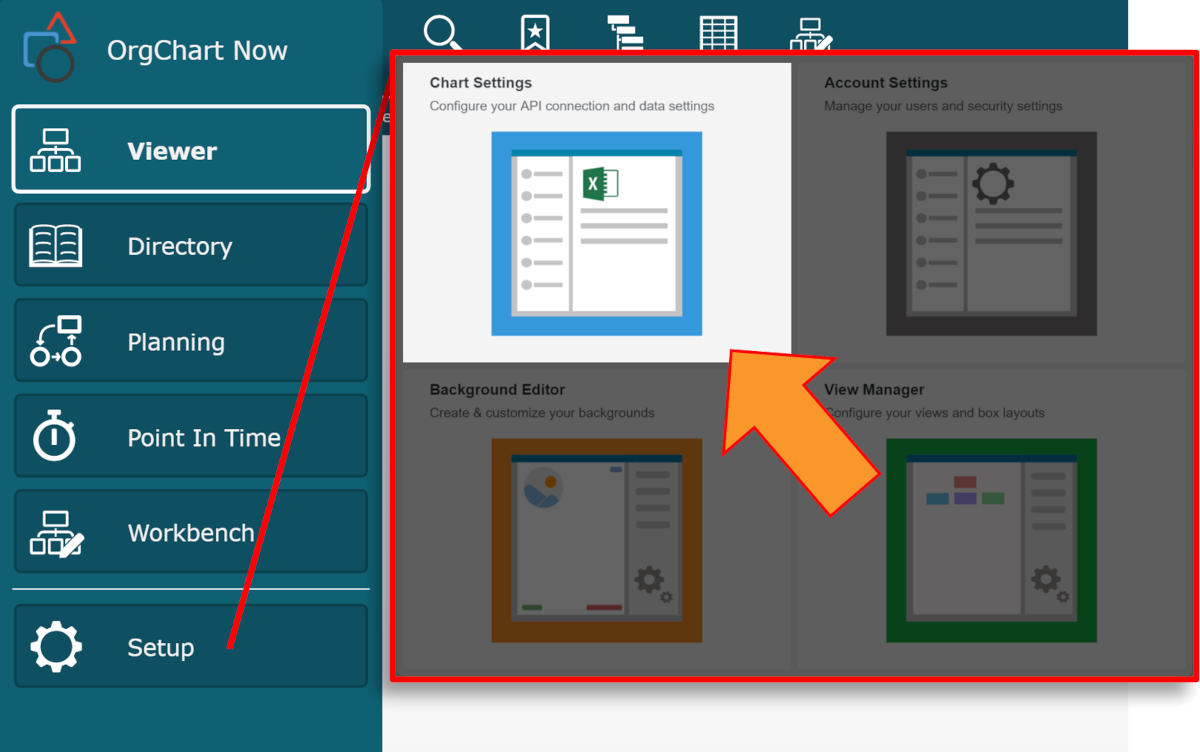
Click on the
 icon in the Top Toolbar, and then select the Setup option. The Setup panel is displayed.
Click on the Chart Settings tile.
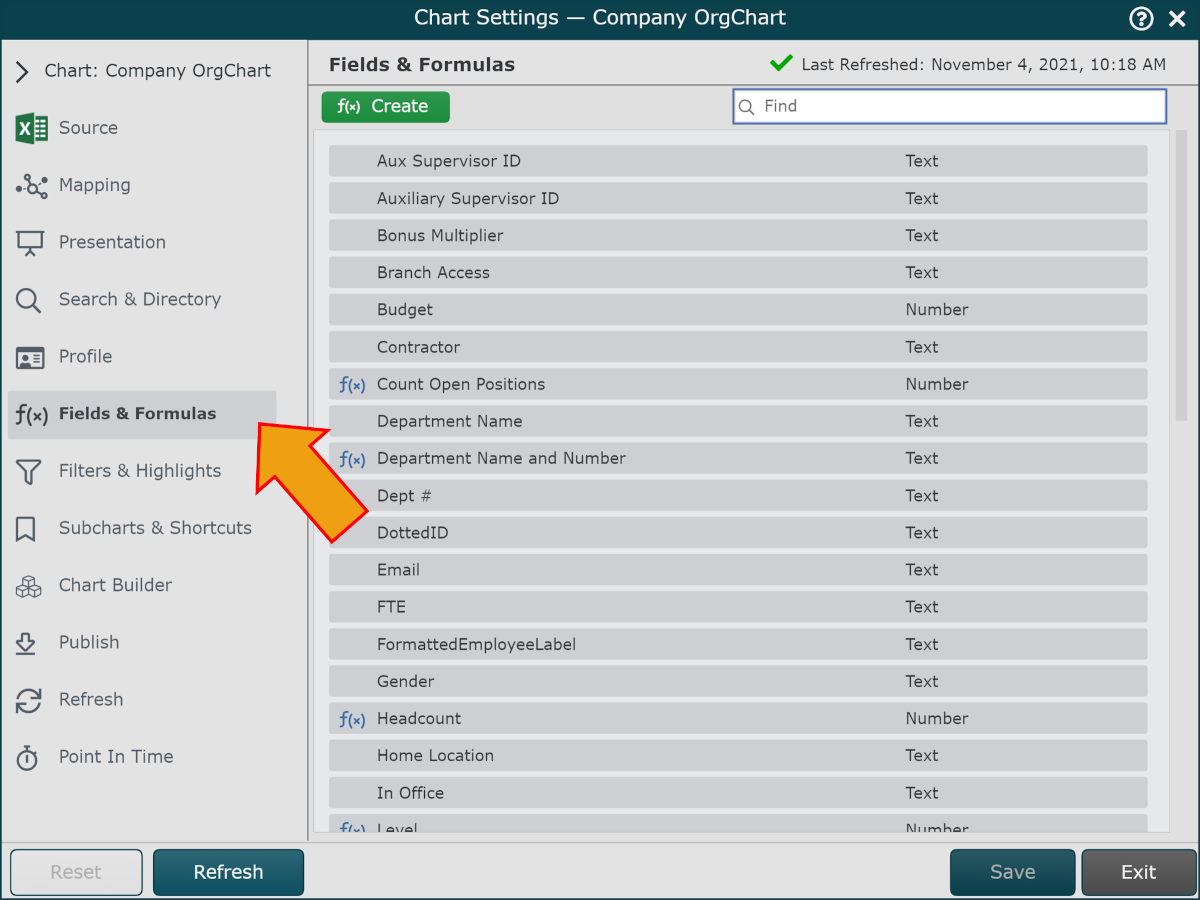
Select the Fields and Formulas option from the left side menu.
Click on the green f(x) Create button in the top left corner, and then select the Static Formula option. The Formula Editor panel is displayed.

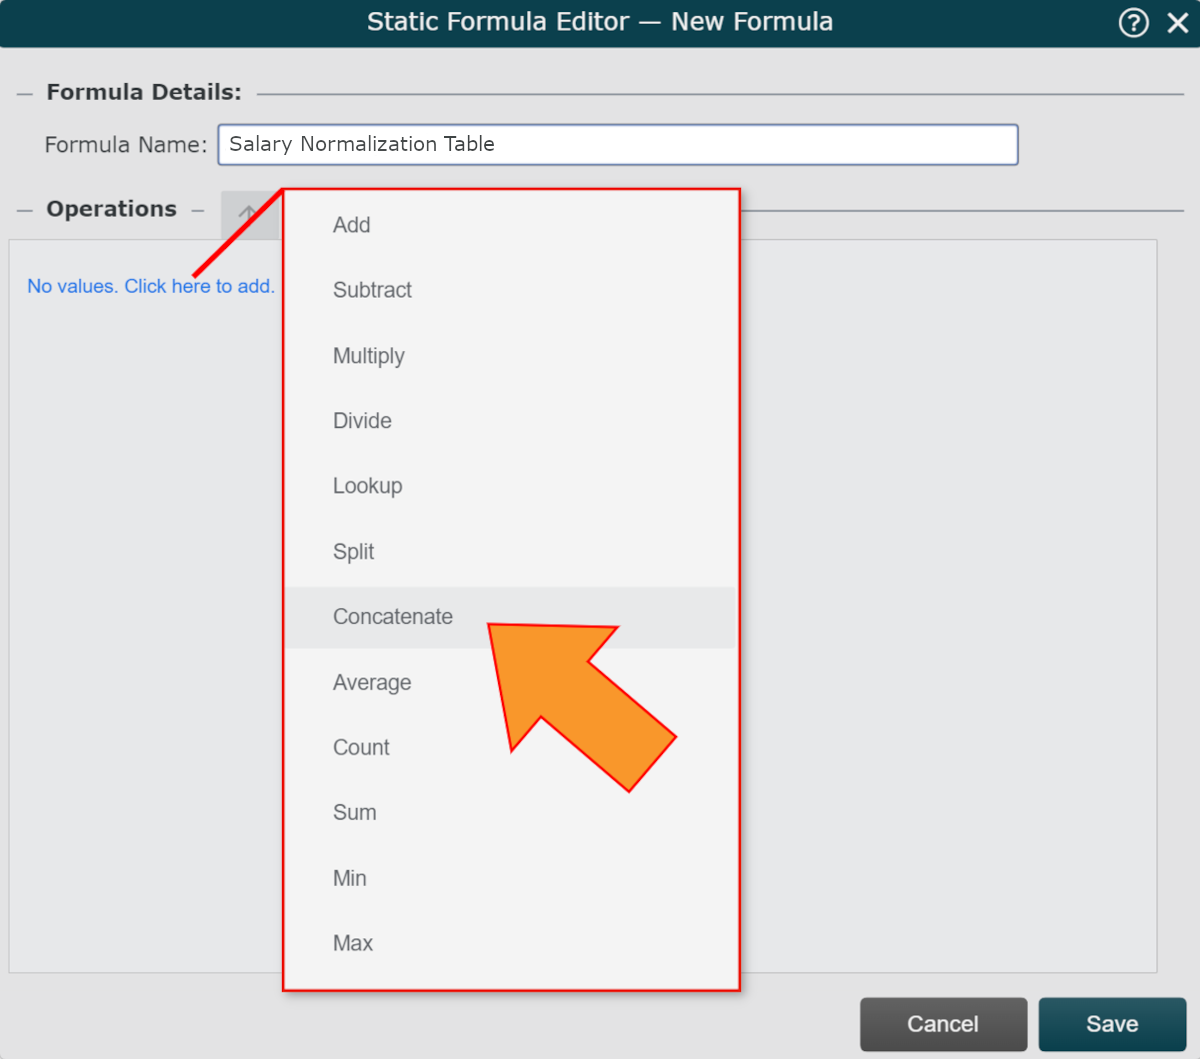
Enter a name for the Reference Table (i.e. Salary Normalization Table) in the Formula Name text box.
Click on the No Values. Click here to add. text in the Operations column, and then select the Concatenate option.
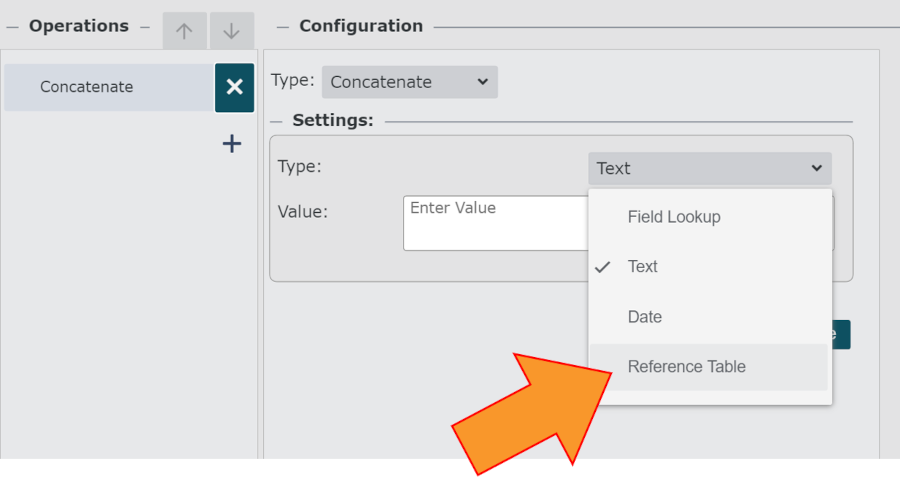
Click on the Type dropdown menu, and then select the Reference Table option.
Click on the
 icon to the right of the Value dropdown menu, and then click on the + Create Reference Table option.
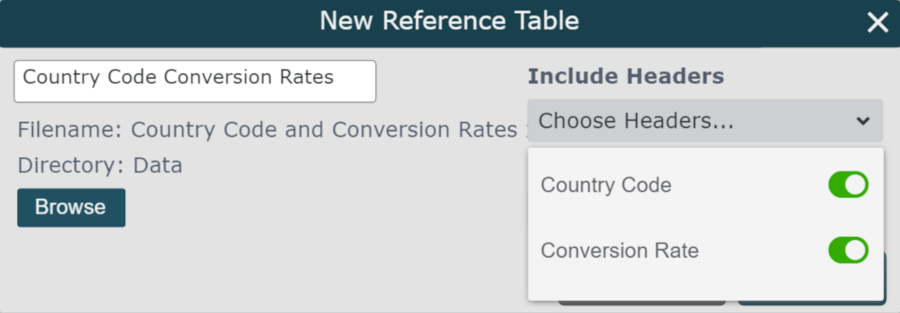
Enter the Reference Table name (i.e. Country Code Conversion Rates) in the Table Name text box.
Click on the Browse option to open the File Manager.
Open the Data folder (or the folder that you'd like to upload the Reference Table to), and then click on the
 option in the top right corner.
Search for and select the Excel file containing your Reference Table data.
Once the file is uploaded, click on in the File Manager, and then click on Select.
Click on the Include Headers dropdown menu, and then select which fields from the Excel file you'd like to upload to your account. By default all fields are selected.
Click on the Target Header dropdown menu, and then select the field in the Excel file that will map to an existing data field. For example, if Conversion Rate does not yet exist in your OrgChart data, Conversion Rate is your Target header.
Click on Save.
Close the Edit Reference Tables panel.
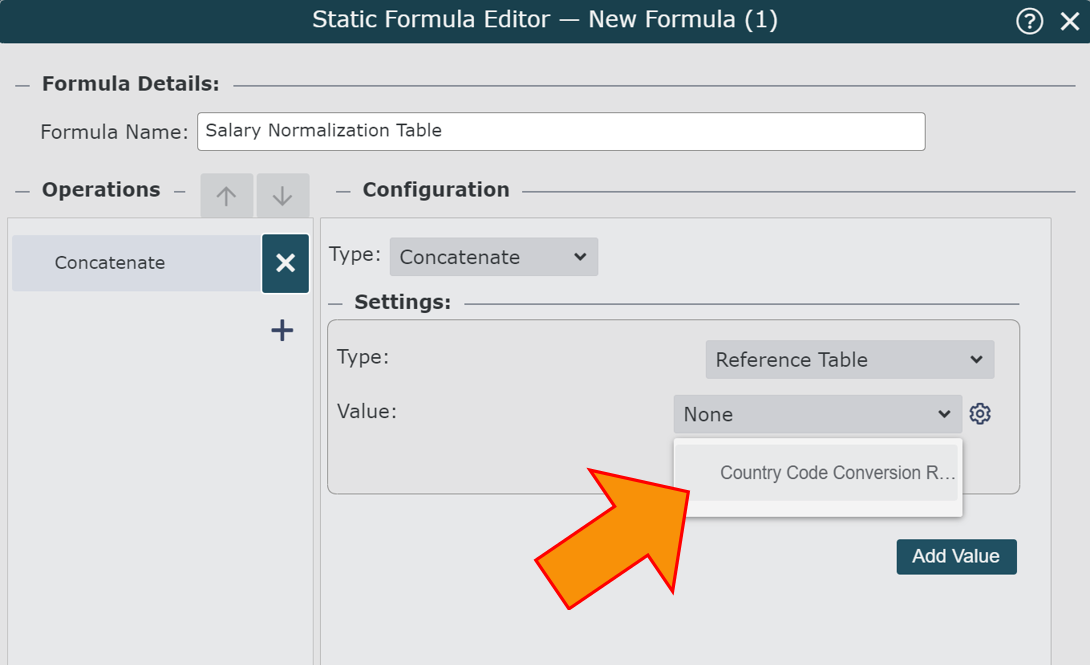
Click on the Value dropdown menu, and then select the Reference Table that you just created.
Click on Save, and then Refresh.
Creating a Formula with a Reference Table
Admins can create custom formulas using Reference Tables.
The following section provides step-by-step instructions for creating a salary normalization custom formula using an existing Reference Table.
This is helpful for normalizing salaries in global organizations that deal with different currencies.
If it is not already open, open the Chart Settings: Fields & Formulas panel.
Click on the green f(x) Create button in the top left corner, and then select the Static Formula option. The Formula Editor panel is displayed.
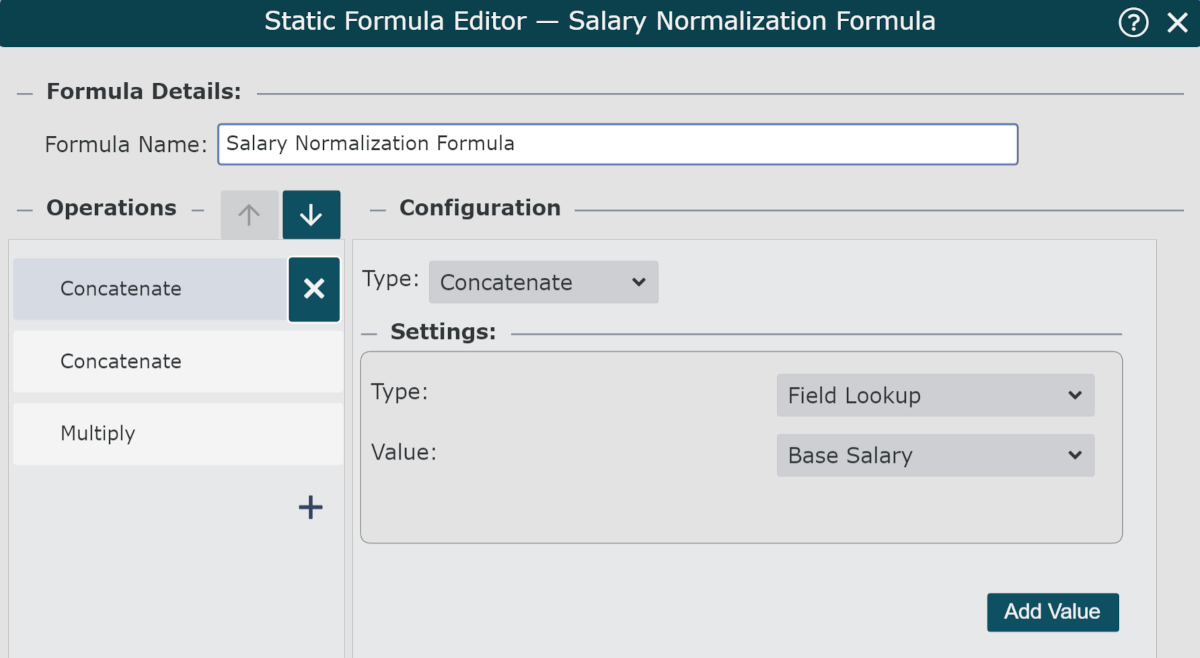
Enter a name for the formula (i.e. Salary Normalization Formula).
Click on the No Values. Click here to add. text in the Operations column, and then select the Concatenate option.
Click on the Type dropdown menu, and then select the Field Lookup option.
Click on the Value dropdown menu, and then select the field that contains employee salary (i.e Base Salary).
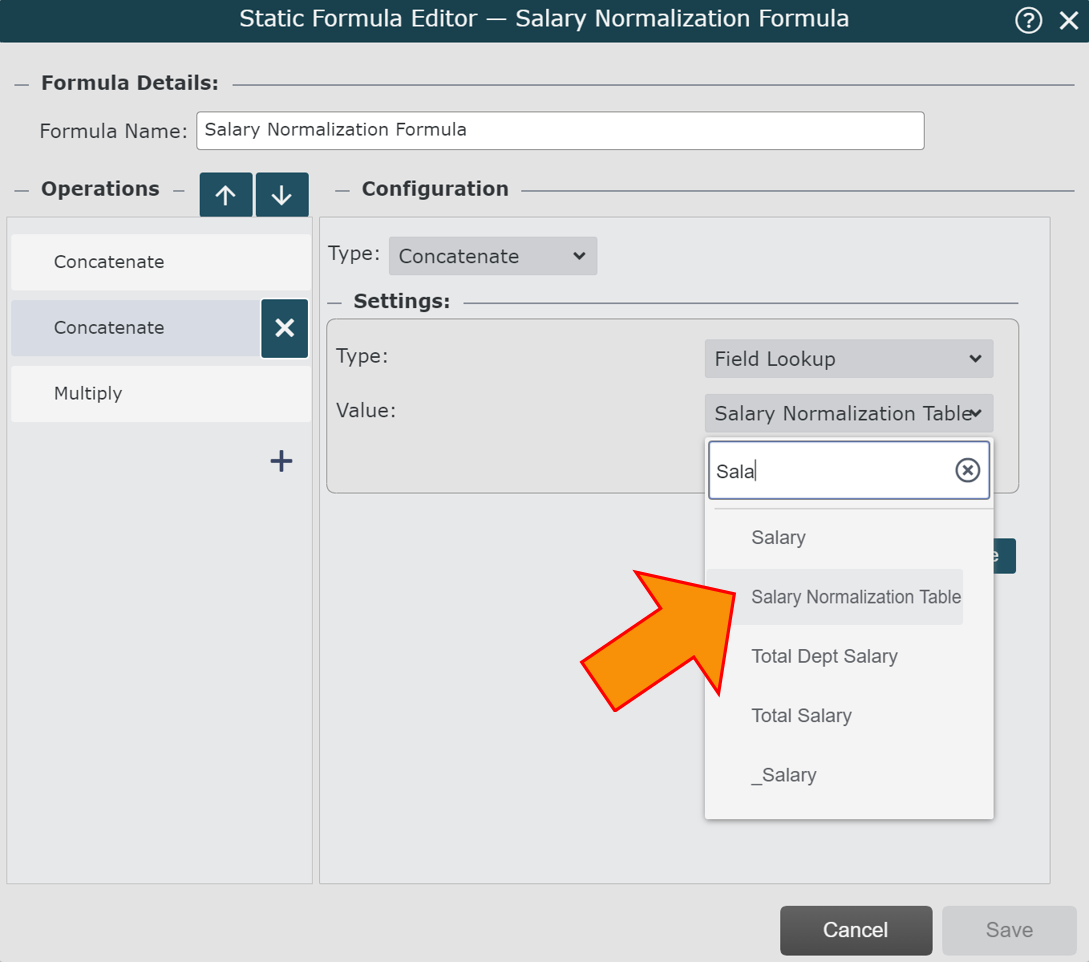
Click on the
 icon in the Operations column, and then select the Concatenate option.
Click on the Type dropdown menu, and then select the Field Lookup option.
Click on the Type dropdown menu, and then select the Reference Table that contains the conversion rate.
Click on the
icon in the Operations column, and then select the Multiply option.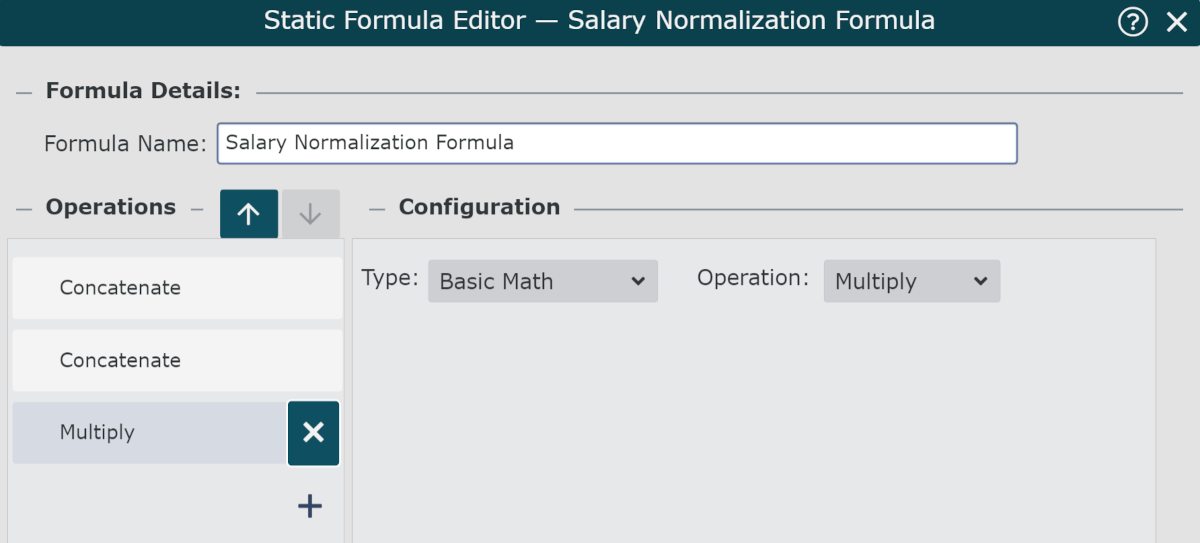
Click on Save, and then Refresh.
The normalization formula is now ready to be used in Salary Rollup formulas, Box Styles, Profiles, or on chart Backgrounds.