Enumerated Tables
Audience
Audience: Administrators and Read/Write Users
Overview
Enumerated Tables are automatically generated from Aggregated Fields, allowing Administrators to easily create legends containing employee metrics for end-users to consume.
The following article provides step-by-step instructions for creating an Enumerated Table in Workbench.
Important
Before you can create an Enumerated Table, you must first configure at least on Aggregated Field in the Chart Settings: Fields & Formulas panel.
Creating an Enumerated Table
Log in to OrgChart.
Open the Master Chart associated with the Aggregated Field you created for display in an Enumerated Table.
Click on the Mode Switcher icon in the Top Toolbar, and then click on the Setup option.

Click on the Background Editor option.
Create a new background, or open an existing one.
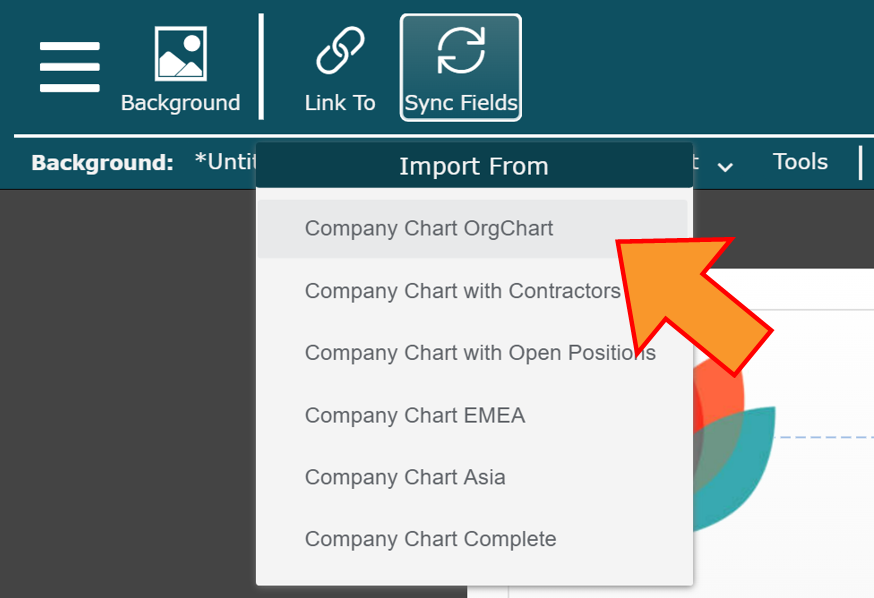
Click on the Sync Fields icon (in the Top Toolbar), and then select the Master Chart that you used to create the Aggregated Field.
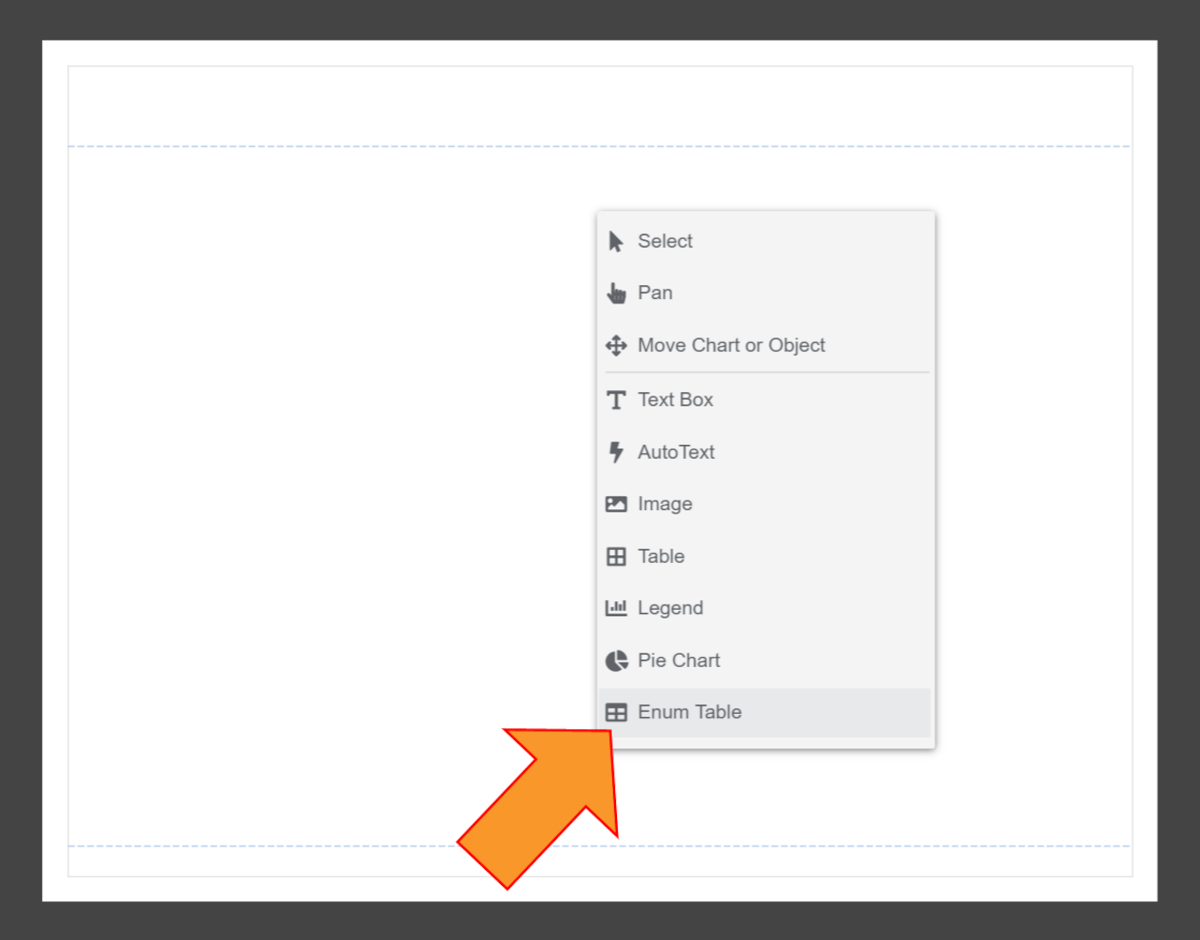
Right-click on the background canvas, and then click on the Enum Table option.
Click on the background canvas to place an Enumerated Table. The Enumerated Table is inserted.
Right-click on the Enumerated Table, and then select the Open Editor option.
Click on the Σ Field Picker icon in the top right corner of the Enumerated Table Editor.

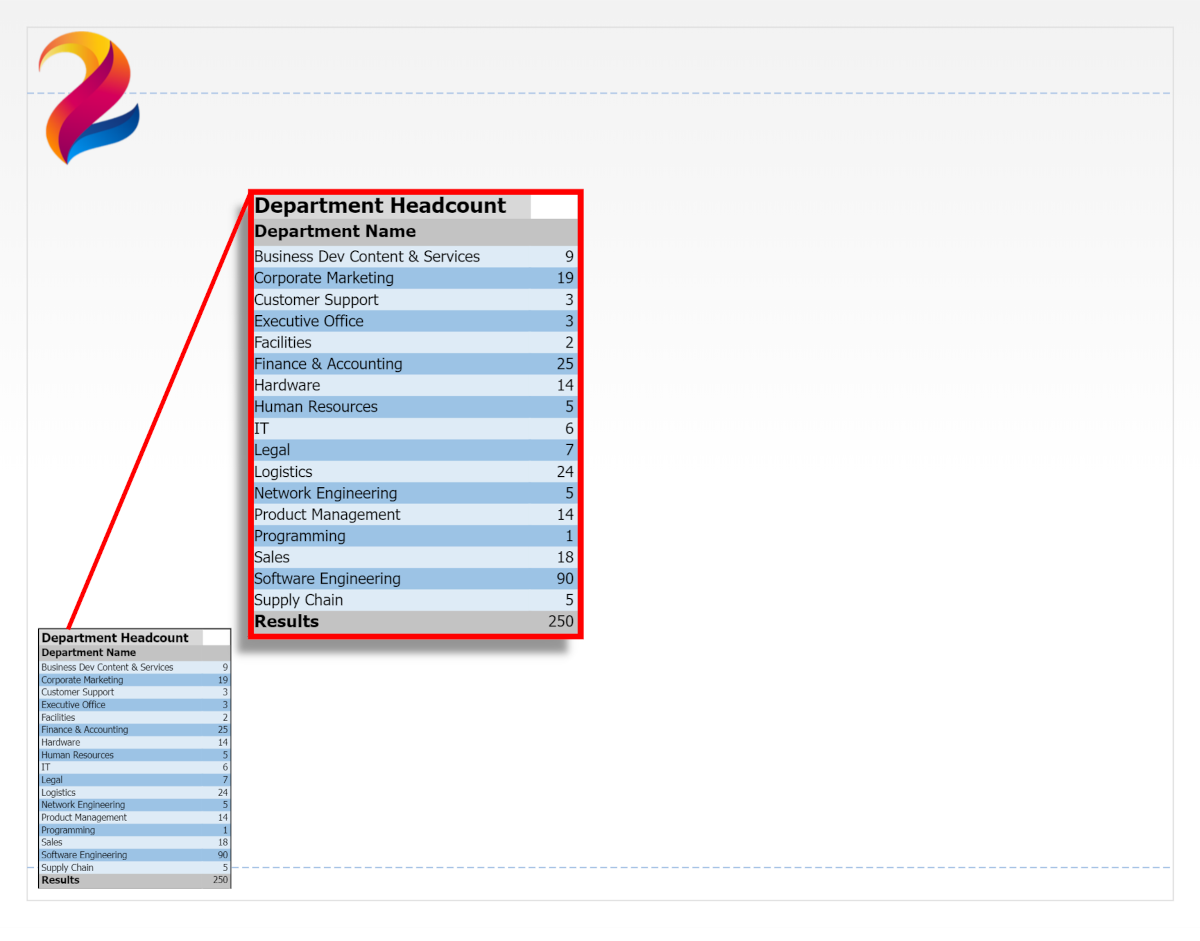
Select the Aggregated Field you'd like to insert into the Enumerated Table from the dropdown list. The Aggregated Field is added to the Enumerated Table.
Optionally, use the
 icons to resize the columns.
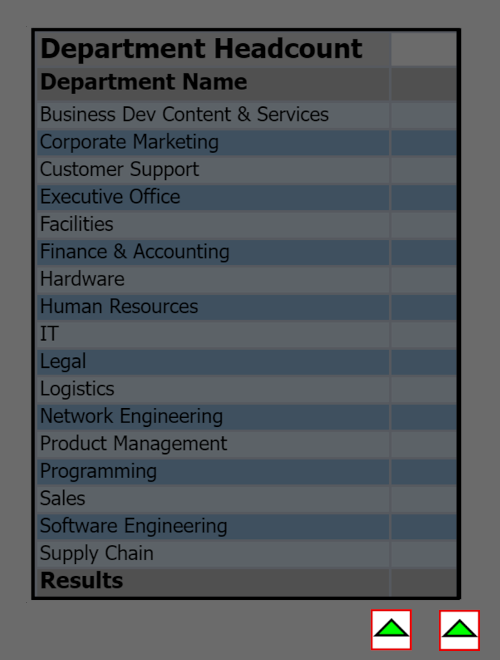
Note
Values are not displayed in the Enumerated Table until the table is Saved.
Click on the Save button. The Enumerated Table generated from the selected Aggregated Field is displayed on the Master Page.
Right-click on the Enumerated Table, and then select the Pin Position option.
Use the Positioning tool to pin the element to a certain area of the background. This will ensure that the Enumerated Table will stay in its position if the page size is adjusted.
Click on the Document menu, and then click on the Save As... option.
Enter a name for the background in the File Name text box, and then click on the Save button.
The background is now available to link to a Master Chart, apply to a Chart Document, or utilize in a View.