Authorization
Audience:
Audience: Administrators
Overview
OrgChart Authorization panel allows Administrators to configure Restricted Link access, SSO, and Access Group auto-assignment for certain users, as well as enable/disable some account-wide sign-in options.
Accessing Authorization
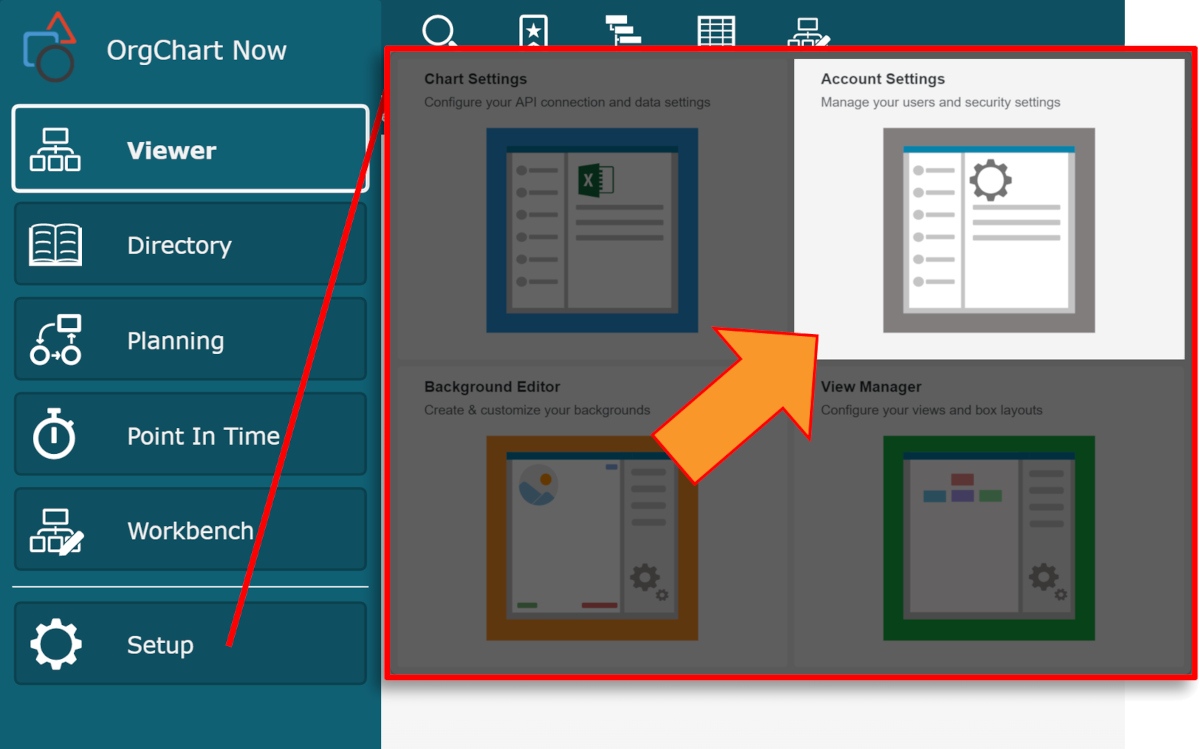
Click on the Mode Switcher icon in the Top Toolbar, and then select the Setup option. The Setup panel is displayed.
Click on the Account Settings tile.
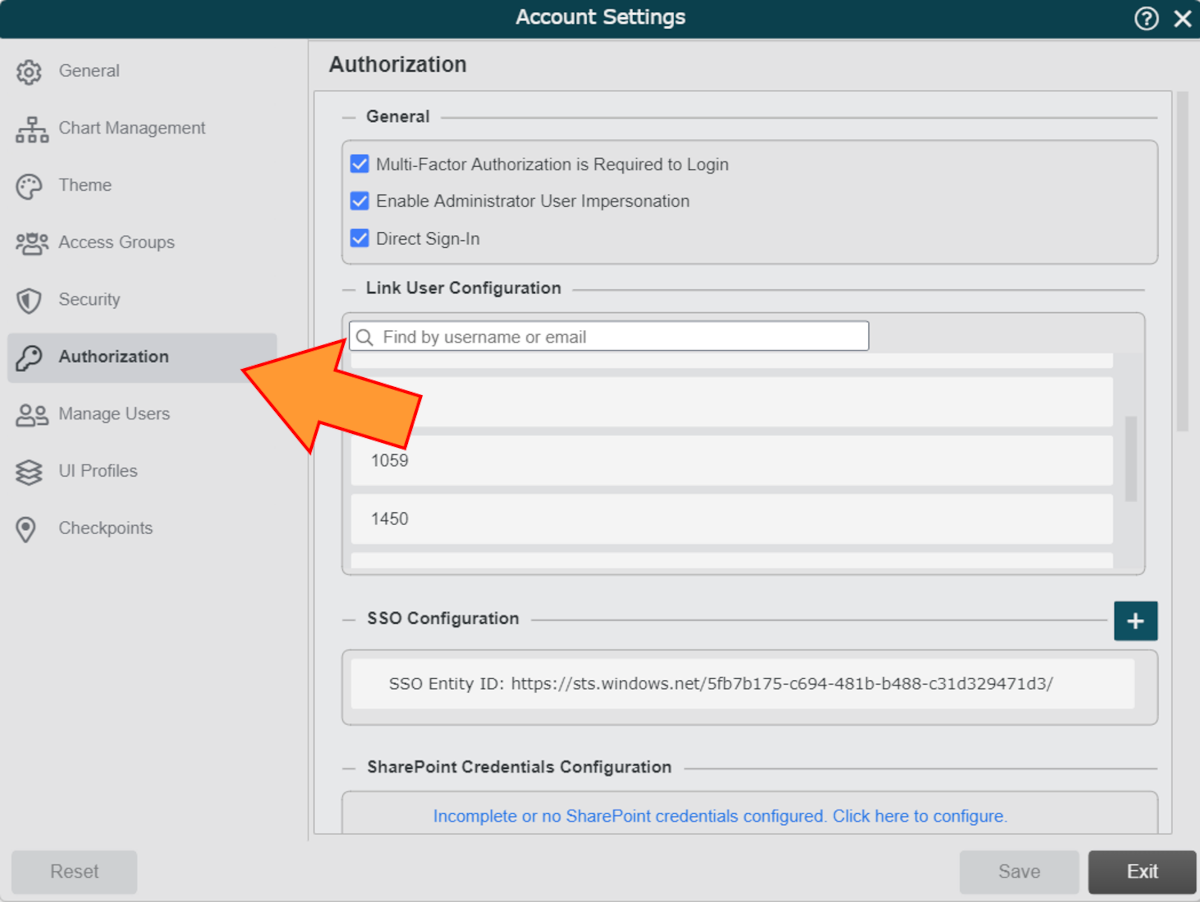
Select the Authorization option from the left side menu.
General
Check the checkboxes associated with the following options to enable them:
Multi-Factor Authorization is Required to Login | Require MFA in order to log in to OrgChart. Enterprise Only Refence the Multi-Factor Authentication article for more information. |
Enable Administrator User Impersonation | Allow an administrator to login as another user. This is useful for troubleshooting user-specific issues, and testing permissions. Reference the Admin User Impersonation article for more information. NoteTo impersonate a user, click on the Support Login link (on the login page), and then enter your user name, password and the Email of the user you would like to impersonate. |
Direct Sign-In | Allow users to sign in to the application via the OrgChart landing page. NoteThe option to disable Direct Sign-In is only available if SSO has been successfully configured within your account. Reference the Additional SSO Configuration section of the SSO Configuration article to learn more about this feature, and how it relates to SSO. |
Link User Configuration
Mouse over a user (listed under the Restricted Link User Configuration heading) to reveal the following Authorization option:
 | Configure restricted link access for selected user. |
Configuring a Restricted Link User
Restricted Links can be embedded in an Intranet or SharePoint site, and are only accessible when launched from an Allowed Referrer Domain. A Referrer Domain is a URL from which the link is accessed.
Viewers of the restricted link will experience OrgChart according to the Access Group and Role assigned to that user.
Restricted links are most often associated with a Service User. Reference the Restricted Link Setup article for more information.
After selecting the Restricted Link User, administrators must configure the Restricted Link Access in the Restricted Link Access dialog.
At least one URL must be added to the Allowed Referred Domains list. This process is known as whitelisting .The Restricted Link is only accessible when clicked on from an Allowed Referred Domain.
To whitelist a Referrer Domain, follow these instructions:
Click on the Mode Switcher icon in the Top Toolbar, and then select the Setup option. The Setup panel is displayed.
Click on the Account Settings tile, and then select the Authorization option from the left side menu.
Mouse over a user listed in the Link User Configuration section.
Select the
icon to configure the restricted link access. The Restricted Link Access dialog appears.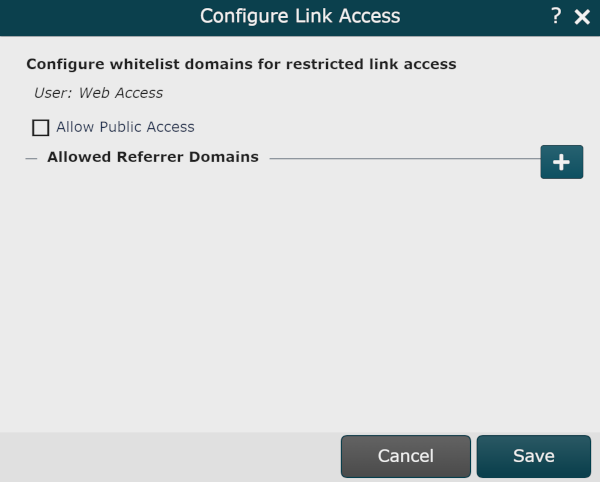
Click on the
 icon to add a URL to the Allowed Referrer Domains list. The Add Whitelisted Domain dialog appears.
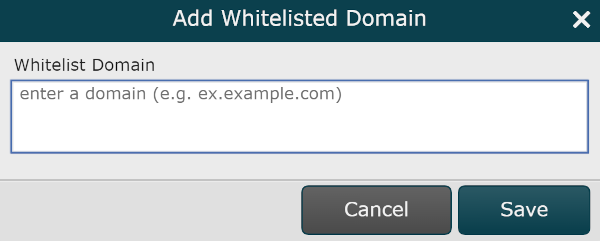
Enter a domain in the Whitelist Domain textbox., and then click OK.
Click Save.
Additional Restricted Link Options
Mouse over a URL in the Allowed Referrer Domains list to access the following options:
 | Edit the selected whitelisted domain. For example, specify the URL path so that users can access the restricted content from a specified page (i.e. https://myhomepage.com/links/manager-links/). |
 | Delete the selected whitelisted domain. |
SSO Configuration
Administrators can integrate OrgChart with their Single Sign-On provider directly in the application.
Reference the SSO Configuration article for more information.
Auto-Assignment Configuration
OrgChart allows Administrators to configure conditions under which people are auto-assigned to an Access Group upon login. Reference the Auto-Assignment Example for step-by-step configuration instructions.
Warning
WARNING: It is possible to lock certain employees, or even yourself, out of the application when configuring Auto-Assignments. Please contact OrgChart Support for help in properly configuring these security settings.
The following options become made available after checking the Automatically assign users to access group upon login check box.
Auto-Assignment Configuration | |
|---|---|
Master Chart used to validate user | Select the Master Chart the assigned user can access. |
Data field used for assignment | Select the field from the data that will be used to assign the role. |
User Record Retrieval - Configure the fields used to identify a chart record that corresponds to a user | |
|---|---|
User Name | Match chart record to user with the User ID listed in the Account Settings: Manage Users panel. |
Case Insensitive Match | Check to allow OrgChart to match a chart record to the user with the User ID listed in the Account Settings: Manage Users panel without considering case. For example, if the User ID in the Manage Users panel is A123, and the User ID in the chart record is a123, the record will still be correctly identified with the appropriate user. |
Match chart record to user with Email Address listed in the Account Settings: Manage Users panel. Email matching is always case insensitive. | |
Field in Record | Select the data field that corresponds with the chosen record retrieval method. For example, if you are using the User Name retrieval method, select the field used to populate the User ID box. See the Identifying the Field in Record section below for more information. |
Identifying the Field in Record
The following information is needed for identifying which field to select in the Field in Record dropdown menu:
Record Retrieval Method - User Name or Email used to match a user with a chart record
Field Mapped to Record Retrieval Method - The data field that is used to populate the User ID or Email text boxes in the Account Settings: Manage Users panel.
The following section provides step-by-step instructions for identifying the correct Field in Record field.
Click on the Mode Switcher icon in the Top Toolbar, and then select the Setup option. The Setup panel is displayed.
Click on the Account Settings tile, and then select the Manage Users option from the left side menu.
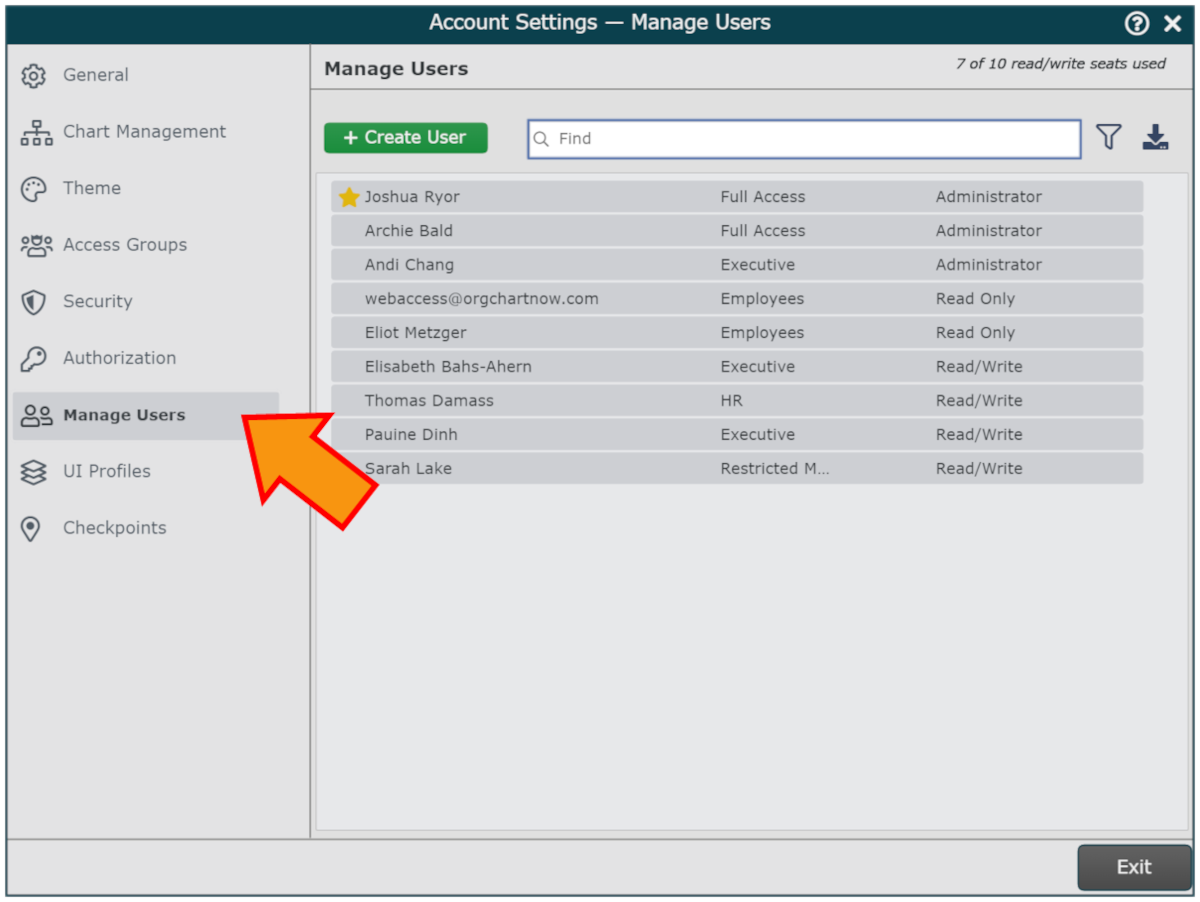
Mouse over a user, and then select the
icon. The User Information panel is displayed.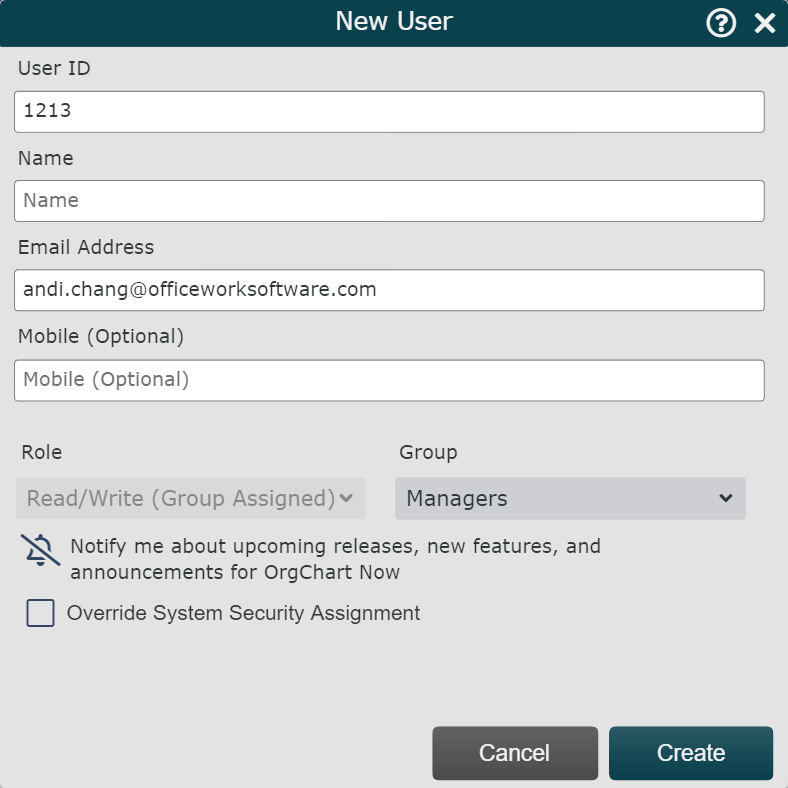
Note the value for either the User ID or Email Address (depending on your selected Record Retrieval Method).
Click on the X (in the top right corner of the User Information panel), and then click on the Exit button (at the bottom of the the Account Settings: Manage Users panel).
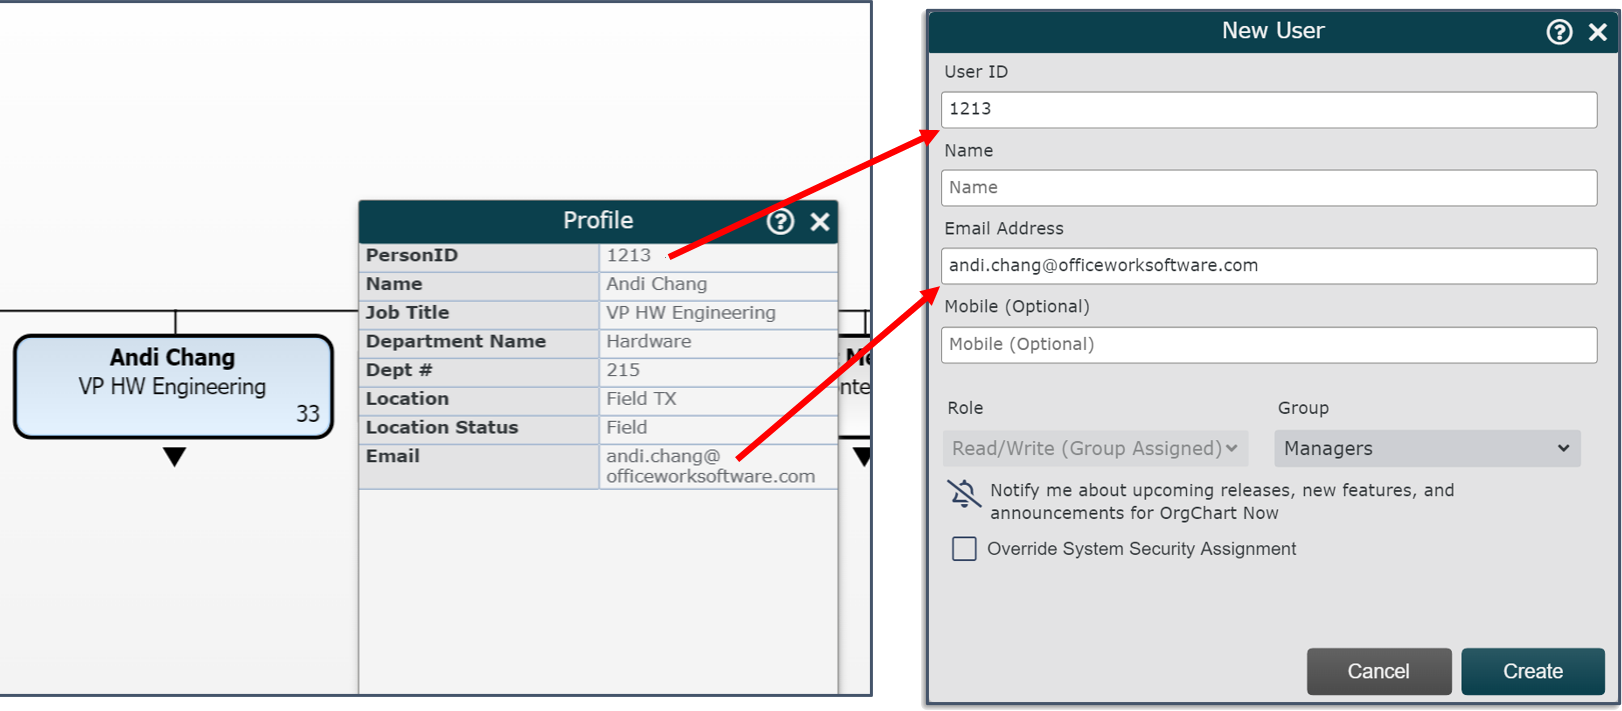
Locate the user whose information panel was just open in the OrgChart.
Click on the user, and then click on the Profile icon.
Note the values in the Profile, and the corresponding fields to which they are mapped.
Open the Account Settings panel, and then select the Authorization option from the Settings dropdown.
Click on the Field in Record dropdown menu (under the User Record Retrieval heading), and then select the field that is mapped to the User ID or Email field. For example, if you are using the User Name record retrieval method, select PersonID from the Field in Record dropdown.
Group Mapping - Set which groups line up with values in your data | |
|---|---|
 | Select the field value and corresponding Access Group to assign users who match this criteria. |
Use default group instead of denying access | Select a group to automatically assign to users who do not meet any auto-assignment criteria. Checking this box, and then setting a default group will prevent users from being locked out of OrgChart. |
Row Level Security | |
|---|---|
Use data field for Row Level Security assignment | Select a field used to auto-assign Row Level Security. This feature can be used independently, or in conjunction with automatic group assignment. |