Import Filters
Audience
Audience: Administrators
Overview
Import filters allow Administrators to exclude or include records based on defined criteria. Import Filters are applied to the Master Chart selected in the Chart dropdown shown at the top of the Chart Settings menu.
Once an import filter has been applied to the Master Chart, and the data has been refreshed, all records and/or fields that are excluded from the Import Filter are inaccessible while using that Master Chart.
Accessing Import Filters
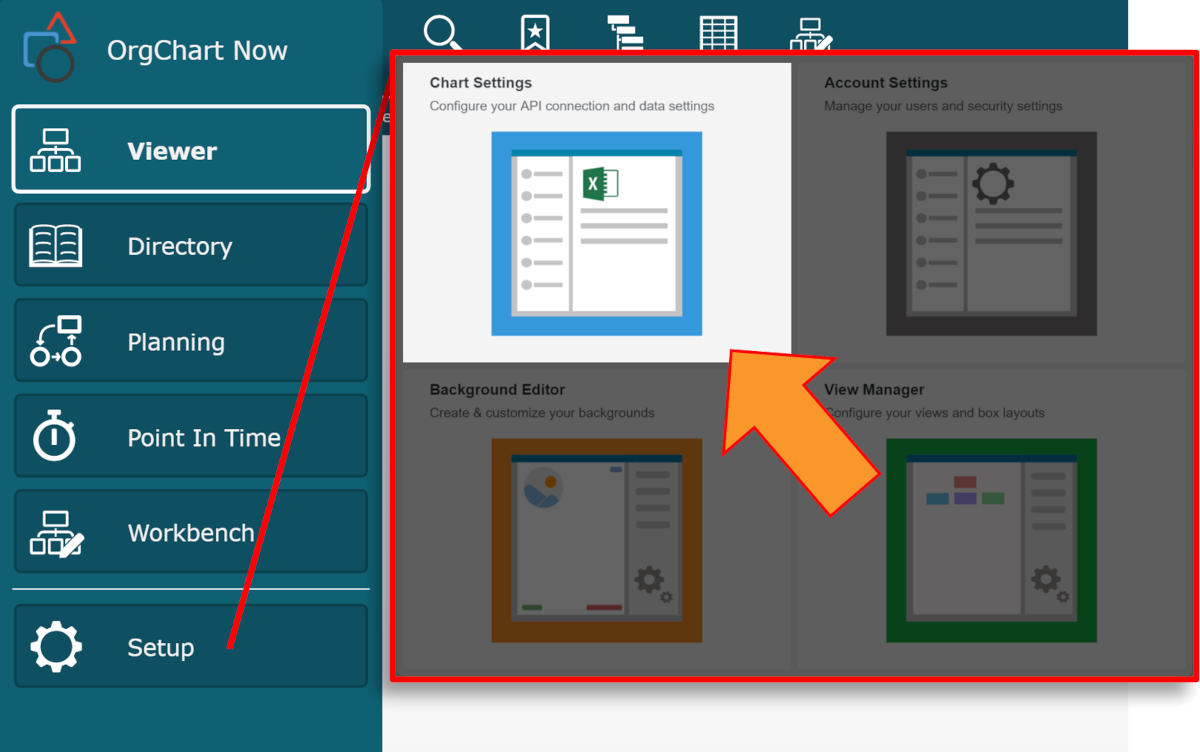
Click on the Mode Switcher icon in the Top Toolbar, and then select the Setup option. The Setup panel is displayed.
Click on the Chart Settings tile.
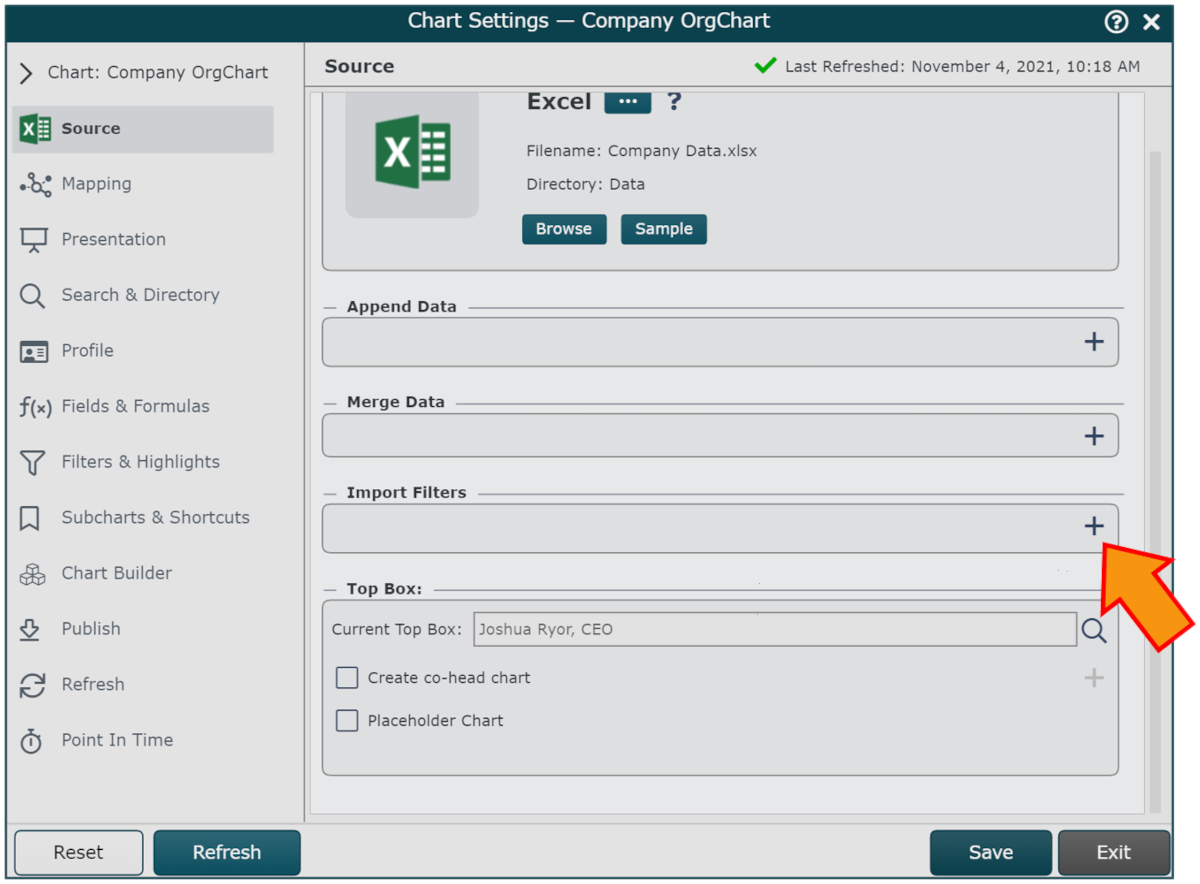
Scroll to the bottom of the Chart Settings: Source panel.
Types of Import Filters
OrgChart offers the following types of Import Filters:
Exclude the records specified in the filter | |
Include the records specified in the filter | |
Import a chosen employee and all of its subordinates | |
controls which fields to import from the data source of the selected Master Chart |
Additional Import Filter Options
Saved Import Filters are listed under the Import Filters header on the Chart Settings: Source panel. The following options are available from this panel:
 | Mouse over to edit a saved Import Filter. |
 | Mouse over to delete a saved Import Filter. |
Additional Import Filter Editor Options
While creating or editing an Import Filter, the following additional options are available in the Import Filter Editor.
Include Filtered Managers checkbox | Check to include managers in the chart that would otherwise be filtered out of the import. |
Date Bracket checkbox | Check to define a static or dynamic range of dates to filter on. See the Inclusive Import Filter article for an example using a static date range. For more information regarding the dynamic date range option, see the Using a Dynamic Date Range section below. |
 | Click to add a field value to filter on. |
 | Mouse over and check to toggle the Contains function ON. See the Using a 'Contains' Import Filter section below for more information. |
| Mouse over to edit the field value to filter on. |
| Mouse over to remove a field value from the Import Filter. |
Using a 'Contains' Import Filter
When using an Include or Exclude Import Filter, Administrators can toggle the Contains option, in order to filter out records that include, but are not equal to a specific value. For example, if your dataset has multiple types of directors, but you want to make a chart including all records with 'Director' in the title, you can create an Inclusive Import Filter using the Contains function.
The following section provides step-by-step instructions for enabling the Contains function on an Import Filter.
Configure an Inclusive or Exclusive import filter.
Click on the
icon (to the right of the Filter Values heading).Search for a field value to filter on, and then select it. The field value is displayed in the Field Values section.
Mouse over the field value, and then click on the
icon. The Edit Filter Value dialog is displayed.Enter the value to filter on (i.e. Director), and then click on OK. The Field Value in the Field Values section is modified.
Mouse over the modified field value, and then click on the
icon. The Contains feature is toggled ON.Click on the Save button. The Import Filter using the Contains function is created.
Using a Dynamic Date Range
It is possible to create import filters using a dynamic date range. A dynamic date range allows an administrators to apply an import filter based on defined amount of time before or after the refresh date.
For example, an administrator might use a dynamic date range to create a chart that excludes future hires whose start date is more than 1 month in the future from the time of refresh.
To access the dynamic range, please do the following:
Configure an Inclusive or Exclusive import filter.
Check the Date Bracket checkbox.
Click on the
icon (to the left of the Filter Values heading), and then select the Dynamic Range option from the dropdown menu.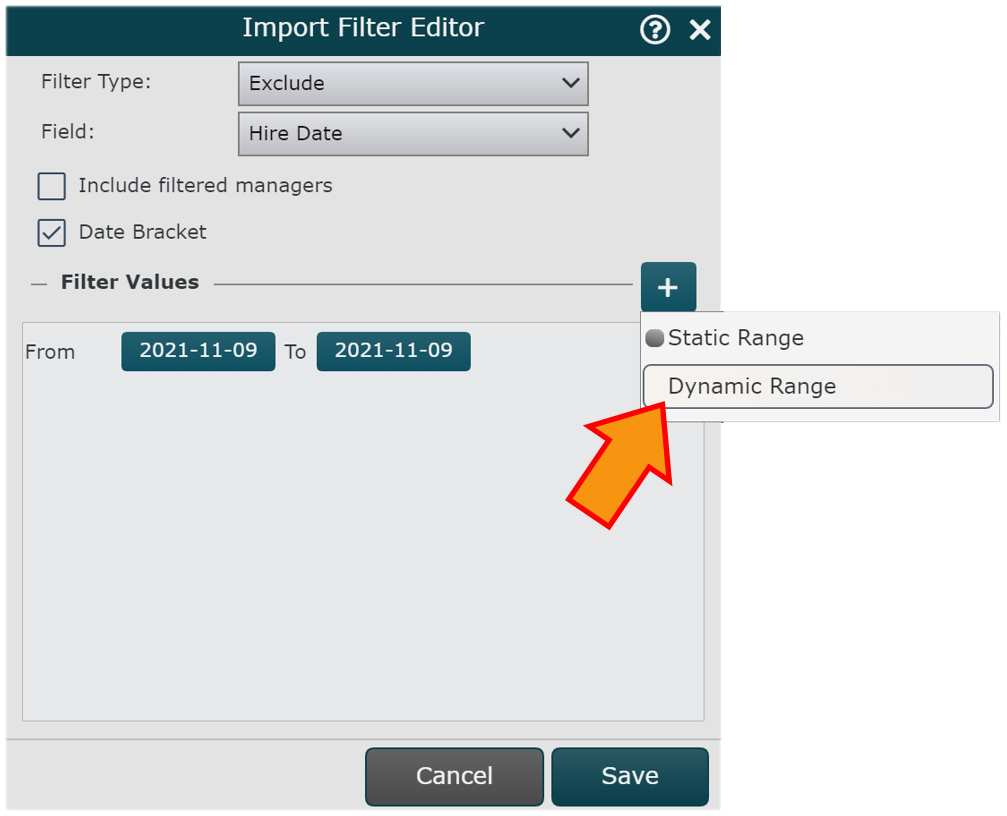
The following interface is displayed:
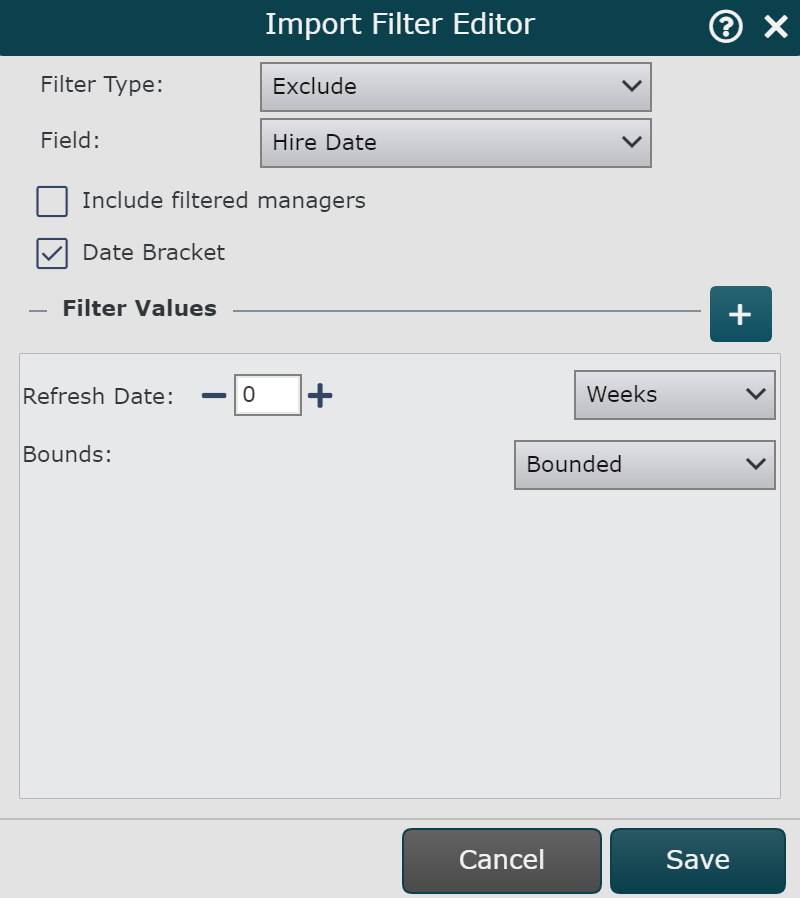
To configure the dynamic date range, select one of the following options from the Refresh Date dropdown menu:
Days
Weeks
Months
Use the + and - icons to properly set the scope of the Refresh Date.
Select one of the following options from the Bounds dropdown menu:
Left Bound - Prior to the current date
Right Bound - After the current date
Click Save. The import filter will be applied upon the next refresh.