Dotted Line Example
Audience
Audience: Administrators
Overview
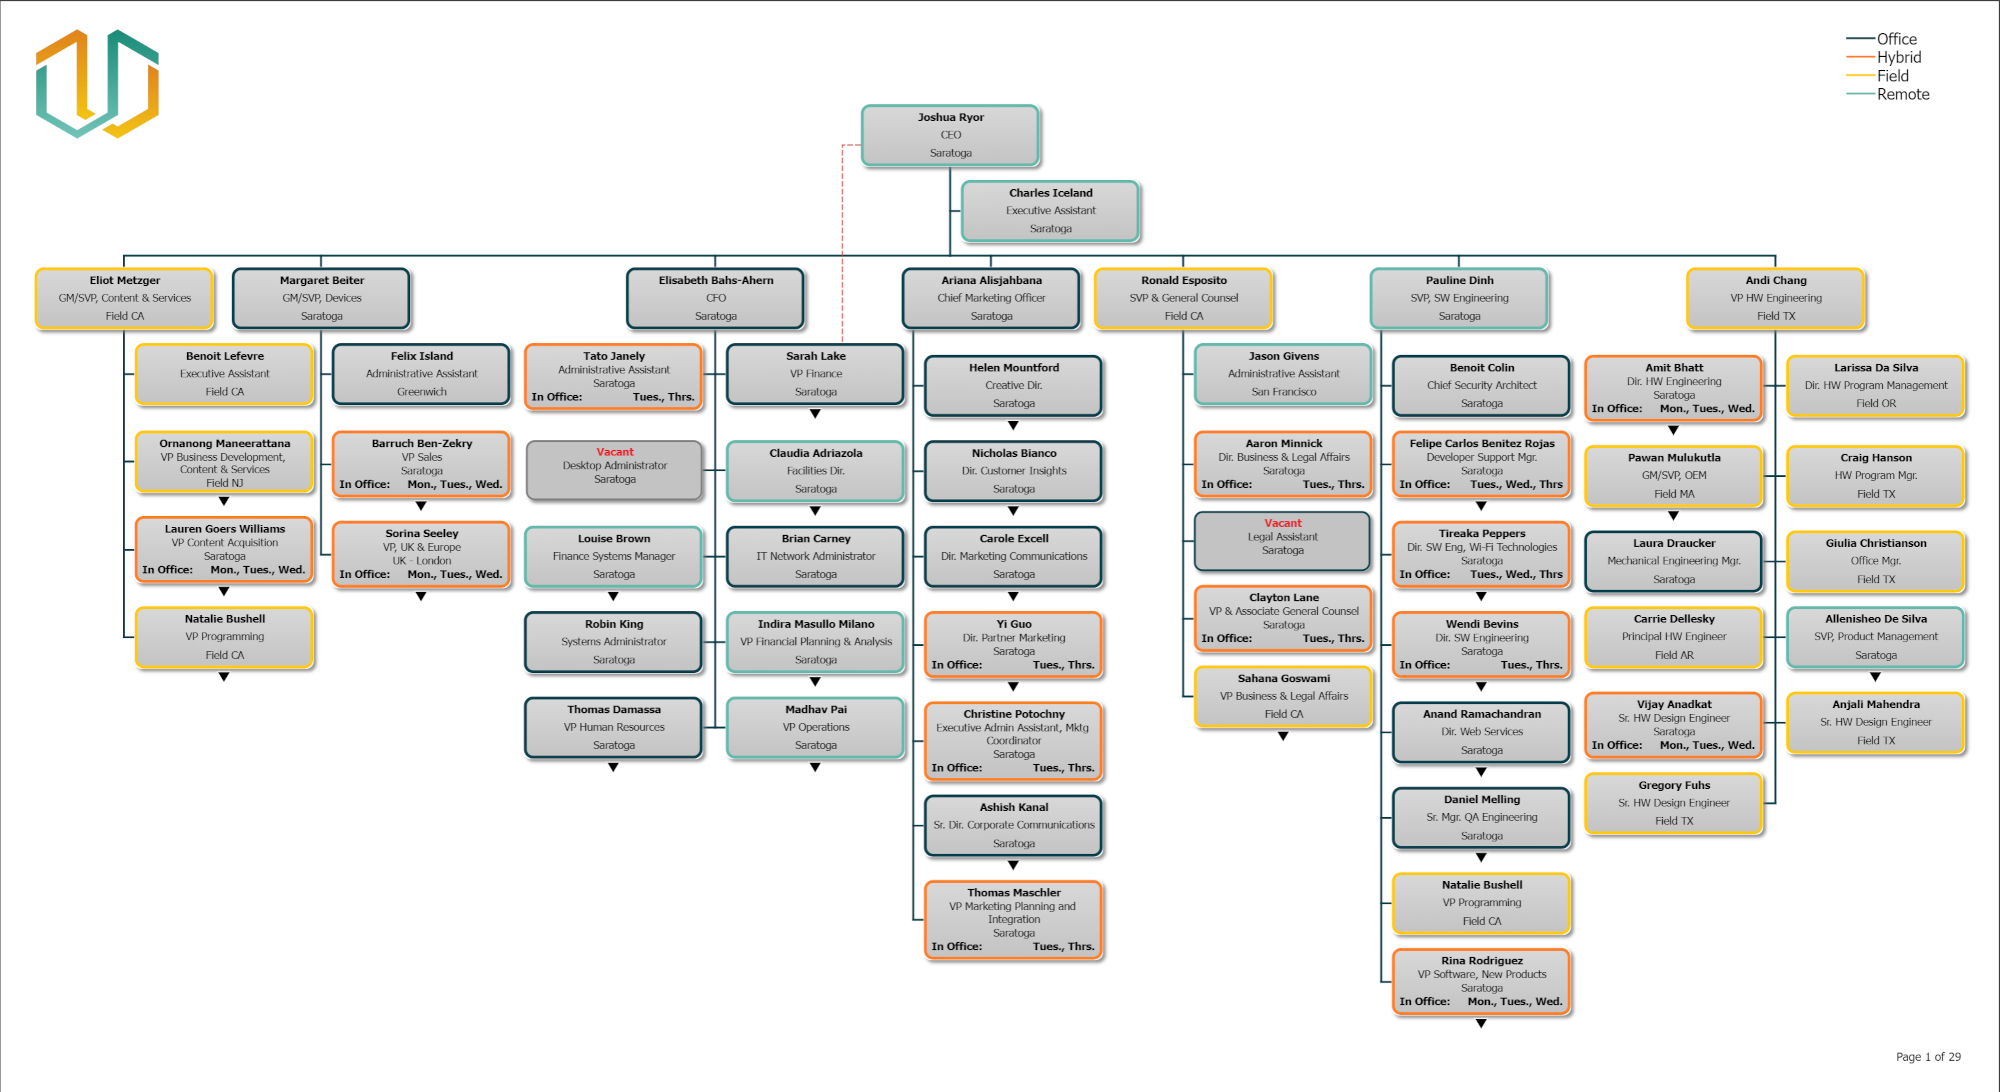
Administrators can configure Dotted Line Reporting to signify an employee reports into a secondary manager.
Dotted Line Reporting should only be used when an employee reports into a secondary manager that is visible on the same page of the OrgChart as that employee. If this is not the case, reference the Auxiliary Reporting article for other options.
The following article provides step-by-step instructions for configuring Dotted Line Reporting.
Formatting the Data
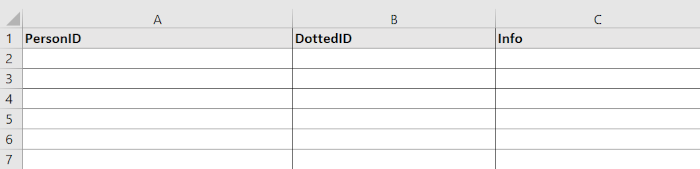
In order to specify a dotted line relationship, you will need to merge a file containing a DottedID field into your Master Chart.
Create an Excel document.
Add column headers (as shown below).
In OrgChart, click on the employee record that has more than one manager, and then click on the Profile icon.
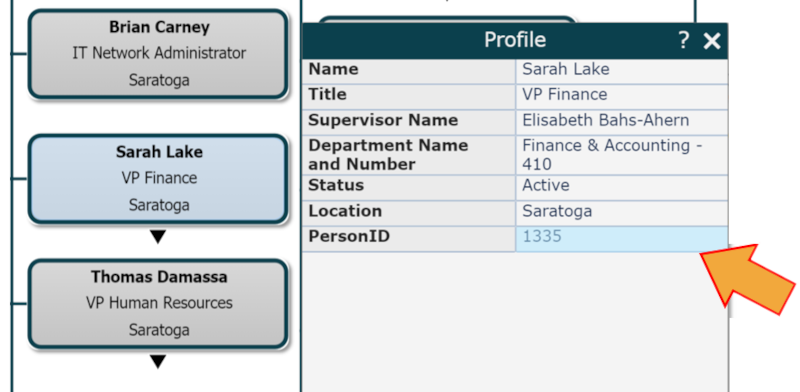
Copy the PersonID value, and then paste it in the PersonID column of the Excel document.
In OrgChart click on the employee record of the employee's secondary manager, and then click on the Profile icon.
Copy the PersonID value, and then paste it in the DottedID column.
Optionally, enter text in the Info column that describes the relationship between column A and column B. This will make it easier to locate the entry later, should it need to be modified or deleted.

Save the file to your local computer.
Configuring Dotted Line Reporting in OrgChart
Log in to OrgChart.
Click on the Mode Switcher icon in the Top Toolbar, and then select the Setup option. The Setup panel is displayed.
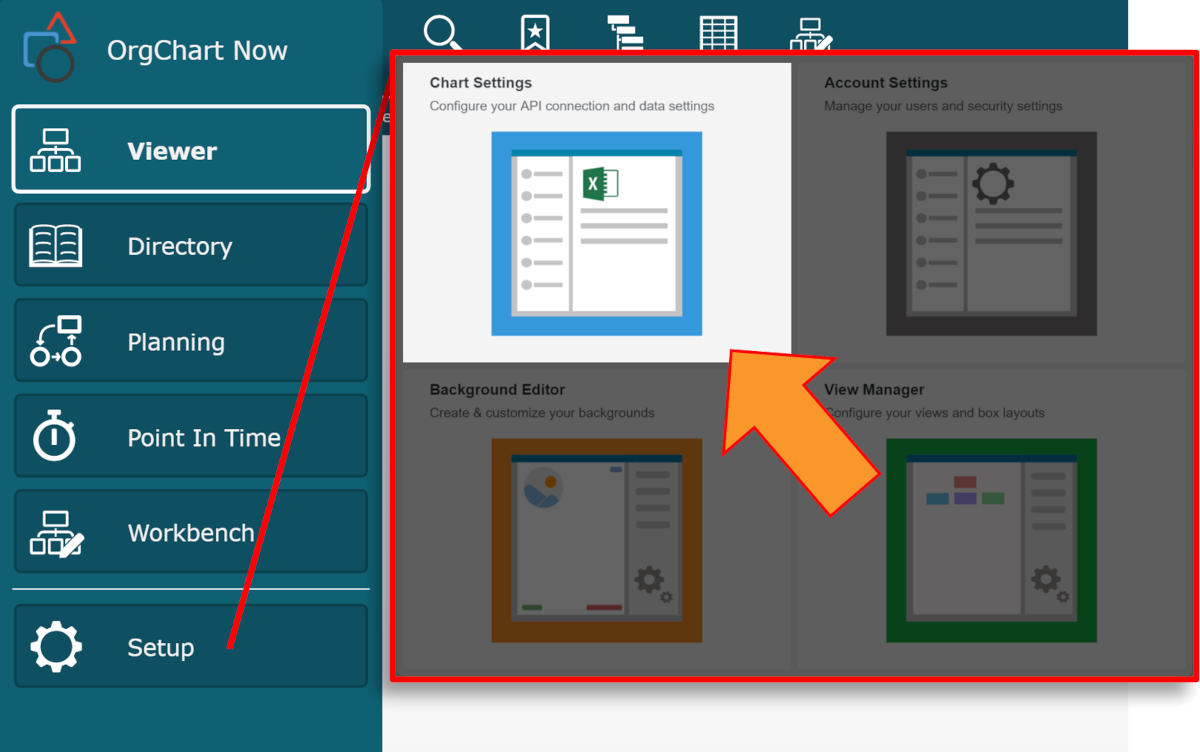
Click on the Chart Settings tile. The Source panel is displayed.
Click on the
 under the Merge Data heading, and then select the Excel option from the Merge Data Source panel.
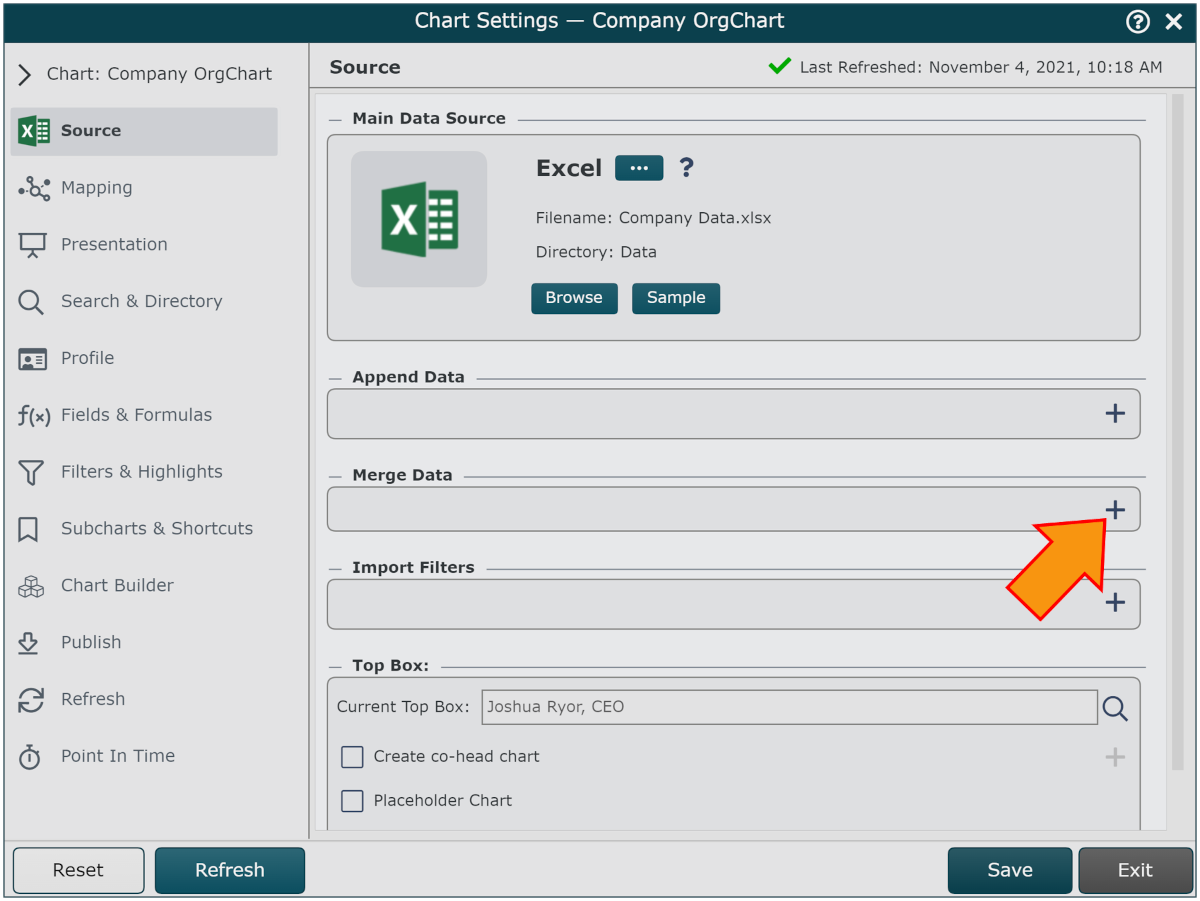
Click on the Browse button associated with the newly added Merge Data source. The File Manager is displayed.
Click on the Data directory, and then click on the
 icon (in the top right corner).
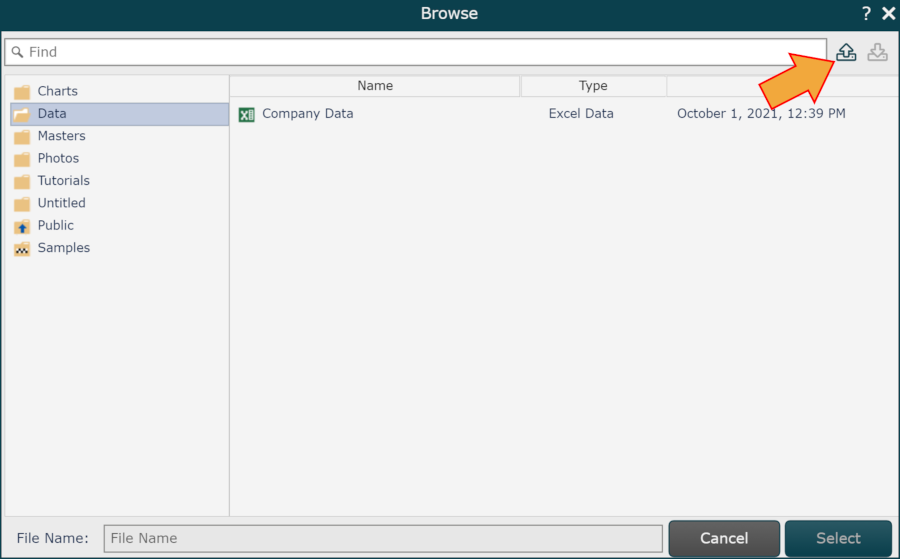
Search for and select the Dotted Line Reporting Excel (configured in the section above) file saved to your computer, and then click on Open. The file is loaded into the File Manager.
Click on the file to highlight it, and then click on Select.
Click on Save and then Refresh. A red, dotted line is generated.
Important
The red dotted line is automated by the system and cannot be rerouted or edited.
Without Dotted Line Reporting
With Dotted Line Reporting