Okta SAML Attribute Mapping
Audience
Audience: Administrators
Overview
SAML Attributes are pieces of information associated with a user. SAML Attributes are sent from a user's Identity Provider, or IDP (i.e Okta), to the application they are trying to access (i.e. OrgChart) in the form of a SAML Attribute Assertion.
Admins can choose what SAML Attributes to send in the SAML Attribute Assertion. Some attributes are required for a user to login. However, some attributes are optional, and can be used to do the following:
Automatically assign OrgChart Access Groups based on a SAML Attribute value
Automatically update user information in the OrgChart User Info panel using information stored in your IDP.
The following article provides step-by-step instructions for configuring your Okta SSO Integration to send additional SAML Attributes for Access Group mapping, and User Info panel updates.
Important
Before you begin, ensure that you a functioning Okta SSO Integration.
Map Access Groups with an Okta Group Claim
Administrators can send a Group Claim in their SAML Attribute Assertion, in order to map users to Access Groups in OrgChart using Okta Groups.
Add a Group Claim to the SAML Assertion
In the Okta Administrator Portal, open the OrgChart application.
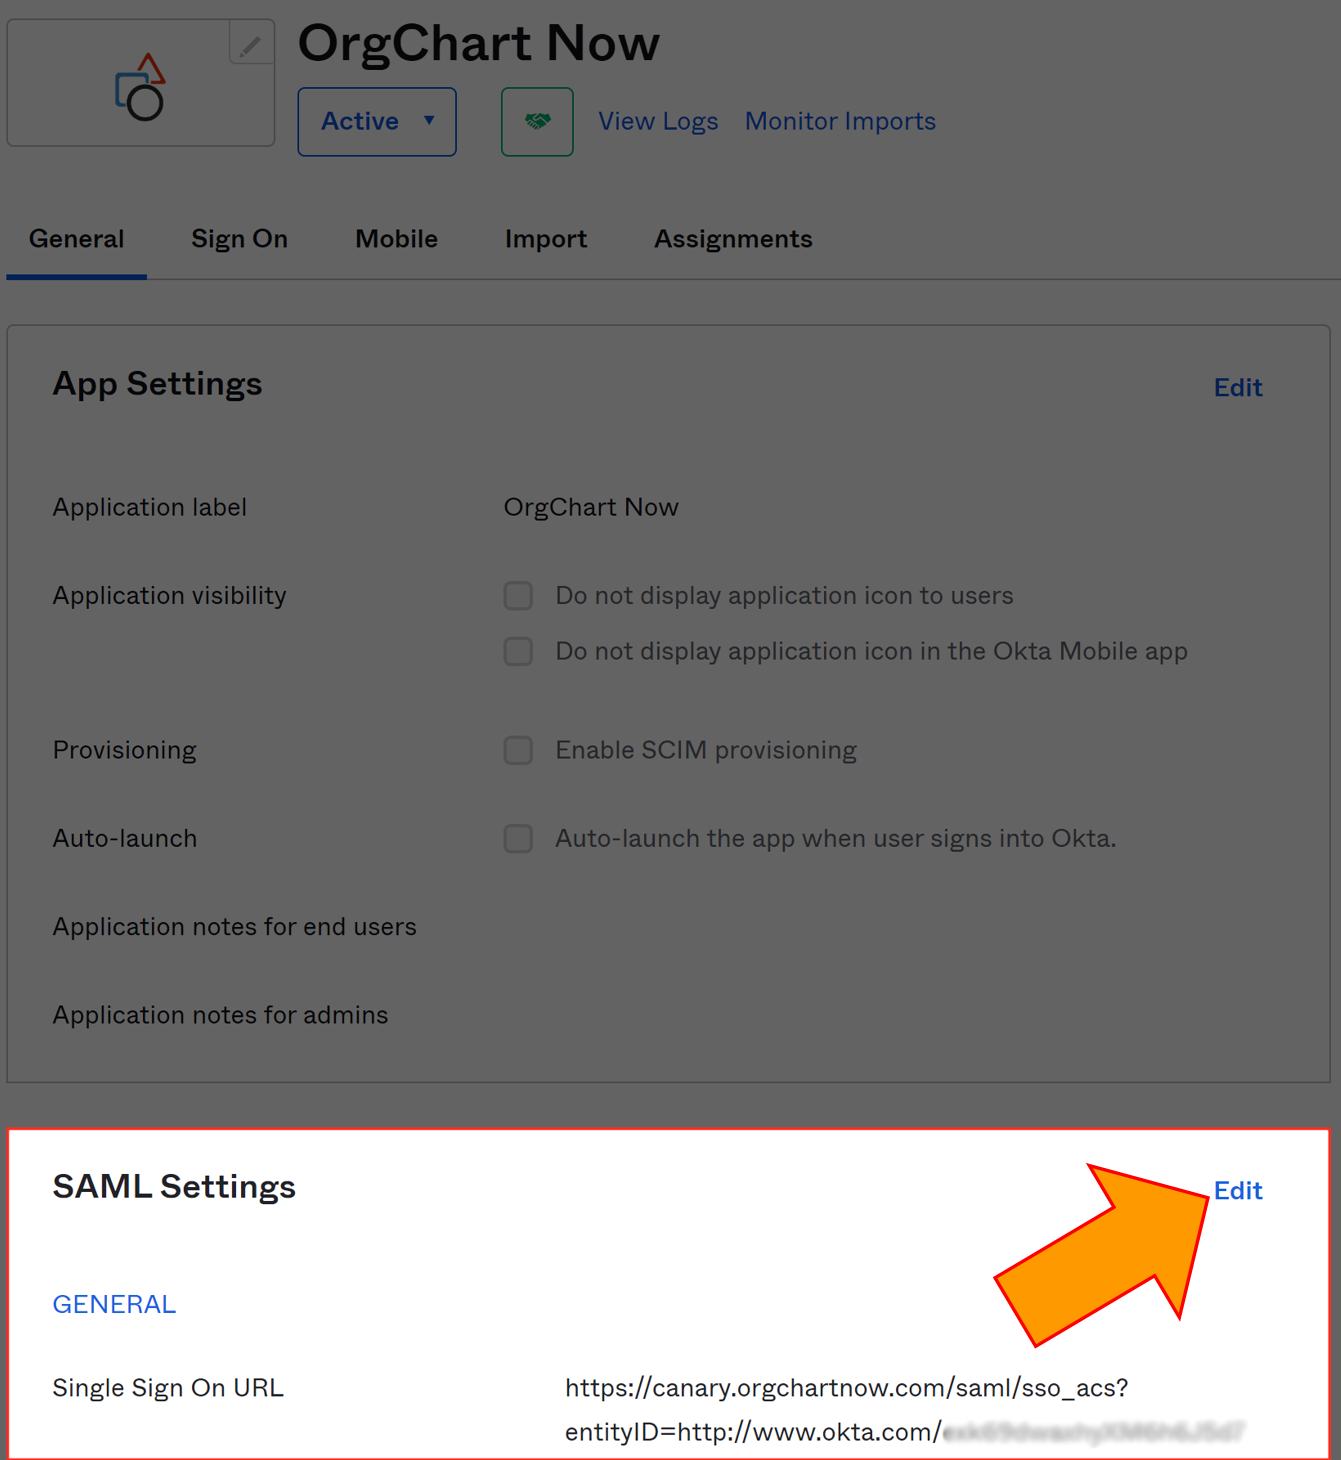
On the General tab, click on the Edit button associated with the SAML Settings section.
Click on Next.
Scroll to the Group Attribute Statements (optional) section.
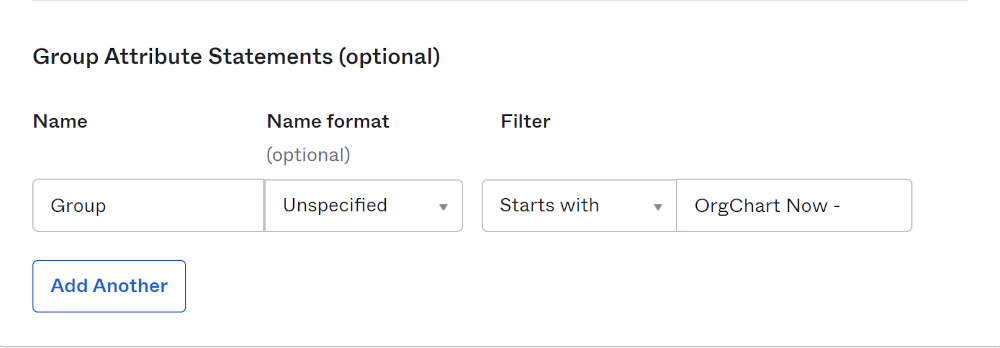
Enter the name of the attribute you want to send to OrgChart for Group Mapping into the Name text box. If you want to send Okta security groups (most common), then type Group in the Name text box.
Click on the Filter dropdown menu, and then select a comparison value. For example, if you'd like to send all Okta security groups that start with 'OrgChart -', configure the Group Attribute Statement as seen below:
Note
Work with your Okta System Administrator for help in defining more complex filters.
Click on Next, and then click on Finish.
Login to OrgChart and follow these steps to complete your setup:
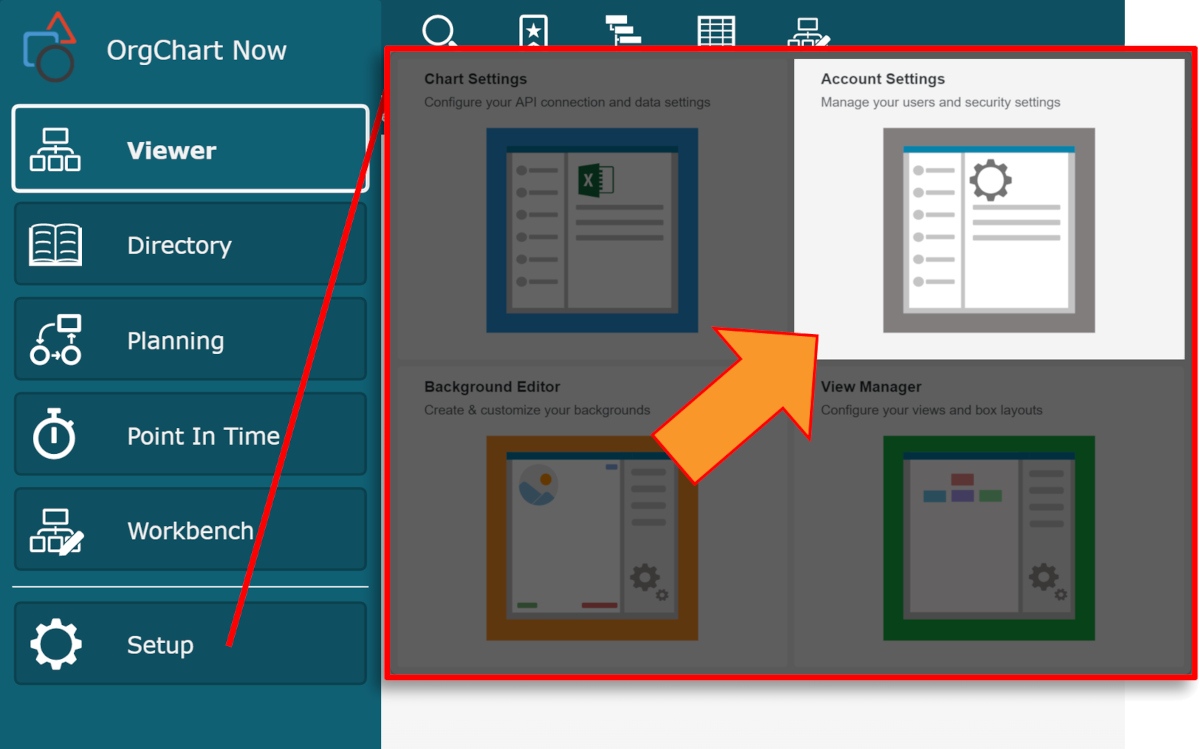
Click on the Mode Switcher icon in the Top Toolbar, and then select the Setup option. The Setup panel is displayed.
Click on the Account Settings tile, and then click on the Authorization tab in the left side menu.
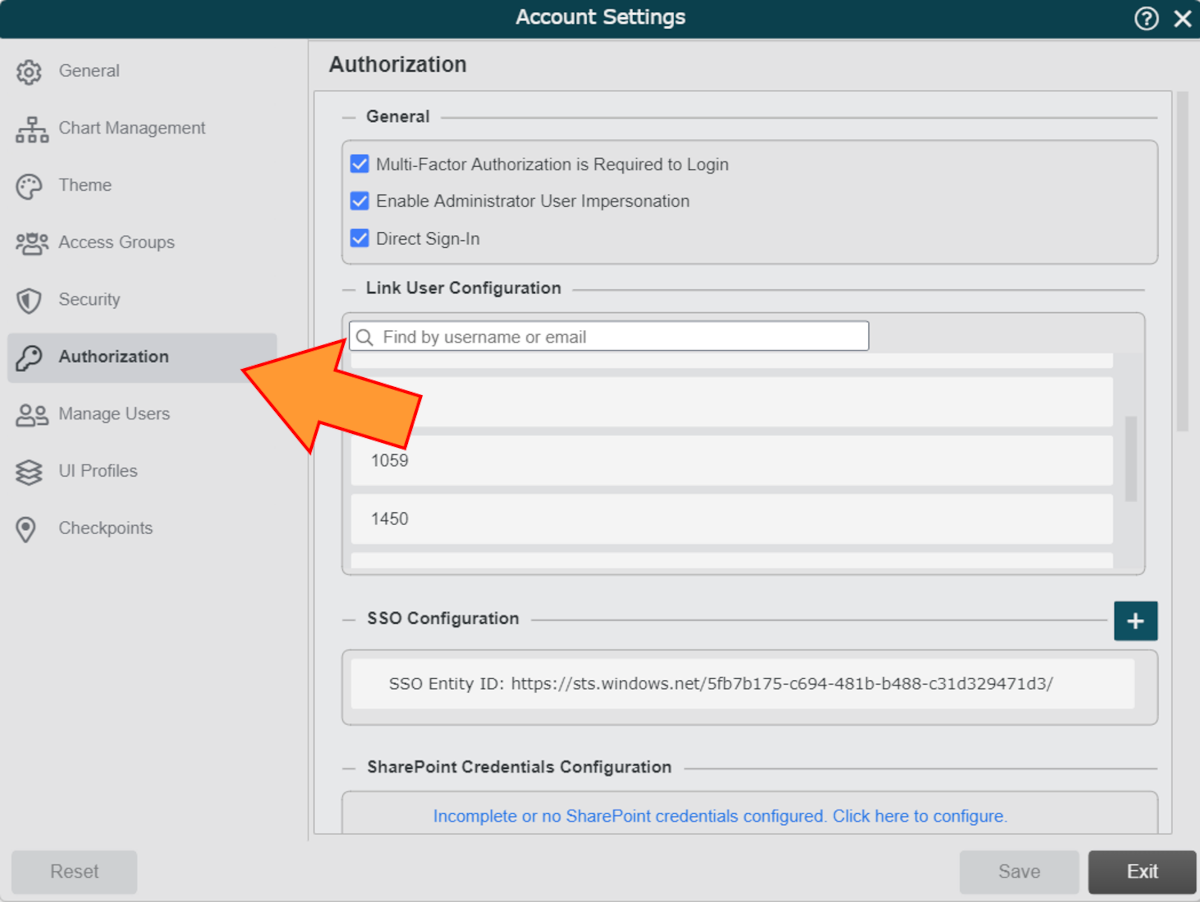
Mouse over your SSO Configuration, and then click on the
 icon.
icon.Enter the name for the Group Attribute (selected in Step 5 above)
Click on the
 icon (to the right of the SAML Attributes Handling header), and then enter an Okta Group name that will be sent in the SAML Assertion (i.e OrgChart - Managers).
Click on the Application Security Group dropdown menu, and then select the OrgChart Access Group that should be assigned to users associated with that Okta Group.
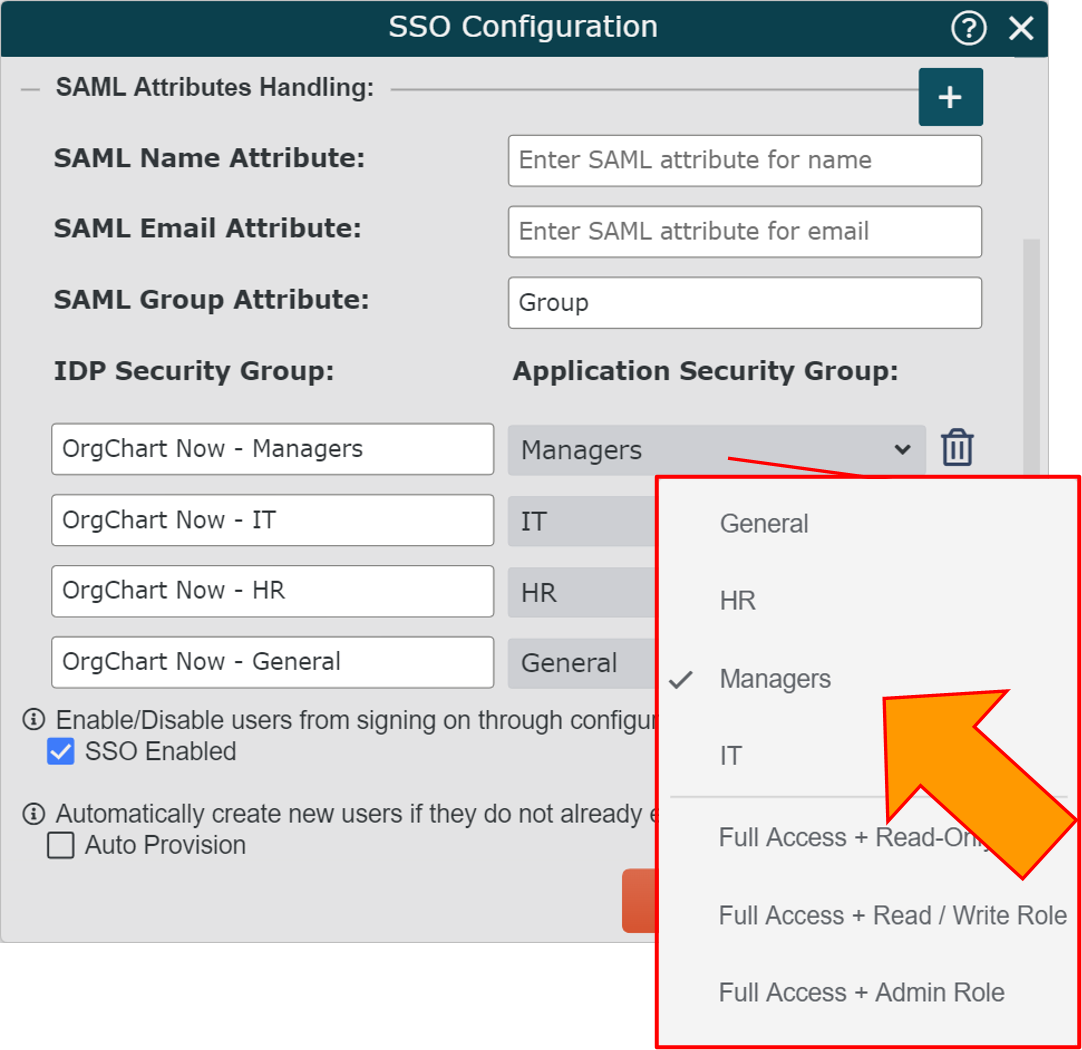
Repeat steps 5-6 until all the desired Okta Groups are mapped to OCN Access Groups.
Click on Save.
Update User Info with Additional Attributes
Administrators can auto-populate and update a user's User Info panel using additional SAML Attributes in Okta.
Add Additional Attributes to the SAML Assertion
In the Okta Administrator Portal, open the OrgChart application.
On the General tab, click on the Edit button associated with the SAML Settings section.
Click on Next.
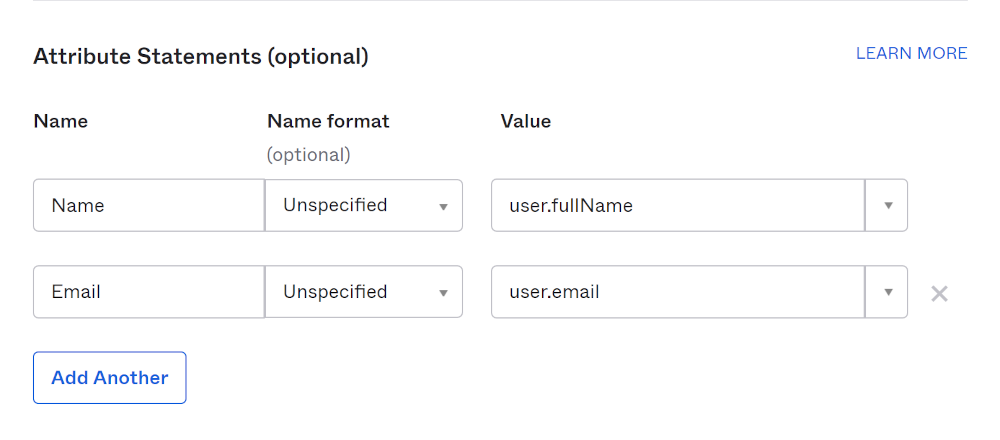
Scroll to the Attribute Statements (optional) section.
Enter the name of the attribute (i.e. Name) you want to send to OrgChart to update user information in the Name text box.
Click on the Value dropdown menu, and then select which Okta value (i.e. user.fullName) should be sent with this SAML Attribute.
Optionally, click on the Add Another button, to send an additional attribute (i.e. Email) that you can use to update user information.
Click on Next, and then click on Finish.
Login to OrgChart and follow these steps to complete your setup:
Click on the Mode Switcher icon in the Top Toolbar, and then select the Setup option. The Setup panel is displayed.
Click on the Account Settings tile, and then click on the Authorization tab in the left side menu.
Mouse over your SSO Configuration, and then click on the
icon.Enter the name of the attribute you are sending to populate Name (selected in step 5 above) in the user information panel in the SAML Name Attribute text box.
Enter the name of the attribute you are sending to populate Email in the user information panel in the SAML Email Attribute text box.
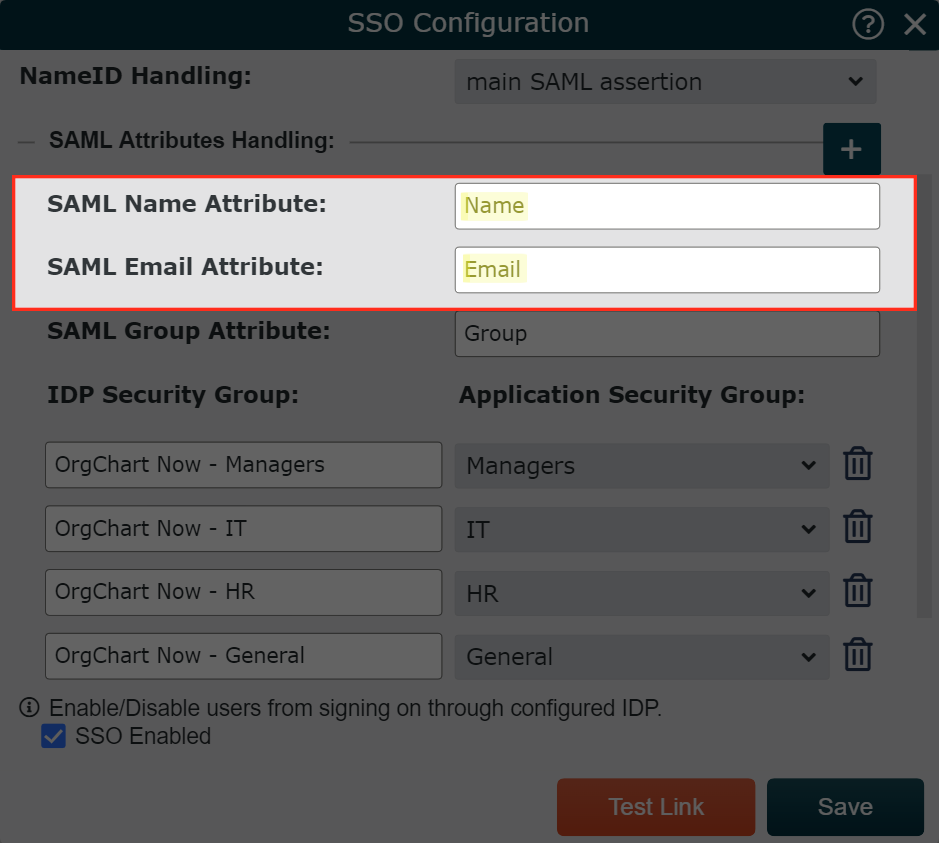
Click on Save. When a user signs into OrgChart via SSO, the user information panel is updated automatically.
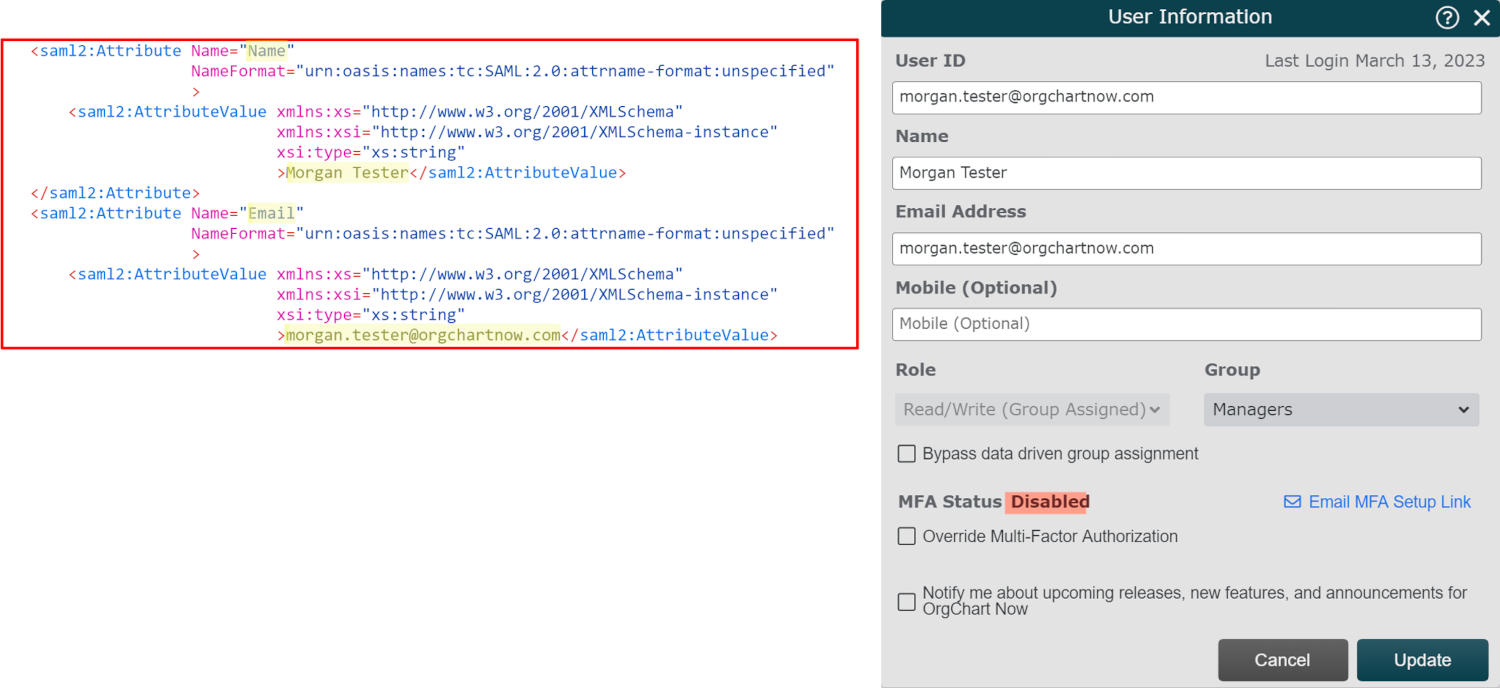
See the sample SAML Assertion and the updated user info panel below: