Dayforce Connector Setup
Audience
Audience: Administrators
Overview
OrgChart can import data directly from Dayforce. The following article provides step-by-step instructions for setting up a Dayforce connector.
Dayforce Connector Setup
Log in to OrgChart.
Click on the Mode Switcher icon in the Top Toolbar, and then select the Setup option. The Setup panel is displayed.
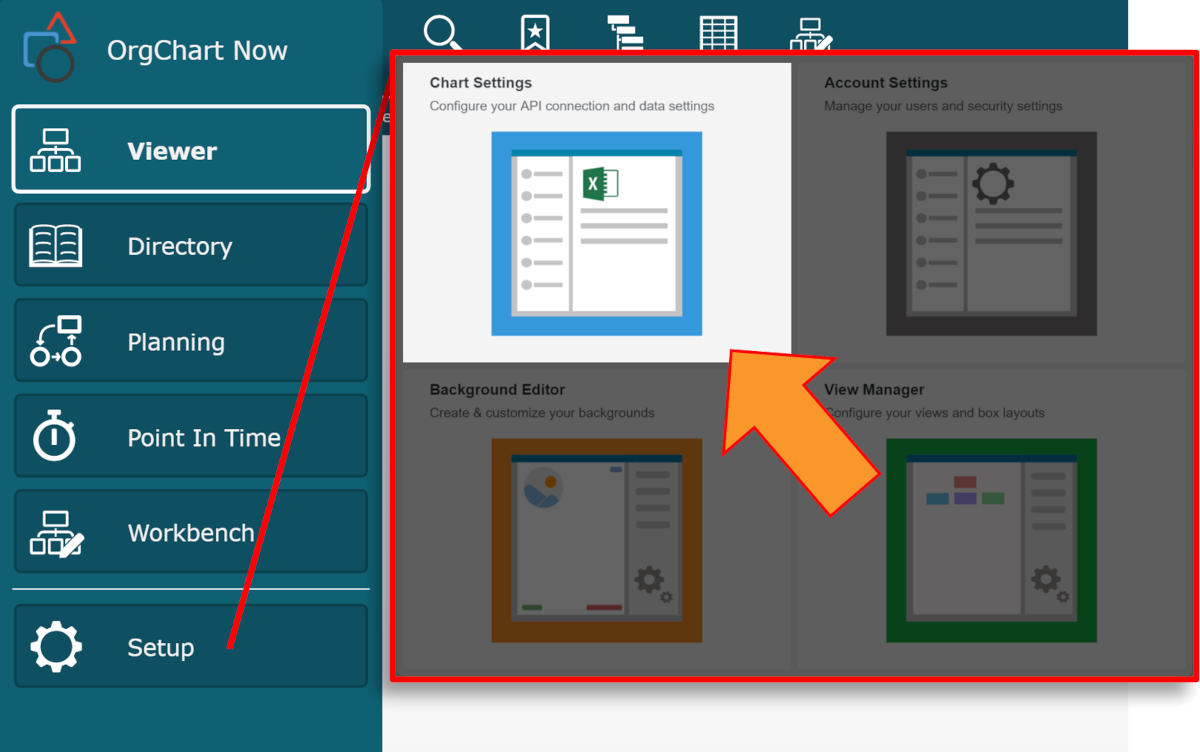
Click on the Chart Settings tile. The Source panel is displayed.
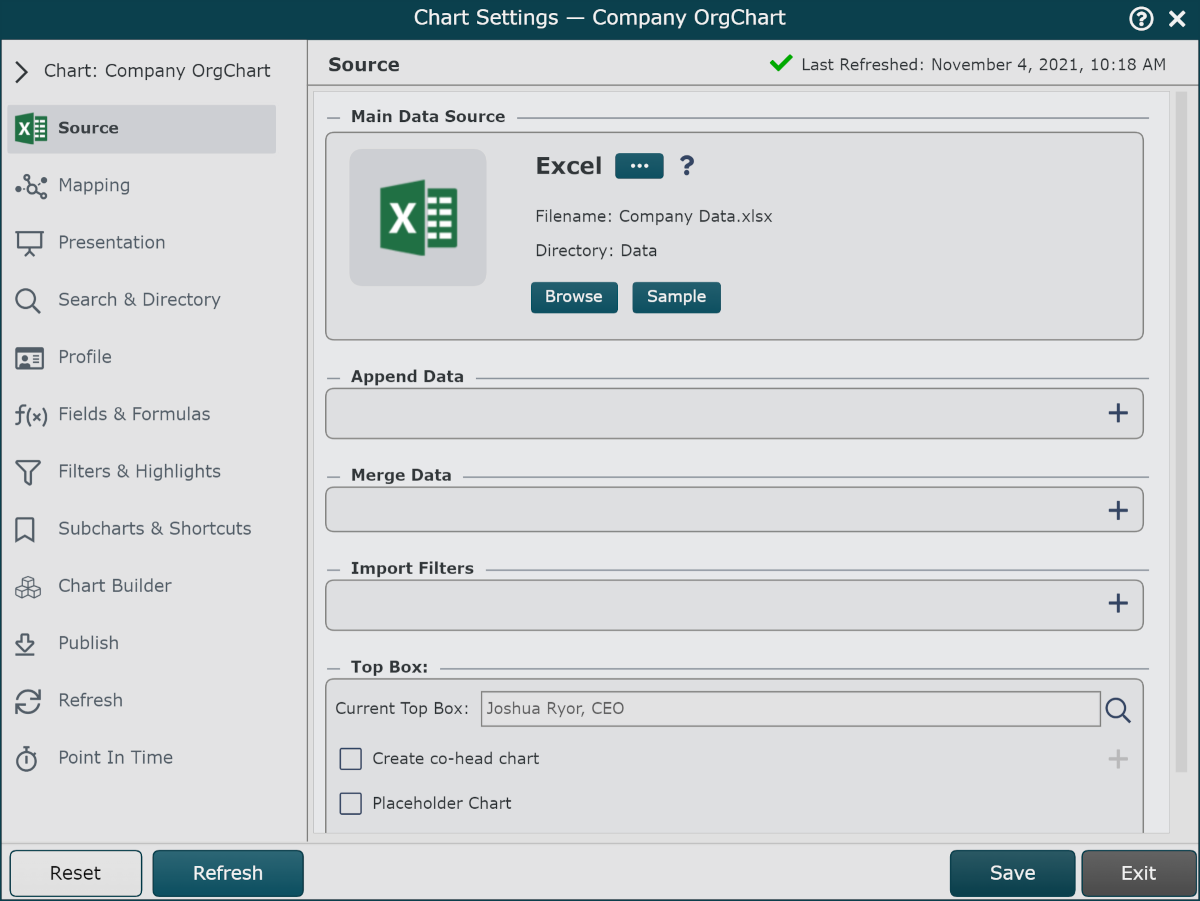
Click on the
 under the Main Data Source heading. The list of Main Data Source connectors is displayed.
Select the Dayforce connector.
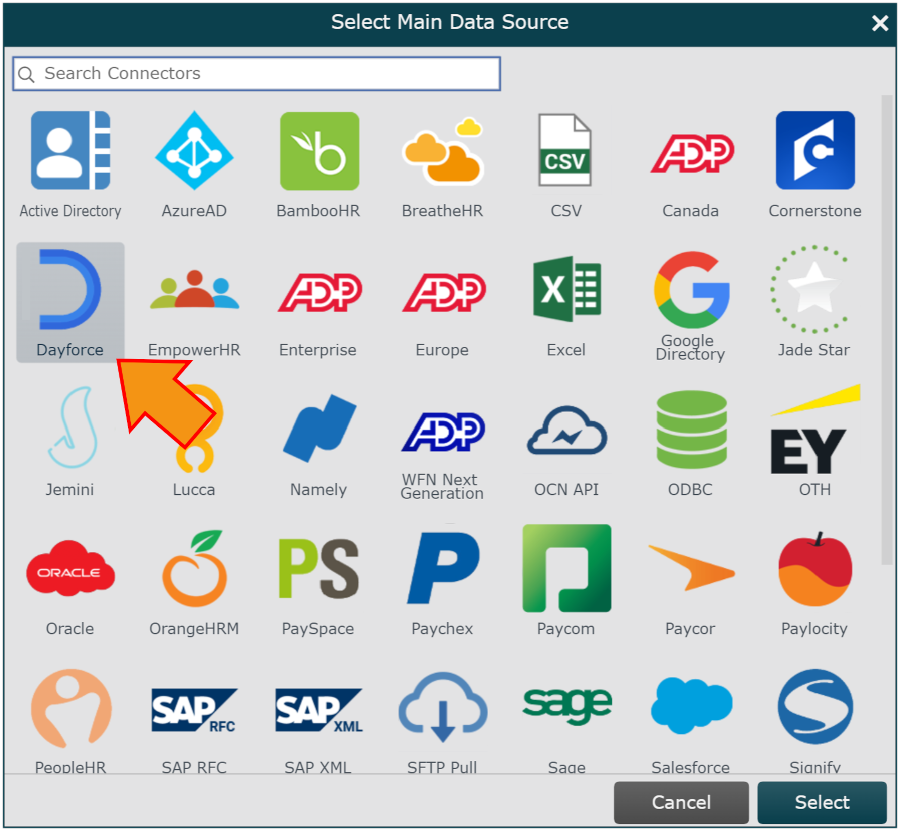
Enter the following information in the corresponding text boxes:
Company code: Your Dayforce company name (the same company name which you use to log in to Dayforce)
Username: Your Dayforce service account username (the service role which was configured earlier)
Password: Your Dayforce service account password (the service role which was configured earlier)
Active Statuses: Enter the status reference code you use to mark Active employee in Dayforce. Leave blank if you use the reference code ACTIVE.
Click on the
 icon (under the Main Data Source heading) to test that the credentials provided are valid.
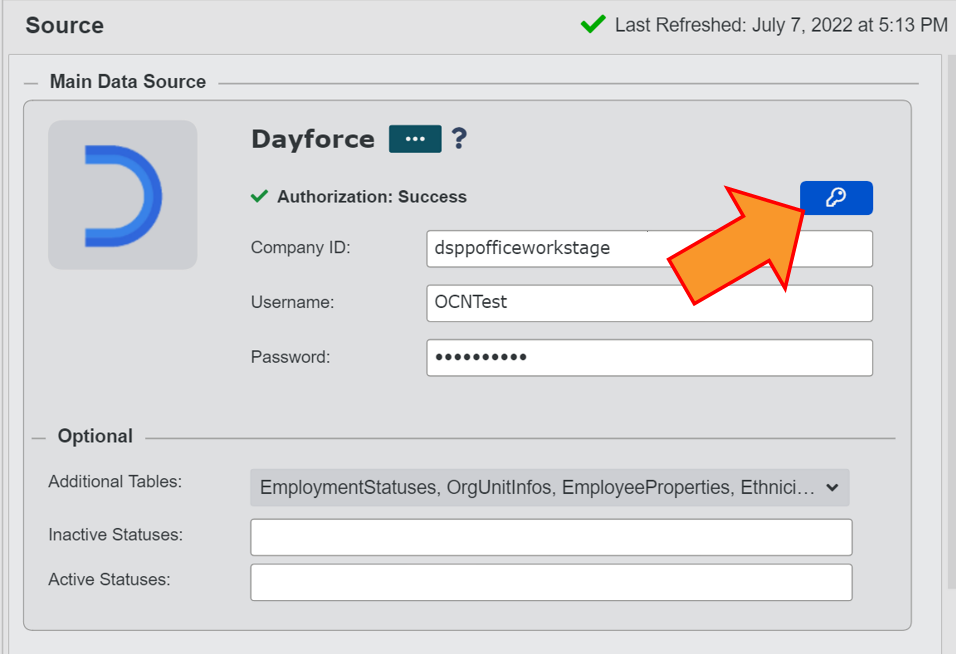
Note
If authorization fails, a Failed Authorization alert is displayed, detailing the invalid credential(s). Re-enter valid credentials, and then re-test until you receive a successful authorization.
Click on Save, and then Refresh.
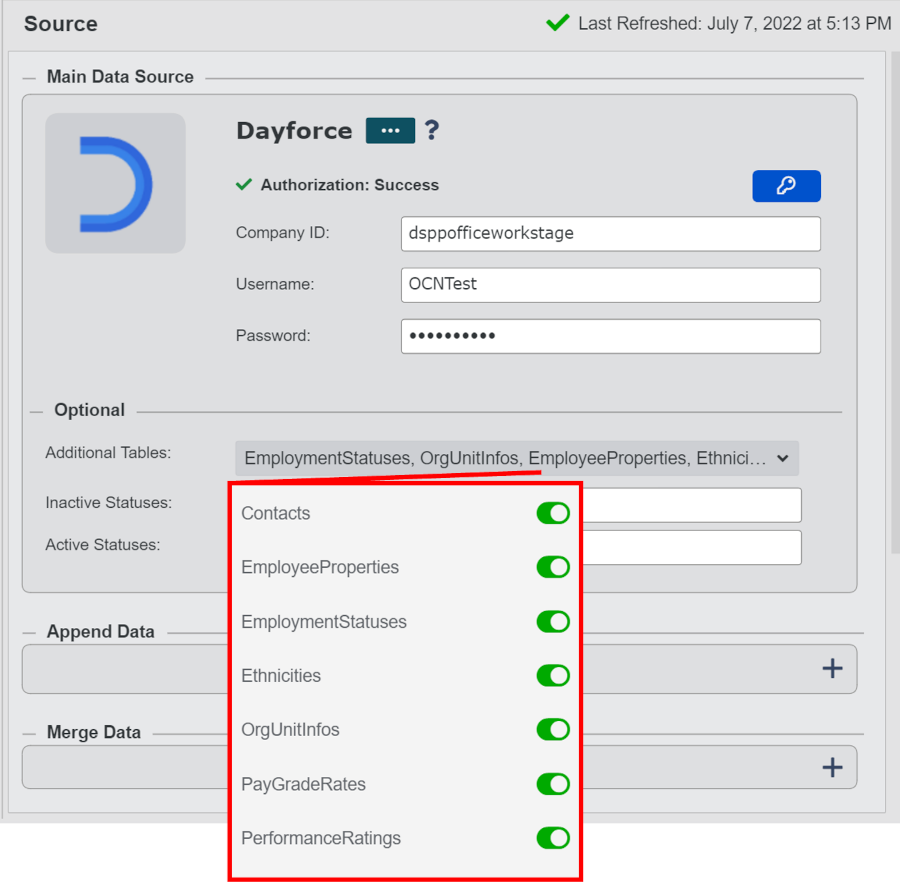
Additional Tables
By default, OrgChart will queries the WorkAssignments table. OrgChart can pull fields from the following additional tables:
Contacts
EmployeeProperties
EmploymentStatuses
Ethnicities
OrgUnitInfos
PayGradeRates
PerformanceRatings
Fields associated with any of the additional tables above will not be pulled into OrgChart until that table is enabled in the Additional Tables dropdown menu.
Note
Verify that you have granted the API Service user in Dayforce permission to pull fields from the selected tables. Reference the Dayforce Configuration article for more information.
Active & Inactive Statuses
Dayforce allows system administrators to create multiple inactive and active statuses.
The following section provides step-by-step instructions for pulling additional active and inactive statuses from Dayforce.
Note
If you only have one 'active' status, and the Reference Code is 'ACTIVE', then you can leave the Active Statuses textbox blank.
Click on the Additional Tables dropdown menu, and then toggle EmploymentStatuses ON.
Enter the Reference Code for the active or inactive status in the corresponding text box.
Note
If you have more than one additional Active or inactive status, ensure that each Reference Code is separated by a comma, and that there are no spaces.
Perform a Dayforce hard refresh (re-load Mapping Headers in the Chart Settings: Mapping panel) to preserve your changes.