Azure Active Directory
Audience
Audience: Administrators
Overview
Azure Active Directory is an Identity Management Platform where customers can access their web apps using SSO.
The following article provides guidance for configuring SSO within Azure Active Directory, so that you can successfully access OrgChart from one, convenient location.
You may also reference the Azure Active Directory Integration with OrgChart article for additional instructions.
Configuring SSO in Azure AD
Create a SAML App in Azure Active Directory. For assistance, contact your Azure AD System Administrator.
Enable single sign on for the application by following the instructions available here.
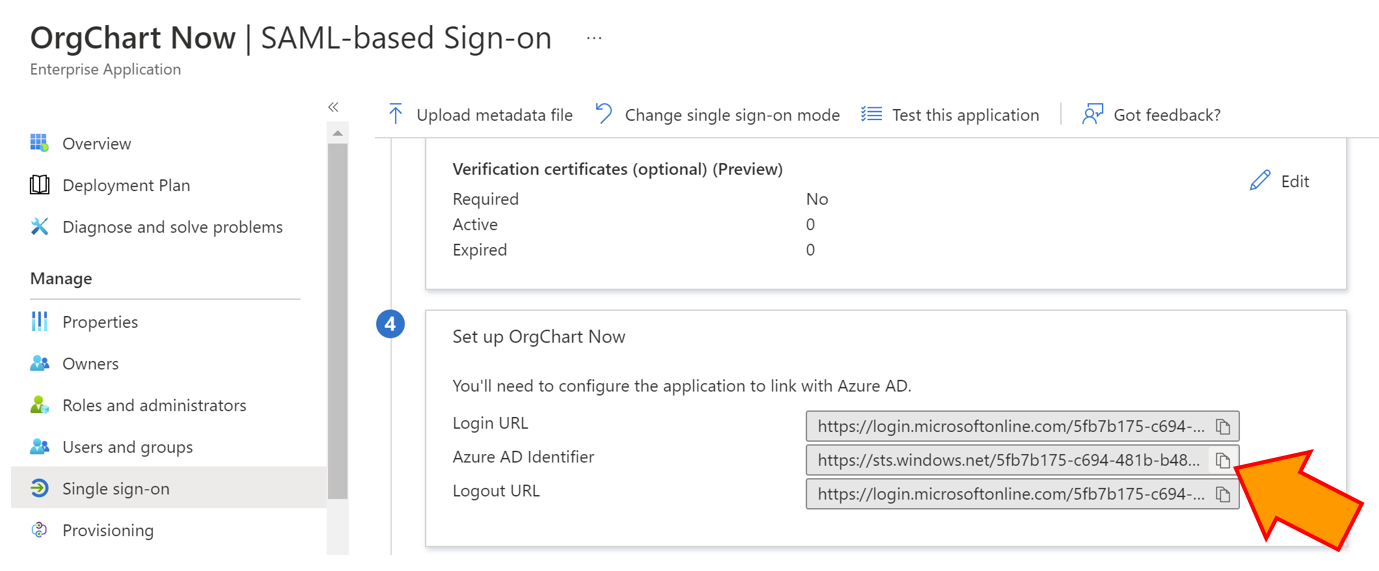
Click on the Single-Sign On tab, and then scroll to section 4 (Set up OrgChart).
Copy the Azure AD Entity ID (Azure AD Identifier), and then paste it in a separate document. You will need this value to complete your SSO setup.
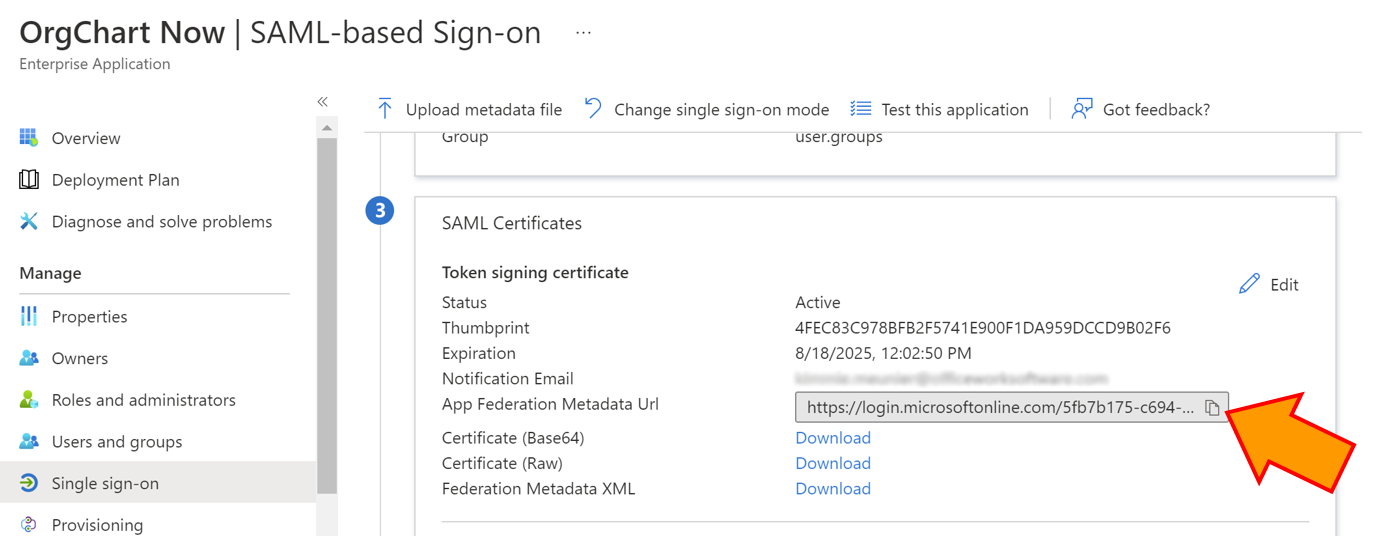
Scroll to section 3 (SAML Certificates), copy the App Federation Metadata URL, and then paste it in a separate document. You will need this value to complete your SSO setup.
Scroll to section 1 (Basic SAML), and then click on Edit.
The following information should be entered for the Basic SAML Configuration section:
Identity (Entity ID): https://{OrgChartServer}.orgchartnow.com/saml/sso_metadata?entityID=Your_Azure_AD_Entity_ID
Note
Your Azure AD Entity ID is the Azure AD Identifier copied in step 4 above.
Redirect URL (Assertion Consumer Service URL): https://{OrgChartServer}.orgchartnow.com/saml/sso_acs?entityID=Your_Azure_AD_Entity_ID
Sign-On URL (Optional): https://{OrgChartServer}.orgchartnow.com/saml/sso_endpoint?entityID=Your_Azure_AD_Entity_ID
Note
Sign On URL only needs to be populated if you plan to use SP-initiated SSO.
SP initiated SSO refers to the initial sign-in request being sent from the Service Provider (OrgChart) to the Identity Provider (Azure AD). The sign-on URL can be provided to users, so that they can access OrgChart from a link rather than from the Azure AD app portal.
Click on Save to preserve your changes, and then assign the application to a group(s) or user(s) in your account.
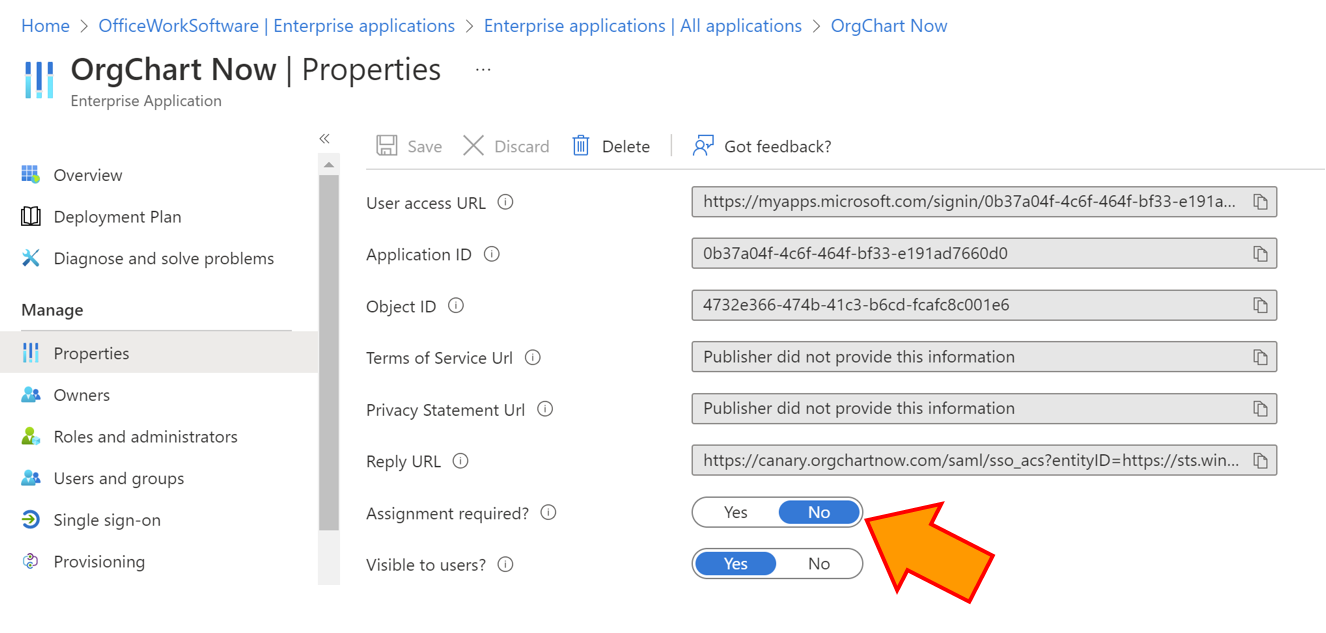
Note
By default, this application will require user assignment in order to login. Ensure that you and your desired users are assigned to the application in Azure AD or disable this requirement in the App Properties tab.
Optionally, modify the values in the Attributes & Claims section to alter additional user attribute information sent to OrgChart. Reference the Azure AD SAML Attribute Handling article for more information.
Once SAML has been configured and the app has been assigned to the desired users in Azure AD, you will need to configure SSO in OrgChart.
Configuring SSO in OrgChart
Log in to OrgChart.
Click on the Mode Switcher icon in the Top Toolbar, and then select the Setup option. The Setup panel is displayed.
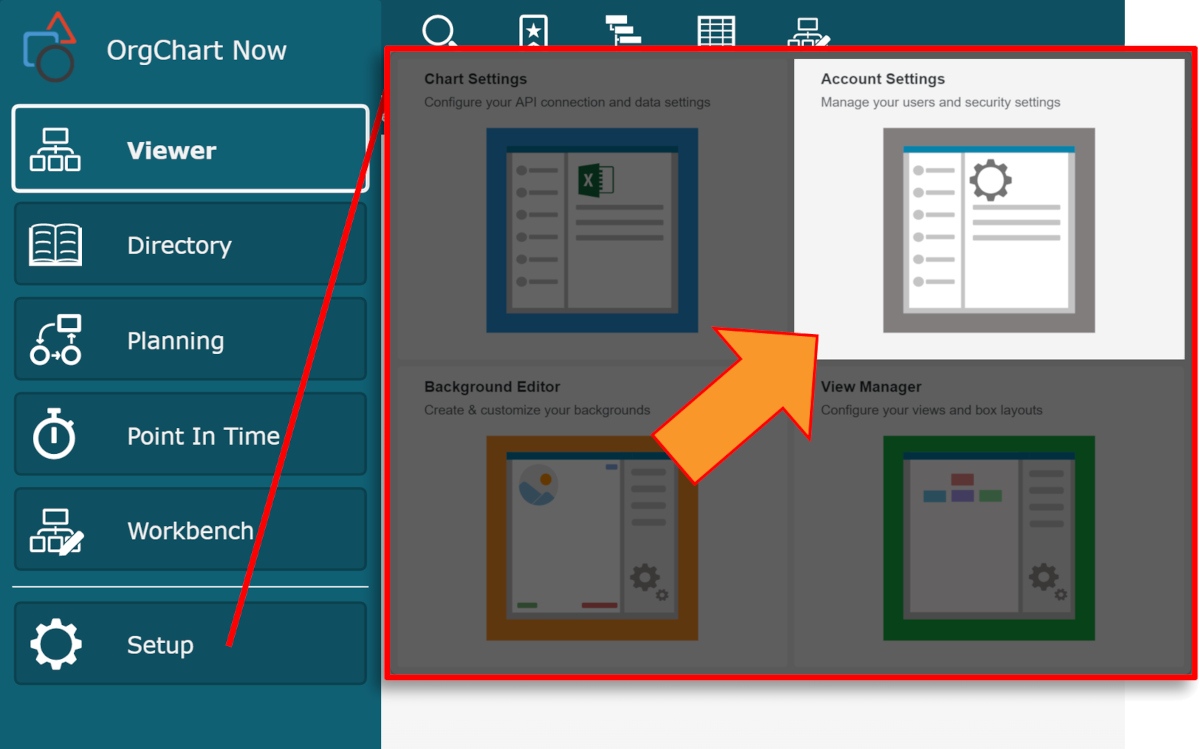
Click on the Account Settings tile, and then click on the Authorization tab in the left side menu.
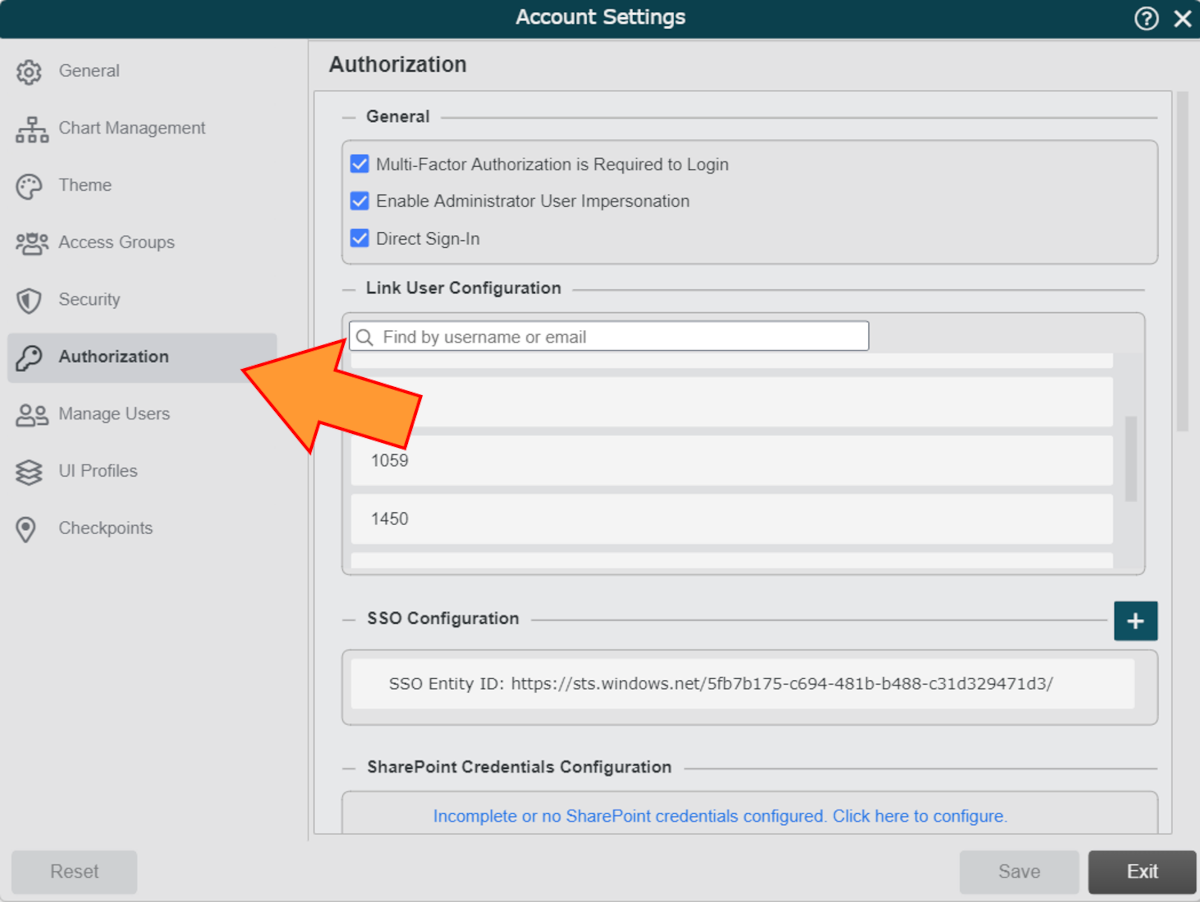
Click on the
 icon (to the right of the SSO Configuration heading). The SSO Configuration panel is displayed.
Enter the Azure AD Identifier (copied in step 4 above) into the SSO Entity ID text box.
Click on the Metadata Type dropdown menu, and then select the Remote option.
Enter the App Federation Metadata URL (copied in step 5 above) into the Metadata Location text box.
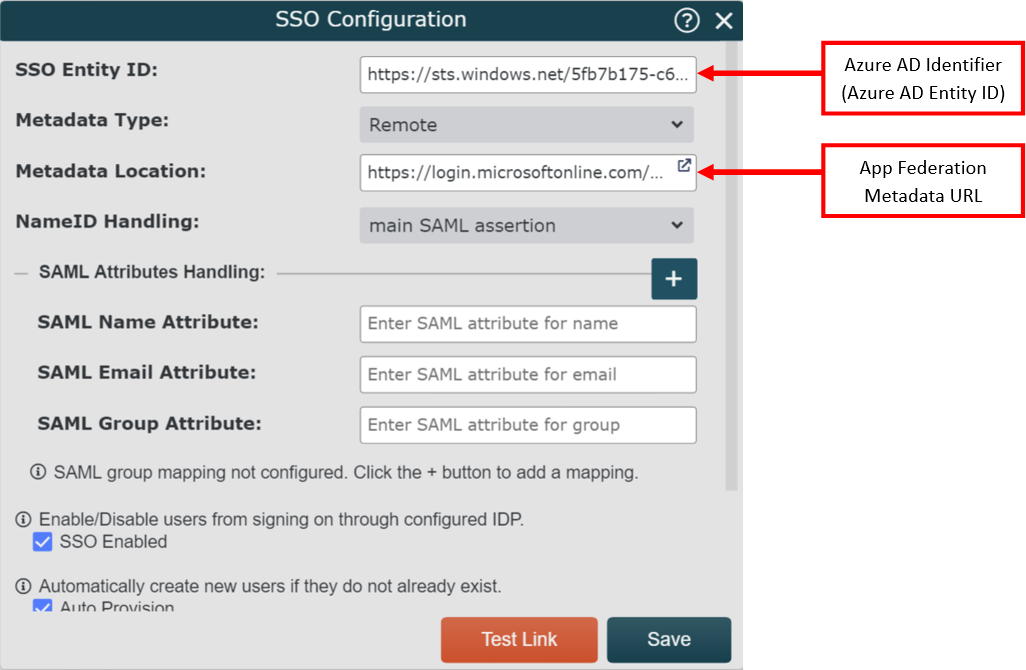
Click on the NameID Handling dropdown menu, and then select one of the following two options:
Main SAML Assertion - Default. NameID attribute is sent in the main SAML assertion, and NOT as an additional claim. Select this option if the Unique User Identifier (Name ID) attribute is listed as a Required claim in the Attributes & Claims section in Azure AD SSO panel.
SAML Attributes - Rare. NameID attribute is sent as a SAML attribute in the SAML Attribute Statements section of the SAML Assertion. Select this option if the Unique User Identifier (Name ID) is NOT listed as a Required claim, or if you plan to pass a NameID attribute that does not follow the default user.userprincipalname format.
Optionally, add SAML Attribute Handling to use Azure AD data to update user information or map security groups. Reference the Azure AD SAML Attribute Mapping article for more information.
Check the SSO Enabled checkbox to enable user to sign in to OrgChart from Azure AD.
Optionally, check the Auto-Provision checkbox to automatically create new users if they do not already exist in OrgChart.
Optionally, check the Single Logout checkbox to automatically sign users out of Azure AD when signing out of OrgChart.
Click on Save.