Azure AD Connector Setup
Audience
Audience: Administrators
Overview
After you've configured your Azure AD connector, you can setup the Azure AD Connector in OrgChart. The following article provides step-by-step instructions for setting up an Azure AD Connector.
Azure AD Connector Setup
The following steps will help you to set up your connection to Azure AD in OrgChart:
Log in to OrgChart.
Click on the Mode Switcher icon in the Top Toolbar, and then select the Setup option. The Setup panel is displayed.
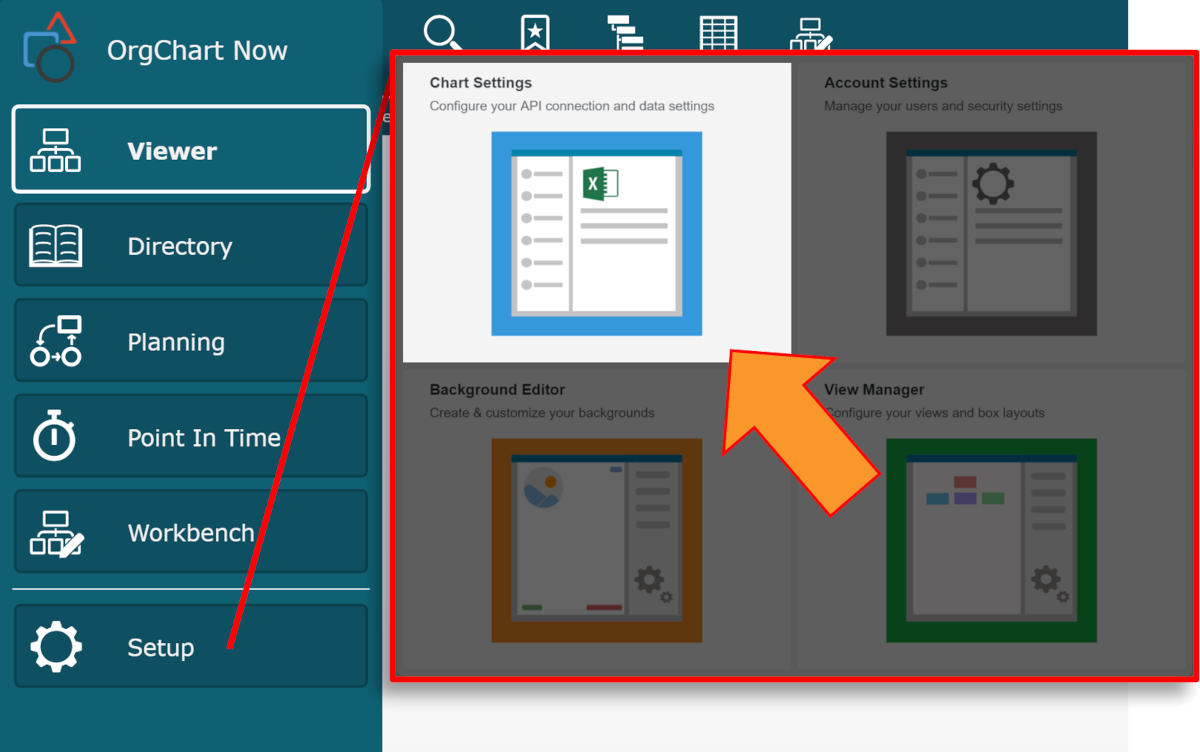
Click on the Chart Settings tile. The Source panel is displayed.
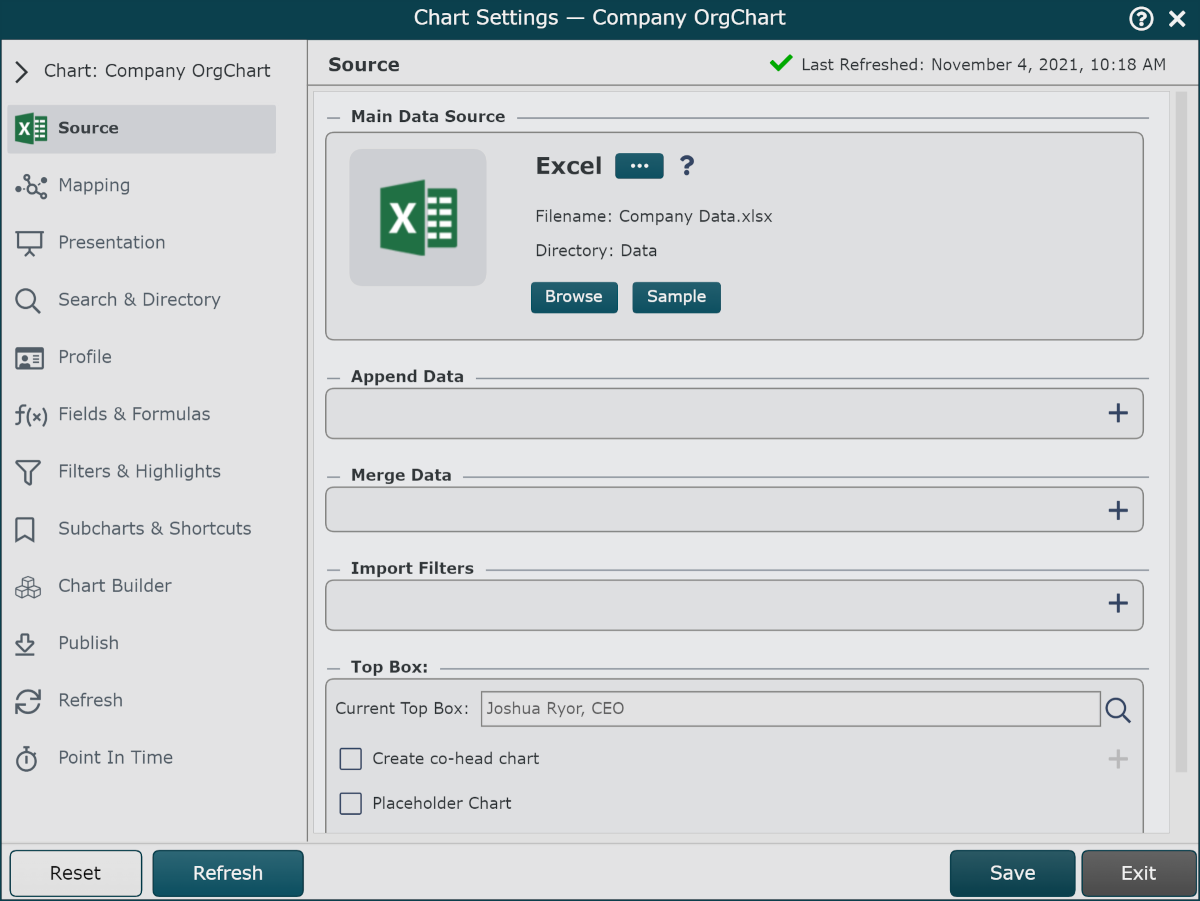
Click on the
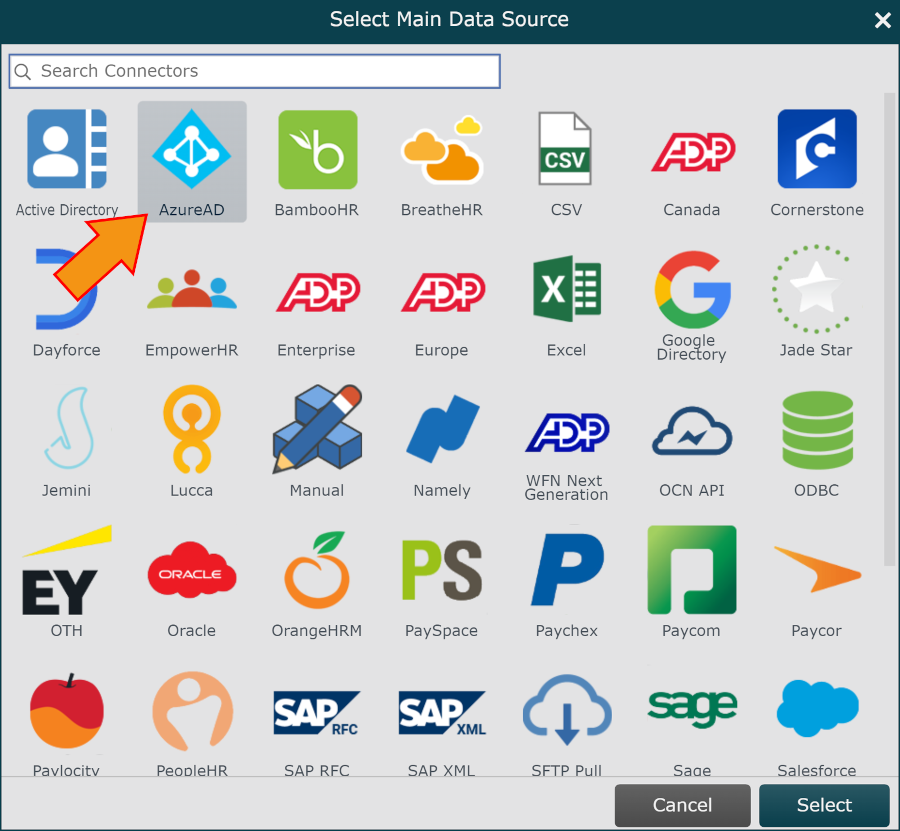
 under the Main Data Source heading. The list of Main Data Source connectors is displayed.
Click on Azure AD, and then click on Select.
Enter the following information into the corresponding text boxes:
Subdomain - Azure AD Tenant ID
Client ID - Application (client) ID associated with the registered app in Azure AD.
Client Secret - Client secret value generated in the Certificates & Secrets panel of the registered app in Azure AD.
Click on the
 icon (under the Main Data Source heading) to test that the credentials provided are valid.
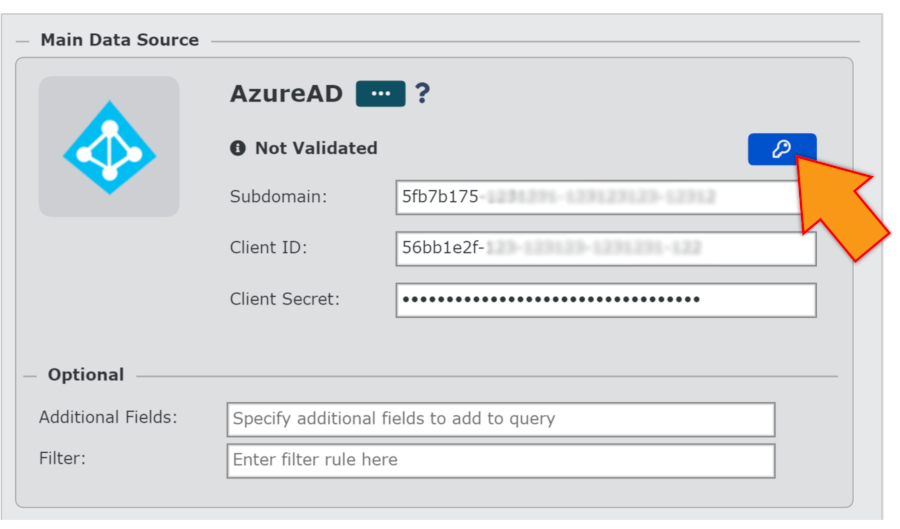
Note
If authorization fails, a Failed Authorization alert is displayed, detailing the invalid credential(s). Re-enter valid credentials, and then re-test until you receive a successful authorization.
Optionally specify additional fields to query in the Additional Fields text box.
Optionally, enter a filter rule in the Filter text box to import employee records that meet the specified criteria.
Click on Save, and then Refresh.